


Land (32)
- 2x The Mycosynth Gardens
- 4x Urza's Saga
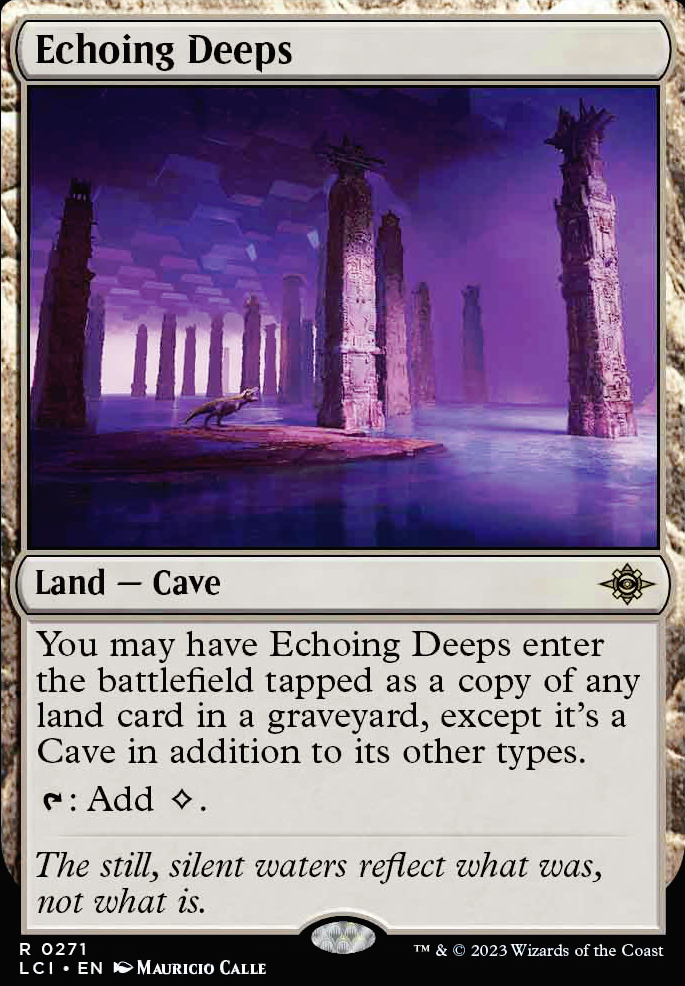
- 1x Echoing Deeps
- 1x Hanweir Battlements Meld
- 1x Mirrorpool
- 2x Golgari Rot Farm
- 4x Gruul Turf
- 4x Simic Growth Chamber
- 1x Tolaria West
- 1x Otawara, Soaring City
- 2x Boseiju, Who Endures
- 1x Crumbling Vestige
- 2x Forest
- 1x Misty Rainforest
- 1x Verdant Catacombs
- 1x Castle Garenbrig
- 1x Hedge Maze
- 1x Valakut, the Molten Pinnacle
- 1x Vesuva
Creature (13)
- 3x Arboreal Grazer
- 1x Elvish Reclaimer
- 1x Azusa, Lost but Seeking
- 4x Dryad of the Ilysian Grove
- 4x Primeval Titan
Enchantment (1)
Artifact (8)
Instant (4)
Sorcery (2)
Sideboard
Creature (4)
Artifact (2)
Land (4)
Enchantment (1)
Maybeboard
Sorcery (7)
Creature (6)
Instant (2)
Enchantment (1)
Land (1)
Please read the description (there's toggles). I'd suggest at least reading the Overview of the Deck, Basic Play of the Deck, and Key Differences Explained sections if you don't want to read the whole thing. However, each section does help to explain the deck a little better, so if you have the time, I highly suggest reading it fully.
There's custom categories on the deck, which you can view by clicking one option in the pie chart to the right, and it will highlight the cards in that category. These categories will just help to give a quick overview understanding of the deck initially, so feel free to give that a peak.
The deck has become quite the toolbox deck (Summoner's Pact is a virtual copy of my creatures, allowing more than 4 of each one, and Primeval Titan does silly things with all the lands - view the Godhand section for some examples).
Elvish Reclaimer also enables some powerful plays with our huge land toolbox, while also being able to pump itself to a 3/4 after blocking at instant speed by finding Misty Rainforest to catch them off-guard.
There's probably some cards that look like questionable includes, but if you read through the description, they are explained in greater detail throughout.
The basic play of the deck game 1 is to mulligan until some type of ramp, usually in the form of Amulet of Vigor / Urza's Saga and multiple land drop cards or a fatty. You basically want to have a plan to have potential for around 6 mana by turn 3 (4 at the latest) when you look at your opening hand, or at least a bunch of little guys that synergize well and create board presence to block with. I've definitely had more than a few turn 3 wins with a 4 card opener, so don't be afraid to mulligan aggressively if you see no opening turns in your hand. The cards you want missing in a keepable opening hand are generally ramp or Amulet of Vigor and/or Primeval Titan (with access to multiple amulets you don't need the extra land cards and vice versa). You need a basic mana engine and some board presence/hate if you don't have the ability to play an early titan. Reason being that Primeval Titan basically runs 8+ copies because of Summoner's Pact + Tolaria West and you don't actually need an Amulet of Vigor for your lands/creatures to produce value, it just gives them more value. I also suggest trying to keep a green bounce land in hand if you happen to have either an amulet or extra land play creature out, and are just waiting on the other piece. Generally speaking, the only time I play my last bounce is when I can hardcast an impactful creature the next time I untap and need to play it for that line.
Once you cast the Primeval Titan you can almost always swing with it same turn. With 1+ Amulet of Vigor(s) and Dryad of the Ilysian Grove you generally want to find Hanweir Battlements + Valakut, the Molten Pinnacle. If you suspect removal and need an extra green, but still want to try swinging while still being able to pay for your Summoner's Pact go for Hanweir Battlements + Gruul Turf. With multiple Amulet of Vigor you can go for Mirrorpool + Selesnya Sanctuary or even Selesnya Sanctuary + The Mycosynth Gardens if you have a way to play another threat, to be able to swing with 3+ Primeval Titan after transmuting Tolaria West. From there, the huge land toolbox will set up your future turns quite nicely, even if that titan was the only thing your hand had going for it. Always look for lines where you can get multiple Primeval Titan into play (don't walk into removal when doing so, sometimes it is better to do this after combat), preferably alongside cheating more Amulet of Vigor effects into play with The Mycosynth Gardens as well. Additionally, there's even more game-winning lines with The One Ring which buys an extra turn against almost every deck while pumping out card advantage and allowing further ramp next tur.
In games 2 and 3 of a match, once you know the deck of your opponent, solid hate can be keep-able instead of the whole fatty plan. You will also be siding out some of your more aggressive lines for something more consistent, but do try to keep the extra land effects close to your number of green bounces. It really comes down to the opponents deck when you are deciding how to play the deck, because it can be played as just about any type of deck (tempo, control, midrange, combo, and even prison if you run some obscure options - not suggested, they are obscure for a reason). I marked some of the more common targets to side out with #flexslot so you can have a better understanding of the core of the deck and some of the filler cards.
How you stack triggers matters. My general advise is to resolve things where you have no choice, first (so you stack them in the opposite order). I generally resolve my triggers as Vesuva / Echoing Deeps copies (not a trigger, but you have to choose it first), Amulet of Vigor untaps, Mosswort Bridge hideaways, Valakut, the Molten Pinnacle targets, Crumbling Vestige color choice, Simic Growth Chamber etc. bounce a land, then finally Lotus Field sacrifices. It is very important to stack them so you have the most options available if a response happens, as sometimes how you stack things can make or break you (you can also play instant speed interaction before resolving some triggers, netting you extra information (or resetting it) before making certain choices). For example, we can use a shuffle effect like Summoner's Pact to shuffle if we revealed a lot of good draws with an earlier Mosswort Bridge, or use Echoing Deeps to copy an opponent's Misty Rainforest for deck thinning before resolving the Hideaway trigger.
A few important tips are that you can bounce utility lands (without an Amulet of Vigor) after fetching to replay and use them the same turn, play Crumbling Vestige / Brokers Hideout as a pseudo-Boros Garrison with Dryad of the Ilysian Grove to not return a land to hand, use Sunken Citadel to go +1 land when copying your Primeval Titan with Mirrorpool, and even play Vesuva as an untapped copy of nothing to produce mana with Dryad of the Ilysian Grove, to name some of the most overlooked lines of play. One other important thing is that Vesuva / Echoing Deeps can only copy lands already in play / the graveyard, not lands found with the same Primeval Titan fetch.
In this section, I will explain some of the key differences from your "normal" archetype. First, let's look at the manabase. One of the key differences is that we are only running 1x Valakut, the Molten Pinnacle and 1x Vesuva instead of 2x of either one to be able to get 3 on the field at once for lethal. We are able to do the same thing, thanks to Misty Rainforest (or Echoing Deeps to copy it) on the final trigger. By fetching Valakut, the Molten Pinnacle and Hanweir Battlements to enable haste, followed by Vesuva (TSP) (copying Valakut, the Molten Pinnacle) and Misty Rainforest on the attack trigger, we are getting 12+6 damage instead of 18 damage. This is "better" in my opinion for 2 reasons. First, we have better mana-fixing and faster mana (untapped green source vs. a tapped red source). Second, we can now activate some of that damage at instant speed to help counter something like The One Ring or be used as removal if not doing lethal.
Another thing that this manabase has going for it over your traditional lines is the access to Hedge Maze. Since we are running essentially 3 copies thanks to Misty Rainforest and Verdant Catacombs, we get to surveil dead draws quite often, which helps the deck to be more consistent. We also don't need to worry about hitting a key land like Hanweir Battlements or Valakut, the Molten Pinnacle thanks to Echoing Deeps being our double Amulet of Vigor kill land.
Finally, many of you will be questioning - "Where's the 2 Amulet of Vigor kill line with Kessig Wolf Run?" Sorry to disappoint, but I've cut it for Echoing Deeps, which actually does some amazing things without double amulet (like enabling its own lethal line), while also enabling some disgusting board presence lines that assure we can win the turn after swinging if unable to just flat-out kill them against almost any deck (explained in great detail in the Godhand section). The main draw here is that Kessig Wolf Run often does nothing in games 2/3 when they start targeting our Amulet of Vigor and Urza's Saga. Echoing Deeps is capable of copying any land that was destroyed by hate (does not come up often) or even an opponent's (or our own) fetch, effectively making it a tapped green source if needed. It is also capable of copying Urza's Saga in our more grindy matchups, which is one of the best lands in those matchups. For the "kill" lines we are often copying Mirrorpool or Misty Rainforest to squeeze in extra mana or damage, but the card is so much more flexible than that.
Next, we will look at our non-lands, as the remainder of the manabase is fairly "standard" in the archetype. The first thing that should standout is Elvish Reclaimer. I am currently using it as a hybrid Arboreal Grazer and Expedition Map. I've never liked drawing into Expedition Map and found myself rarely searching for it. I don't mind drawing into Elvish Reclaimer nearly as much, and it actually opens up a line to tutor for Elvish Reclaimer with multiple Amulet of Vigor and Summoner's Pact where you can use the effect to pay for the pact during your next turn's upkeep and still get the land in hand after using it for mana (you are usually missing a bounce). For any other lands you may want, this puts them directly into play. For example, Urza's Saga on T2 is a common line, allowing far more consistent T4 kill lines. It also allows blocking like Arboreal Grazer so I've trimmed one of the copies for this pseudo-extra land/tutor hybrid that can grow itself into a mini-beater. Thanks to fetches and Hedge Maze you can also pump this after blockers fairly reliably, often making profitable trades which can catch your opponent off-guard.
We are also going pretty heavy on Explore effects to help us naturally draw into whatever missing piece(s) we may need for the matchup. You'll notice there's a lot of digging/tutoring effects in this particular iteration of the deck, allowing us to more consistently get to the cards we want.
You'll also notice that we run some interesting lands in our sideboard that a lot of traditional Amulet Titan decks do not, and that is mostly because I am of the belief that a good manabase wins games. No matter how good your spells are, they all do nothing if you can't cast them.
I like to place a die on top of my deck after casting Summoner's Pact - you can also conveniently track how many triggers - to remind myself not to miss the trigger(s) prior to drawing.
Always stack triggers with the most options first so they resolve last. Stack triggers where you have no option last, that way you still have the most options available if your opponent responds to a trigger.
Always hold priority after playing an extra land card, and play those land(s) immediately after to play around removal. On this note, if possible, try to play a land without a trigger following Azusa, Lost but Seeking so you can get in both extra lands without your opponent having a chance to respond.
If you don't need to activate the draw effect of The One Ring or Explore prior to swinging with Primeval Titan, don't. You want to avoid drawing into your haste enabling (or other key) lands as much as possible, so activate it in your second main if possible. Fetching more lands after swinging also trims your deck giving you a higher probability of drawing into threats instead of blanks (lands).
If you mulligan badly game 1, it may be beneficial to just not play lands that give away your deck if you will probably lose anyway (basically play like you kept a 0 land hand). You'll gain information as to what your opponent is playing and they won't have any information. This of course depends on if your opponent already knows your deck, but it is still worth mentioning. This also applies to your opponent playing a searching effect like Necromentia where you have no hope of recovery. It may be beneficial to just concede in response, so they can't see all of your deck tech.
You'll notice that a lot of my commonly tutored for targets have an easily recognizable unique coloring to the card when the deck is fanned out, making finding them that much faster instead of having to search card by card. For example:
Forest - all of my basics are white-bordered
Valakut, the Molten Pinnacle - the only red expedition frame
Primeval Titan - Time Spiral Remastered old frames (different coloring)
Urza's Saga - look for the Saga frame on the left (any print works)
Amulet of Vigor - only artifact in old frame pre-boarding - still waiting for a non-halo Engineered Explosives with a full art or something
Tolaria West - the "Heads I Win, Tails You Lose" print with the stamp bottom left
I have a lot of full art cards for this purpose as well, and try to use "the List" or similar prints to have the small stamp on the bottom left to help differentiate at a glance some cards that don't have unique frames. You can also use the Modern and old frames in a similar way, since the coloring or frame itself is a slightly different color.
Some of these lines aren't commonly known, or are very hard to see, so I will mention them here.
Haste with double Amulet of Vigor in play and Hanweir Battlements in hand - play your Primeval Titan and clone it with Mirrorpool and any bounce, then on the second trigger, find Tolaria West + Gruul Turf producing . Transmute Tolaria West using for Summoner's Pact. Fetch Arboreal Grazer putting Hanweir Battlements into play and using your remaining to double activate it giving both Primeval Titans haste.
Remove a blocker/threat with singular Amulet of Vigor - play your Primeval Titan finding Crumbling Vestige + Hanweir Battlements for haste, leaving Crumbling Vestige untapped. On the attack trigger, find Otawara, Soaring City + any bounce, allowing you to bounce almost anything back to your opponent's hand.
Some other little tricks are: playing Vesuva untapped as nothing with Dryad of the Ilysian Grove to produce mana and using Dryad of the Ilysian Grove as a pseudo-answer to Blood Moon thanks to layering (if played after Blood Moon, you have Mountains that are every basic land type).
The number in parenthesis after the card is its suggested quantity. As an example, Amulet of Vigor (4) means I suggest running 4 copies of the card. In general, I suggest 31-33 total lands if running Urza's Saga with 28-29 being preferred if not including the card, of which at least 8-9 should be green bouncelands, with at least a copy of all of the "mandatory" utility lands, like your haste enabler. Try to maximize on untapped and green sources as much as possible, as that helps to keep the deck explosive and consistent. You should also run 9-11 extra land creatures, with 10 being the preferred number. These numbers can flex a bit, but try to keep your green bounce and extra land creature counts relatively close, never off by more than 1 card if possible, as you want to maximize having both in hand.
Amulet of Vigor (4) - One of the cards that makes this deck really shine, eliminating the downside of many of my lands, while also giving my titans +2/0 and haste (plus an extra land!). Multiples of this ramp me really fast, and is a force to be reckoned with.
The One Ring (4) - a powerful stalling option which provides card advantage. This helps us to stay alive and find whatever card we may be missing.
Primeval Titan (4) - The main creature this deck revolves around, quite the force to be reckoned with. It often comes out as a 8/6 haste trample vigilance, after fetching Boros Garrison and Slayers' Stronghold with at least 1 Amulet of Vigor out (each multiple means it gets another +2/0 or you can haste multiple creatures). Also, even if it gets removed, you still get the ETB trigger, so sometimes playing into removal is the correct play, ignoring haste for redundancy.
Summoner's Pact (4) - Pretty much 4 more copies of Primeval Titan or whatever creature is needed, but be careful with the upkeep (I like to account for them potentially destroying any of my lands)! As this is a commonly sided out card thanks to Subtlety, it is reasonable to trim slightly, but I wouldn't go below 3 copies.
Arboreal Grazer (1-4) - This is actually fetchable ramp in a sense, because it can net you 1+ extra mana in a lot of situations with a Summoner's Pact (not a suggested path against interaction). It also has reach and makes a decent blocker afterwards. You always want to run at least one of these, even post-sideboard against decks with 0 creatures to block, as it enables a lot of lines when fetching with Summoner's Pact.
Spelunking (0-2) / Explore (0-4) / Growth Spiral - Spelunking is a bit different than the others, having an Amulet of Vigor effect built into it, but I am going to group them all together. While Spelunking is arguably the best of the bunch, especially post-board, it does get progressively worse in duplicates, becoming an overpriced Explore after the first copy. The main benefit to Growth Spiral over Explore is if you have any lands that can be used in response to something else, for example Sejiri Steppe for protection of a creature, any bounce as protection against land removal, or an activated Valakut, the Molten Pinnacle that you can use as removal for your opponent's creatures/planeswalkers. You can also use it for extra information in response to a Simic Growth Chamber trigger, allowing you to bounce a different land, or sneak in the one in your hand to reuse, etc. The extra color restriction can backfire, which is a large trade-off for minimal upside, so not really suggested unless you can really benefit from that instant speed.
Azusa, Lost but Seeking (0-2) / Dryad of the Ilysian Grove (0-4) - Azusa, Lost but Seeking is two additional land drops per turn, which enables Primeval Titan the turn after pacting and having 0 open mana with an amulet and bounceland. However, she is legendary, so you never want more than 1, which is why I generally run less than 4 copies of her. Dryad of the Ilysian Grove is an additional land drop every turn, mana-fixing, and a solid 2/4 body for 3 mana, allowing us to flex into a midrange deck. It also combos with Valakut, the Molten Pinnacle as a win-condition. 3 CMC is also a critical point for the deck, since we can usually go from 3 mana straight to 6+, so this slot is very important.
Elvish Reclaimer (0-4) - Surprisingly, this versatile guy is decent at just about everything you could want. It can act as a pseudo-extra land card, a land tutor, a sizable threat to stabilize when you have nothing. This is a 1 drop that scales up as the game goes on, and can also be used as a tutor for the land you really need (really good at finding your missing bounceland or Urza's Saga). You can also use the activated ability in response to the triggered ability of Urza's Saga's 3rd chapter to basically replace/upgrade your land in addition to searching for your artifact of choice. The main downside of this option is it is a tap ability, so it suffers from summoning sickness, which may not always be desired in a combo deck. Realistically, this is very close to a hybrid Arboreal Grazer and Expedition Map, being able to fulfill the main uses of both cards (although not being findable with Urza's Saga and only Summoner's Pact).
Valakut, the Molten Pinnacle (0-2) - This is actually a win-con with enough land drops and Dryad of the Ilysian Grove. Due to bouncelands being able to bounce themselves, you are generally able to utilize all your extra land drops on each turn, so this damage can add up really quickly. It can be used to clear the board or to do direct damage.
Vesuva (1-2) - This is essentially a mandatory include because of all the great plays it enables. Vesuva is probably the best land in the deck, as it can be pretty much anything. In addition to copying anything (opponent's lands included), you can play it untapped copying nothing with Dryad of the Ilysian Grove out to produce mana, an often overlooked line of play.
Crumbling Vestige (1-2) - This is a pseudo-bounce, producing 2 mana with an Amulet of Vigor. It also allows us to go +1 land or +1 mana with certain lines, which is very relevant. Also being an untapped green source makes this one of the most useful/versatile lands in the deck, essentially filling all the checkmarks of what we want a land to do in this deck. It also enables us to activate Otawara, Soaring City during our combat step with only 1 Amulet of Vigor if using the Hanweir Battlements package to haste by finding it to enable the haste, leaving it untapped to get up to 4 mana during our combat phase. You can also haste your Primeval Titan without an Amulet of Vigor using some combination of this, Hanweir Battlements and a bounce. For all these reasons, I would call it a mandatory include, but some people choose not to play any copies.
Tolaria West (1-2) - this can transmute into Summoner's Pact for whichever creature fits your situation best. It can also become any other land, a Chalice of the Void or Engineered Explosives if either is in the deck (or any other 0 CMC sideboard card, including lands). At least 2 copies enables swinging with 3+ Primeval Titan when you get to that many amulets, which is essentially enough for lethal.
Boseiju, Who Endures (1-3) - One of the best utility lands for the deck, since we can easily bounce it back to hand, making it fetchable removal for artifacts, enchantments, and even troublesome lands (essentially a broader version of Ghost Quarter if you don't plan to use it on yourself). It does technically ramp your opponent in most cases, but that's a fair tradeoff for eliminating a more troublesome permanent. Be careful not to run too many copies, as the legendary rule does come up when trying to use multiples as a land.
Cavern of Souls (0-3) - Good for control matches, and it can also be useful for colored mana when trying to hard cast more color intensive creatures like Sigarda, Host of Herons. Since we have a lot of bouncelands in here, we can change the creature type named almost as often as wanted, so this is almost like an Ancient Ziggurat that can tap for colorless when not casting creature spells.
Hanweir Battlements (0-1)/ Slayers' Stronghold (0-1) + Boros Garrison (0-1) - These are some of the best utility lands for this deck. It allows your titans to come out with haste, you can't really ask for more. Slayers' Stronghold is arguably the better of the two, since it gives haste/vigilance and +2/0, which can be important (this does require committing another slot to Boros Garrison as well). Hanweir Battlements is better at granting our titans haste without an amulet, or squeezing extra damage out of Valakut, the Molten Pinnacle. Having both as an option gives some added flexibility in plays, and makes us less susceptible to things like Surgical Extraction or drawing into our only haste enabling land before playing the titan. It is not really recommended to run both, and I recommend being careful not to overcommit to non-green lands, as you really need green lands for the deck to function early.
Urza's Saga (4) / The Mycosynth Gardens (2-4) - These are super powerful in game 1, but they are also super vulnerable to removal/hate (you basically concede against an early Blood Moon, Magus of the Moon, or Force of Vigor). However, one thing they both do well is allow for a double amulet more often (making them a solid turn 1/2 land). One additional upside the Saga does have going for it is the negatives aren't really preyed upon until games 2/3 of the match making it a powerful game 1 tool, which is why most decks want 4 copies, then side them out as needed. The Mycosynth Gardens needs a first Amulet of Vigor to copy, but it can have us go +1 the same turn, instead of needing to wait. It is a little less vulnerable to hate than its counterpart, since it isn't a Saga or Enchantment, but a little less powerful overall. When comparing the two, Urza's Saga is an investment of 2 turns for an Amulet of Vigor, while The Mycosynth Gardens is an investment of 2 mana, which also requires a first copy for us to copy. While it is pretty clear which of these effects is more powerful, both cards enable us to have an explosive turn 3 more consistently. These are also both colorless lands, which is something you need to be careful of running too many copies of, especially if you have a lot of early plays that want colored mana.
Forest (2+) / Snow-Covered Forest (2+) - basic lands are needed, enough said. It stops Path to Exile-type effects from being as devastating, and gives hope against Blood Moon. I typically like to use white bordered basics to make fetching easier (you can fan out your deck instead of going card by card) if going with fetchlands, just a little trick I like to use to help speed up games. I never suggest dropping below 2 basics with this deck, and if you aren't splashing heavily, more is always better.
Misty Rainforest (0-2) - fetches are surprisingly great in here, for two main reasons. First, the reason they are played in most decks, great mana-fixing. We can play more virtual copies of our non-basics without being forced to draw into them, which is great for something like the Surveil lands. Second, it enables additional landfall triggers, which is very important to our deck with the inclusion of Valakut, the Molten Pinnacle.
Hedge Maze (0-1) / Breeding Pool (0-1) - this is a forest subtype land which allows us to dig into our deck or has the option of coming in untapped. This makes our opponent's Boseiju, Who Endures into even more of a double edged sword, now giving us some additional card selection. If running any fetches, it also gives us decent access to pseudo-turn 1 plays, playing this tapped and potentially eliminating a bad draw.
Selesnya Sanctuary (0-4) / Golgari Rot Farm (0-4) / Simic Growth Chamber (1-4) / Gruul Turf (0-4) - green bouncelands, the main thing this deck revolves around. It is a good idea to keep one of these in hand at all times (or a Vesuva to copy one) to make the most of your multiple land drop potential. The only time I play my last one in hand is if it means I can hard cast a bomb that I feel will get through when I untap next turn. Otherwise it is best to keep one in hand with the potential of drawing extra land cards, allowing you to "go off" in a lot of cases (considering you have either an amulet in play, or dryad/azusa in hand, and are just waiting on the other piece). I would suggest having 8+ of these, with 9-10 being preferred. Simic Growth Chamber is a mandatory include alongside Tolaria West so you can bounce it back to hand and transmute it.
Castle Garenbrig (0-4) / Sunken Citadel - Castle Garenbrig is decent as potential ramp if you run enough fetches + Forest Subtypes that it can consistently come out untapped. Not really worth forcing into the deck, but it can be viewed as +2 for mana calculations in a lot of scenarios, so definitely a solid include if there's enough space and support for it. Sunken Citadel can be used to enable many of our lands, and can even be seen as a 5 color land, since we can pick any color. They both compliment each other quite well also, so if playing a more budget version, look to use these instead of Urza's Saga.
Lotus Field (0-1) / Echoing Deeps (0-1) - these often go hand in hand, since a huge drawback of the first is sacrificing a key land you may need later. Echoing Deeps also has the added benefit of copying an opponent's fetchland, most of which are green in the current meta, allowing some extra lines in certain scenarios.
Sunhome, Fortress of the Legion (0-1) / Mosswort Bridge (0-1) / Mirrorpool (0-1) / Kessig Wolf Run (0-1) / Oran-Rief, the Vastwood / Drannith Ruins (0-1) / Novijen, Heart of Progress (0-1) - Sunhome, Fortress of the Legion is great to block something with deathtouch (take that Wurmcoil Engine - I live and you don't even gain life), or just double your damage. Mosswort Bridge can cover the defensive and offensive purposes of Sunhome, Fortress of the Legion in almost every situation, without the need of as much mana investment, even allowing more aggressive plays sometimes, all while being a colored mana source instead of colorless. Mosswort Bridge is the most powerful digging tool and virtual advantage this deck has to offer. Cast off anything for 1 green? Yes please! Need to find some removal because they are just stalling with something stupid and annoying? Keep copying/bouncing this until you find what you are looking for. If you are running Mosswort Bridge, it is basically required to run Slayers' Stronghold + Boros Garrison alongside it, allowing you to get to 10+ power far more consistently. Because of those mandatory inclusions, Sunhome, Fortress of the Legion is a basically equivalent option as well, being in the same colors. Also worth mentioning is that you can use the hideaway of Mosswort Bridge to exile cards you don't want to draw, if you don't plan on activating it prior to bouncing it back to your hand. After a shuffling effect, this deck-thinning helps increase your odds of hitting cards you do want by a few percentage points. Mirrorpool is able to be a strict replacement for Sunhome, Fortress of the Legion allowing us to create 2 titans to double pump with Slayers' Stronghold for lethal, or Kessig Wolf Run / Oran-Rief, the Vastwood / Drannith Ruins / Novijen, Heart of Progress if you are on Hanweir Battlements to enable haste.
Expedition Map (0-1) / Candy Trail - this is mainly found with Urza's Saga when you already have the mana or Amulet of Vigors but are missing a bounce or a threat. Expedition Map lets you tutor for a specific land like Simic Growth Chamber or Tolaria West, while Candy Trail lets you look at the top 3 and draw one essentially. Candy Trail is able to find more targets, although less consistently, but it does feel significantly better to draw into.
The number in parenthesis after the card is its suggested quantity. As an example, Amulet of Vigor (4) means I suggest running 4 copies of the card. Excluding all of the mandatory includes, we are able to fit around 5 land and 5 non-land Filler options, allowing tweaking the deck for specific needs.
Bonny Pall, Clearcutter - This is just a solid option for when we don't have Amulet of Vigor, creating 2 blockers, and even allowing the attack trigger without haste by swinging with something like an Arboreal Grazer.
Altered Ego (0-1) / Phyrexian Metamorph (0-1) - with the increased access to 2 copies of Amulet of Vigor, Altered Ego is a very powerful option, essentially lowering the mana threshold for 2+ Primeval Titans. You can now play that second titan after transmuting Tolaria West if you have access to 7 mana, with 6 of it coming from the Simic Growth Chamber + Tolaria West you found. Phyrexian Metamorph cant be tutored for, but it is the superior version when drawn into, both being cheaper, and allowing us to also copy The One Ring, Amulet of Vigor or whatever we are already copying with The Mycosynth Gardens.
Cultivator Colossus (0-1) - This is basically Primeval Titan's big brother when your hand is mana flooded or a utility land you need is in your hand instead of your deck. It doesn't quite go infinite with bouncelands since you need to fully resolve Cultivator Colossus's ability before resolving anything else, but it is definitely a way of making the most of mana-flooding, letting you draw into things to spend that mana on. This is significantly worse than Primeval Titan if you don't have at least 2 lands in hand. If you have 4+ lands in hand, I would say it is generally better (you can still whiff). With 3 lands in hand, they are generally equivalent, with certain board states preferring one option over the other.
Misty Rainforest (0-1) / Breeding Pool (0-1) / Spara's Headquarters - Fetches / Shocks / Triomes just enable better mana fixing, landfall triggers, and deck thinning. The triomes can also become card draw when bounced if needed. You should generally pick 5 color lands or fetches, it's a little hard to support both. I generally go with fetches alongside at least one shock, because you still have all the untapped potential, but can choose for them to be tapped sources as well, to make the most of multiple Amulet of Vigor lines.
Aether Hub / Gemstone Mine / Mana Confluence / Waterlogged Grove / Reflecting Pool / Flooded Grove - Gemstone Mine probably has the most synergy, since you can use it twice then bounce it to reset its counters. Aether Hub is a strictly better version of Tendo Ice Bridge and is next in line, since you can bounce it and replay it without using the to stack multiples for later. The draw-land cycle of cards like Waterlogged Grove is one land that actually isn't terrible to draw when mana-flooded. The filter cycle like Flooded Grove helps manafix if you have a lot of non-green double cost cards. Reflecting Pool is basically a psuedo-5-color land that makes cards with multiple of the same color cost a lot easier to cast. It gets exponentially better with more multicolored lands, and is quite nice in greedy manabases like this one. Some similar options are Tendo Ice Bridge / City of Brass / Vivid Grove / Yavimaya, Cradle of Growth
Worldsoul's Rage - at worst removal and ramp, but at best an infinite combo with Mirrorpool. It is a bit slower, and does require a specific splash color, so there are some downsides for this powerful option.
Scapeshift - capable of winning games with Dryad of the Ilysian Grove or Amulet of Vigor + 6 lands out by finding Valakut, the Molten Pinnacle or setting up a (usually) game winning Cultivator Colossus by finding Bouncelands + Tolaria West. With only 5 lands and Amulet of Vigor out, you can run away with the game by transmuting into Primeval Titan in pretty much the same way, depending on which lands you have to sacrifice. With 2+ Amulet of Vigor you only need 3 lands to sacrifice to produce enough mana to transmute into a threat. It is strongly suggested to run multiple haste enabling lands if you run any copies of this. It can also function as mana-fixing or ramp depending on the situation as well. Not really the greatest thing in multiples, since most of our lands are important utility lands, but definitely a lot of strong synergy with the deck overall. It's also pretty horrible without Dryad of the Ilysian Grove or Amulet of Vigor, so it isn't ideal against decks with interaction.
Fae of Wishes / Wish / Glittering Wish / Karn, the Great Creator - even though Fae of Wishes is technically a creature, it's adventure mode is a non-creature spell, which is what we are interested in mainly. This is the most relevant of the wish cards, since we can still cast it for the adventure mode when hidden away, and it has extra synergy when hit with Turntimber Symbiosis for a 4/7 flier. Wish is just the most flexible wishing card, letting you grab literally anything. However, it forces you to use it the same turn, so it isn't as ideal as some other wish options in certain scenarios. Glittering Wish is the most reasonably priced of the bunch, but can only tutor for something multicolored in the sideboard. Karn, the Great Creator is the artifact wish and potentially usable multiple turns.
Honorable Mentions
Tyrranax Rex - keyword soup, toxic edition... Seriously though, this card fits fairly well by being a near impossible to deal with threat against any kind of control variant. It also helps with any kind of "infinite" life shenanigans, since we can now win through poison counters instead.
Gwenna, Eyes of Gaea - This is a very interesting option for the deck, which has some pros and cons to it. The first (and really only) major con is that this card doesn't do much the turn it is played, unlike most of our other ramp options. However, this is a card that can color-fix, and gets us to a turn 4 titan on its own. It also makes it far easier to chain Tolaria West into multiple Primeval Titans since it untaps when playing a 5+ power creature, essentially reducing the casting cost by 2.
Tireless Tracker / Courser of Kruphix - Tireless Tracker is a form of card advantage that is capable of growing itself, although at the cost of investing further mana. Courser of Kruphix is good at letting us eliminate land draws, which can really be a problem sometimes. It also is Lightning Bolt proof, which can be huge sometimes. Lifegain from lands hitting play is just icing on the cake. Something that is also very relevant for both is that the 2+ power can be just what's needed for that Mosswort Bridge activation.
Ghostly Flicker - this is actually a super flexible option, able to be used to reset our The One Ring, ramp us by flickering lands / ETB creatures, or even just protecting our creatures from removal. Even though it has all that going for it, it is a bit dependent on having certain cards in play already, so we don't want to over-invest in it.
Manamorphose - color-fixing where the main downside is not knowing what card it "really is" when considering your hand for a mulligan. It also doubles as a pseudo-answer for Blood Moon as a happy coincidence.
Khalni Garden / Radiant Fountain / Kabira Crossroads / Blossoming Sands cycle - chump blocker or lifegain slot. Sometimes that is enough to turn the tide of battle, so it isn't to be under-estimated as a utility option. I generally go with Khalni Garden / Kabira Crossroads if I have enough space (can potentially filter the with Wooded Bastion).
Elvish Reclaimer - a slower card, since it needs to be in play for a turn before doing anything. However, it is essentially an upgraded Expedition Map putting the land directly into play, while being able to flex into a mini-threat mid-late game. This is a very versatile creature, well worth it if not leaned into too much, and the rest of the deck supports it. I think of this card like a hybrid between Expedition Map and Arboreal Grazer often being able to fulfill the needs of both slots with minor trade-offs.
Echoing Deeps - this is also essentially only a kill line enabler. This is the "best" option of the kill line enablers if your goal is to have good mana, since it can essentially choose to be tapped or untapped, or even color-fix for you if certain other scenarios are met. It's also not completely irrelevant when you don't have 2x Amulet of Vigor, as it can copy key lands in the graveyard.
Replacement Options:
In addition to anything listed in the Filler Options section, you can always run increased copies of anything we don't already run 4 of, like Arboreal Grazer, Explore, or any key lands are always great replacement options. Moving any creature from the sideboard to the mainboard can also be an option if your meta supports that decision. The deck would almost always like more extra land cards or creatures, 3 CMC or less that fit, like Courser of Kruphix or Tireless Tracker or anything else that grants a useful ability and can be used to generate value, apply pressure and/or block with.
Sideboard
Culling Ritual - this is my pseudo-boardwipe card that can actually ramp me into a threat. The whole ramping me after clearing their board is the draw of this very off-color inclusion. Is that worth it? Probably not, but it is fun to use when it works.
Engineered Explosives - honestly, in today's meta, there's not a lot of decks this is "needed" against, it is just a nice option to have. Holding up the 2 mana for interaction is also something our deck isn't really interested in doing, but being easily accessible removal thanks to Tolaria West makes this a fairly useful option.
Force of Vigor - honestly not the strongest card in today's meta, as there's not a lot of decks anymore that rely heavily on artifacts or enchantments. That being said, when it is effective, it basically wins games on its own. Being able to 2 for 1 two of the opponent's important pieces is quite the powerful effect, especially if you consider that it can be pitched for no mana if desired.
Replacement Options:
A few too many to list, since this deck can easily flex into any of the 5 colors. Basically, you want to always have a few gravehate slots, a few lands to move in, and some ways to deal with problem cards/decks, whatever those may be (always consider Blood Moon and Magus of the Moon). You may also want some redundant threats, as there's cards like Surgical Extraction that can target our very linear plan, which is why mill is a surprisingly difficult matchup if not respected. "Silver Bullet" type cards are also always a great choice, cards where when you play it against a certain deck, they basically lose on the spot.
In my current sideboard, your main consideration should be where to double up on hate and where not to. You also want to consider which cards are strictly wish targets (if running any of the options), and which cards you can actually side in. Siding in your targets enables you to have a faster response, so that is generally the preferred line. This means you don't go heavy on cards which are only good when wished for.
My biggest suggestion is to try to have a tutor-able target for your major issues when possible (Summoner's Pact functions as a tutor for green creatures). There's a lot of smaller synergies with lands, since we can tutor them up with Primeval Titan or Elvish Reclaimer but you shouldn't rely on those paths as your only answers, since they are less reliable to have access to early. Think of land hate in this deck as more coincidental than something you can rely on, even with all the tutor options.
I would order your preferred hate cards as:
Green Creatures - 1 card is 6+ virtual copies (Summoner's Pact / Tolaria West)
Everything Else
Just as a disclaimer, the Glittering Wish and Karn, the Great Creator sections may be a bit outdated, since I do not keep their sections up to date. They are still worth mentioning as potential options though.
Castle Garenbrig - This is another "generic" land that we can side in when we remove some of our not ideal flexslot lands to not lose too much land density. Having a ramp option at the ready when we side out our Urza's Sagas helps us to not lose out on too much explosiveness.
Khalni Garden / Radiant Fountain - our "lifegain" slots, with 1 creating a blocker, which can be more virtual life than +2. These are a little more important with our choice of Echoing Deeps over a traditional kill line.
Force of Vigor / Boseiju, Who Endures / Pick Your Poison / Tear Asunder / Stormkeld Vanguard - some of the best artifact and enchantment removal in the format. Force of Vigor is capable of removing 2 problem permanents at the cost of 2 cards and no mana, this option definitely keeps some unfair decks in check (ours included, as this is one of our problem cards). Being a potential "colorless" out to a resolved Blood Moon is also a huge upside that cannot be overstated enough. Boseiju, Who Endures has the added benefit of being a land we can use to replace Urza's Saga when suspecting Blood Moon. Pick Your Poison / Tear Asunder can flex as an answer to larger creatures, alongside everyone's favorite indestructible artifact - The One Ring with the later option. Stormkeld Vanguard is capable of being a threat later into the game after being used as removal, and is also searchable by Summoner's Pact. They all have their respective pros/cons.
Dismember - some of the best creature removal in the format, not really much else to say.
Endurance / Turn the Earth / Relic of Progenitus / Bojuka Bog - Endurance is preferred mainly due to it's evoke cost and the ability to be found with a Summoner's Pact. Even when you are tapped out, you can find this card and essentially counter anything if it is going to be game-ending by exiling another green card in hand. It can also be used on yourself to help in the mill matchup, unlike some other options (I only run 1-2 copies to not expose ourselves to Surgical Extraction and Extirpate as much since we have lots of creature tutor options). Turn the Earth makes up the other copies, and has some things going for it over multiple copies of Endurance. It is both usable from the grave when milled over, and can be used multiple times thanks to the flashback. The lifegain isn't completely irrelevant either. Relic of Progenitus is probably the weakest of the bunch, but it is a nice option to have vs. black graveyard decks especially. Its strength is being findable with Urza's Saga and able to be held up as instant speed interaction, while slowly keeping the opponent's graveyard in check at no additional cost. Bojuka Bog is a land that is findable with Elvish Reclaimer and primveal titan (TSR) giving it some added utility, although usually at sorcery speed. Ironically enough, don't consider this as a land when sideboarding it in, since it is not a fast mana source and is not green - so it does nothing we want a land to do in this deck.
Engineered Explosives / The Filigree Sylex / Ratchet Bomb - targeted CMC removal. Being findable with Tolaria West gives EE extra value as the first copy in the deck, while I prefer to run the versions that don't require holding open mana for 2+ copies.
Thragtusk - This is a big dumb green creature that gains us life on the ETB and can trade profitably, since we still get a 3/3 to replace it. This is a mini-threat that is more defensive in nature, allowing us to recover and stabilize against some of the more aggressive decks in the meta right now.
Roxanne, Starfall Savant - this is a nice option against Magus of the Moon, both removing it and producing a 5 color mana source alongside a decent threat that needs to be answered before it produces too much value.
Spelunking - this is a very underrated card in a lot of scenarios and has some very niche uses. The main benefit to this card is in games where we side out Urza's Saga so we will see less double Amulet of Vigor, as that is really the card's only downside, turning off one of our key cards. The major upside of this card is to stop untap triggers. So for example, with Azusa, Lost but Seeking we can play a tapped land followed by a bounce and they cannot react in-between. It is essentially Amulet of Vigor + Explore as a single card, but multiples of it or Amulet of Vigor are bad and we'd just rather have Explore in that scenario. That makes it a very good option to help replace the 3-4 Urza's Saga we side out against most red decks.
Arcbond - this is mainly there to help with red decks that go wide. In a lot of cases, you can use it in response to red removal, and it is a castable "Wrath" through Blood Moon. Since the average red removal spell is 3+ damage, this is costed fairly efficiently. It can also be used with damage from blocking, turning your Arboreal Grazer into a tactical nuke. Be aware that it also damages each player, which is not ideal for us.
Colossal Skyturtle - the main draw here is the last triggered ability, bouncing a creature. Since this effect is a triggered ability and not a spell, it makes it very difficult for other decks to interact with. It also gets around things like Emrakul, the Aeons Torn's protection and Iona, Shield of Emeria's colored spells clause which come from some of our more troublesome matchups. It's not a terrible creature either, having decent stats with built in evasion and a little bit of protection. Recursion and the ability to pitch it at instant speed can also be useful in matchups like mill or Living End.
Honorable Mentions
Surge of Salvation / Veil of Summer / Silence - Surge of Salvation is essentially a Leyline of Sanctity effect with some additional upsides that be used as a combat trick against select decks. Veil of Summer is a nice option against any blue or black deck. It is mainly here to stop targeted discard. That being said, it is only effective against it if you have the mana open, so it is not nearly as effective on the draw. Silence can be used to protect our combo by resolving it first, or to "time walk" any sorcery speed deck.
Spell Pierce / Swan Song / Test of Talents - Spell Pierce hits hard early, and becomes less powerful into the late game. The other options are really solid hate against problem instant or sorceries (or enchantments) which just so happen to be some of the matchups we don't typically have interaction with otherwise. These are very useful against Indomitable Creativity, Calibrated Blast, Persist, any cascade target like Living End / Glimpse of Tomorrow, any storm piece, or just a Counterspell war. They can't be tutored for and have to be drawn into naturally - but it can be fairly game changing when you do, especially against combo decks, which is the intended target. Spell Pierce is currently the option because of the prevalence of The One Ring and its ability to answer planeswalkers as well.
Chalice of the Void - very powerful denial against decks that are efficiently mana-curved, as most modern decks are. This is one that is best played early for 0 or 1, maybe even 2 if facing a hatebears/goodstuff kind of deck. It doesn't deal with any current threats at that CMC, it only prevents future ones from being played. This also hits your own cards as well, so be careful about that. It is findable with Tolaria West, giving it extra value in the deck. If you run lots of 0 or 1 drops, this gets a lot less valuable, as it is a double-edged sword.
The Stone Brain - good for removing any problem card from our opponent's deck, usually useful against more linear combo decks.
Void Mirror / Defense Grid - good options vs various decks, both mostly deal with the MH2 pitch elementals though.
Cursed Totem / Stone of Erech - these are mainly there for the creature combo decks, completely invalidating them until dealt with.
Tyrranax Rex - this helps against anything that wants to play like control, whether they are blue or not. Being a near impossible to kill threat, that cannot be interacted with beneficially really cripples the decks it is meant to deal with.
Hokori, Dust Drinker - this lets you shift into more of a prison-style gameplay. It's a shame it isn't green and the cost is a little hard to consistently have early. If you play this while your opponent is tapped out (and they aren't an aggro deck or don't have a crazy board state) you basically win. This card hits most "fair" decks hard, but barely affects us because of Amulet of Vigor + Bouncelands, turning it's effect into more of a 1 sided Winter Orb. You basically transition a combo-deck into a prison deck with this sideboard option. Most non-aggro decks just aren't ready for that in modern and can't recover fast enough. Since most of the current meta is aggro oriented, this card isn't positioned very well in the meta. However, in a slow meta, this is some top-tier sneaky tech.
Elderscale Wurm / Empyrial Archangel / Hornet Queen - I found myself being able to cast off a Summoner's Pact for a Primeval Titan in a lot of situations against more aggro builds, only to realize it didn't matter since I was dead the next turn anyway. Elderscale Wurm and a lot of the following options help to solve that, albeit in different ways. Everything has their specific situations and pros/cons, which I will try to explain. Elderscale Wurm just makes you invulnerable to damage until it is either removed or you drop below 7 life (loss of life bypasses the protection). Empyrial Archangel has shroud, which really comes in handy against removal. One thing worth noting is that the replacement effect is not optional, so they can remove it by simply doing 8 damage to you in 1 turn, probably its biggest downside to consider. Hornet Queen is less vulnerable to targeted removal, but more vulnerable to wipes due to low CMC and toughness. However, an army of deathtouch blockers will often slow/stop the opponents deck for a bit.
Wurmcoil Engine / Inferno of the Star Mounts / Inferno Titan / Dragonlord Atarka - mainly for Blood Moon matchups, although they all have other uses as a solid uncounterable threat, resilience against removal, Land destroyer, or pinger (killing Magus of the Moon on entry), which helps with the intended use since most Blood Moon decks tend to play counterspells and removal too. The firebreathing ability on some also gives you something to do with all that red mana, if you aren't able to deal with Blood Moon. Wurmcoil Engine is more relevant in other matches since colorless is a lot easier for our manabase to support, and is a resilient to removal option, so it is probably the best option of them all.
Forest / Plains / Island or other basic land - This is just a land to side in, when I side out Urza's Saga. An off-color basic does help with splashing vs. Blood Moon and has synergy with the correct fetches, Sakura-Tribe Elder and Springbloom Druid making them into better mana-fixers.
These are some Fae of Wishes / Wish guidelines.
Scapeshift - This is basically the go-to option in most scenarios. It's capable of winning games with Dryad of the Ilysian Grove or Amulet of Vigor + 6 lands out by finding Valakut, the Molten Pinnacle or setting up a (usually) game winning Cultivator Colossus by finding Bouncelands + Tolaria West. With only 5 lands and Amulet of Vigor out, you can run away with the game by transmuting into Primeval Titan in pretty much the same way, depending on which lands you have to sacrifice. It can also function as mana-fixing or ramp depending on the situation as well. Not really the greatest thing in multiples, since most of our lands are important utility lands, but definitely a lot of synergy with the deck overall. It generally ends up a cheaper Cultivator Colossus or Primeval Titan, but sometimes one of your lands in play were important, so it's not always game winning on the spot (we help to mitigate this by running both Hanweir Battlements + Slayers' Stronghold). It's also pretty horrible without Dryad of the Ilysian Grove or Amulet of Vigor, so it does very poorly against decks with interaction.
Worship - some sneaky tech that can buy us enough time to get back in the game in most cases. It's not really the best thing to try for, as you are dangerously close to death for it to take effect, but effects like these are capable of turning games around on their own. Since we can wish for it, then cast Fae of Wishes from exile to enable it, this is a pretty decent option to pivot a game you feel slipping away. It is actually really solid tech against RDW variations, as they don't expect troublesome enchantments from us, and will mainly pack artifact hate, or use their removal on Dryad of the Ilysian Grove instead.
It's also important to have some access to "free" options that answer specific things like Chalice of the Void, Force of Vigor, Endurance, or Slaughter Pact as at least a 1-of. Being able to convert a wish card into a specific answer or win on the spot card, is the main benefit of it over a standard sideboard. Make sure the slots you are committing to the wishboard are worth it, if you don't plan to actually side them in, as those are slots you cannot use for something else.
I'm keeping this here more for archival purposes, as I think Fae of Wishes / Wish is almost better in every situation. I ran this wish package for a long time, so I'll just keep this subsection for now (it may not include some newer options).
Silver Bullets
Fracturing Gust - mostly there for affinity/hexproof, or anything else with lots of artifacts/enchantments. I feel the recent Culling Ritual does a better job in most situations, since it can also ramp me. It's basically ramp vs. lifegain when considering the two (instant speed and initial mana cost matters too of course). I tend to think a wipe + threat with the ramped mana is better generally speaking.
Batwing Brume - another form of hate that is fairly specific to certain decks. the mode is potent against the Splinter Twin variants, while the mode is very effective against things like infect that go all in on one turn, where you just need to survive past their combo. This particular silver bullet isn't in my sideboard currently, as I've been seeing a lot less of both types of decks (infinite creature swarms and 1 trick ponies).
Lavinia, Azorius Renegade![]() / Gaddock Teeg / Yasharn, Implacable Earth / Scheming Fence - very strong denial in matches where relevant. Most of the decks Gaddock Teeg shut down have become less prevalent in the meta, so he isn't a needed option right now. Lavinia, Azorius Renegade
/ Gaddock Teeg / Yasharn, Implacable Earth / Scheming Fence - very strong denial in matches where relevant. Most of the decks Gaddock Teeg shut down have become less prevalent in the meta, so he isn't a needed option right now. Lavinia, Azorius Renegade![]() on the other hand is strong against Tron, and 'free' spells like Solitude, Living End, Memnite, etc. Yasharn, Implacable Earth is very good against fetchlands, and anything that plans to sacrifice anything, like sacrifice outlet creature combo decks, Treasure and Food token decks, etc. Scheming Fence is a solid option against anything with activated abilities. It steals the abilities of anything short of planeswalkers, and it still turns those off. It is like an upgrade to Pithing Needle that's wishable.
on the other hand is strong against Tron, and 'free' spells like Solitude, Living End, Memnite, etc. Yasharn, Implacable Earth is very good against fetchlands, and anything that plans to sacrifice anything, like sacrifice outlet creature combo decks, Treasure and Food token decks, etc. Scheming Fence is a solid option against anything with activated abilities. It steals the abilities of anything short of planeswalkers, and it still turns those off. It is like an upgrade to Pithing Needle that's wishable.
Wheel of Sun and Moon - this one is anti-mill and gravehate built into one neat package. It is also a softlock when combined with Elderscale Wurm if your opponent has no form of removal. Simply cast it on yourself and keep casting an instant to prevent yourself from decking out.
Unmoored Ego / Slaughter Games - basically a silver bullet against most combo decks. This lets you completely remove one of their key pieces.
General Options
The Gitrog Monster![]() / Sigarda, Host of Herons / Dragonlord Dromoka / Empyrial Archangel / Hydroid Krasis / Nethroi, Apex of Death / Vhati il-Dal / Shelob, Child of Ungoliant - This slot is basically a multi-colored filler card that's in there for when I just need some presence on the field, but there's lots of great options, even beyond these (I try to go with creatures with at least 1 green cost so they can be found with Summoner's Pact when sided in - being castable with green/white is also suggested, so you always have access to cast it when wished for and aren't manascrewed). The Gitrog Monster
/ Sigarda, Host of Herons / Dragonlord Dromoka / Empyrial Archangel / Hydroid Krasis / Nethroi, Apex of Death / Vhati il-Dal / Shelob, Child of Ungoliant - This slot is basically a multi-colored filler card that's in there for when I just need some presence on the field, but there's lots of great options, even beyond these (I try to go with creatures with at least 1 green cost so they can be found with Summoner's Pact when sided in - being castable with green/white is also suggested, so you always have access to cast it when wished for and aren't manascrewed). The Gitrog Monster![]() is a beater with lots of synergy with the deck. It can transform our excess lands into cards and give us much needed extra land plays every turn. It's only real downside is its lack of protection and evasion. Sigarda, Host of Herons is a hard to remove threat - its effect is notable against annihilator, plus it's a flyer and hexproof. Dragonlord Dromoka is very good in a lot of matchups, specifically against blue/red due to the uncounterable and lifegain. Empyrial Archangel just ends games where it does its job right. It's biggest downside is that the replacement effect is not optional. Hydroid Krasis is just card advantage and life gain attached to a large beater with evasion and trample. Nethroi, Apex of Death is a different form of anti-removal from the hexproof/shroud options. Let them remove your creatures, then use the mutate cost on this guy to bring back some nice board presence that just happens to be enough to let you use Mosswort Bridge's hideaway. Vhati il-Dal is a very solid controlling option, making my creatures into essentially deathtouch blockers or attackers, or allowing me to block with Vhati il-Dal then tap it before damage calculation and block just about anything without it dying.
is a beater with lots of synergy with the deck. It can transform our excess lands into cards and give us much needed extra land plays every turn. It's only real downside is its lack of protection and evasion. Sigarda, Host of Herons is a hard to remove threat - its effect is notable against annihilator, plus it's a flyer and hexproof. Dragonlord Dromoka is very good in a lot of matchups, specifically against blue/red due to the uncounterable and lifegain. Empyrial Archangel just ends games where it does its job right. It's biggest downside is that the replacement effect is not optional. Hydroid Krasis is just card advantage and life gain attached to a large beater with evasion and trample. Nethroi, Apex of Death is a different form of anti-removal from the hexproof/shroud options. Let them remove your creatures, then use the mutate cost on this guy to bring back some nice board presence that just happens to be enough to let you use Mosswort Bridge's hideaway. Vhati il-Dal is a very solid controlling option, making my creatures into essentially deathtouch blockers or attackers, or allowing me to block with Vhati il-Dal then tap it before damage calculation and block just about anything without it dying.
There's also a lot of multi-colored planeswalkers, and non-green multi-colored creatures that could be options as well (Geyadrone Dihada / Nicol Bolas, God-Pharaoh / Blood Baron of Vizkopa / Dragonlord Ojutai / Narset, Enlightened Master being some top choices). However, I generally prefer to go with a green creature in this deck, as Summoner's Pact makes a singleton green creature into essentially 5 copies once sided in.
Finally, let's look at some of the more generic removal options - these are some of my top choices:
Potential 2 for 1 or better:
Firespout![]()
Deafening Clarion
Culling Ritual
Quandrix Command
Crime / Punishment
Hazardous Conditions
Fiery Justice
Maelstrom Pulse
Catch / Release
Razia's Purification
Permanents:
Abrupt Decay![]()
Assassin's Trophy
Despark
Vanishing Verse
Vindicate
Anguished Unmaking![]()
Specialized:
Kaya's Guile
Crackling Doom
Hide / Seek
Catch / Release
Riveteers Charm
Eladamri's Call
Cindervines
Honorable Mentions:
Anafenza, the Foremost
Kambal, Consul of Allocation
Knight of Autumn
Meddling Mage
Lightning Helix
Nature's Chant
Terminate
Detention Sphere
Deputy of Detention
I suggest picking well balanced removal spells for the slots (that fit in your color options, and are capable of dealing with more problems), but the choice(s) is/are yours.
Since Karn, the Great Creator is limited to artifacts, and is the highest CMC of all the wishes, it is probably the worst option of them all. However, it is a permanent, so if the game goes longer, you can get more value from it. It is in a very awkward spot of the mana curve, and most modern games are over by the time it does anything, so I don't particularly like it. However, with that being said, there are some very good options, which are valid sideboard cards with or without Karn, the Great Creator.
The One Ring - capable of buying a turn and granting 3 cards of card advantage, all for the low cost of 4 mana and 1 life.
Liquimetal Coating - this allows your Karn, the Great Creator to destroy your opponent's lands, provided you can also protect him.
Chalice of the Void - very powerful denial against decks that are efficiently mana-curved, as most modern decks are. This is one that is best played early for 0 or 1, maybe even 2 if facing a hatebears/goodstuff kind of deck. It doesn't deal with any current threats at that CMC, it only prevents future ones from being played. This also hits your own cards as well, so be careful about that. It is findable with Tolaria West, giving it extra value in the deck. If you run lots of 0 or 1 drops, this gets a lot less valuable, as it is a double-edged sword.
Engineered Explosives - targeted CMC removal. Being findable with Tolaria West, gives it extra value in the deck.
Defense Grid - solid against control, and even better against MH2 elementals.
Unlicensed Hearse / Relic of Progenitus / Tormod's Crypt / Stone of Erech - Unlicensed Hearse has better interaction, being twice as powerful, and letting you choose the targets, along with being a potential threat on its own, while Relic of Progenitus is able to cantrip itself, and is findable with Urza's Saga. Tormod's Crypt is a one time shot at 0 CMC, but like Relic of Progenitus, it is findable by Urza's Saga and also Tolaria West making them all have their specific pros and cons. Stone of Erech is a great form of hate for anything that hits the battlefield, being a replacement effect, the strongest of all effects, but slightly more narrow than the rest.
Pithing Needle / Sorcerous Spyglass - quite powerful against planeswalkers, fetches, and anything else with an activated ability. Either option can break certain combo decks if they rely on activated abilities. I generally go with Sorcerous Spyglass because it gives extra information, and can be cast through a Chalice of the Void at 1. However, with Urza's Saga, Pithing Needle can be a better option.
Haywire Mite - artifact/enchantment removal, something we always want. Also, since this is findable with Urza's Saga it gets some extra value.
The Stone Brain - an effect previously restricted to splashing at least - there's 4+ variations of this effect in multiple colors, but they've always included at least previously - this is a very powerful card. Against a lot of combo decks, eliminating their key card can be back breaking and win the game on the spot.
Phyrexian Metamorph / Blade of Shared Souls - having access to a copy effect can sometimes be extremely beneficial. These cards are not to be underestimated.
Crucible of Worlds / Conduit of Worlds - pretty solid against your typical land destruction, essentially letting you gain card advantage from their removal.
Wurmcoil Engine / Cityscape Leveler - big threats to help seal the game.
To make things a little easier, I marked all the cards I sometimes side out in various matches with the tag #flexslot if you look at custom categories.
First of all, when heading into game two, I usually decide what to side out first. I evaluate which cards are less than optimal. Arboreal Grazer gets cut to as little as 1 copy against decks that don't plan to attack much (never side out all copies). Things along those lines, where you take out suboptimal cards. Any "wish" cards like Fae of Wishes will almost always go out after the first game, since we generally move most relevant targets in. Another option is removing some utility lands that don't really serve a purpose in the match (Cavern of Souls) depending on the deck you are facing. I generally don't suggest going down below 28 lands with the deck.
After all that, I decide which sideboard cards could prove useful in the match, and move them in. Afterwards, I adjust to make my sideboard as close to 15 cards as I can, whether I need to remove more "filler" slots like Summoner's Pact / Explore, or if I have to move in some of the "better" cards I tried to side out (dependent on the match).
Also worth mentioning is don't stress about getting exactly 60/15; there's times I will play with a 61 card deck in game 2 (usually against some weird homebrew where I want more options and lots of our sideboard seems relevant).
Lastly, you can always include some sneaky tech like Hokori, Dust Drinker / Worship / Elderscale Wurm if you have the space (I ran Elderscale Wurm mainboard for a while before modern became a removal heavy format). If you're facing anything with a more aggro build, Hokori, Dust Drinker isn't the best option. For example, puresteel decks can be seen as a combo deck, but they are a more aggro combo deck, where they get early board presence. Hokori, Dust Drinker is not a good option against decks like these, since they can still keep applying pressure even without mana with a quick start, and since a large majority of the meta falls into this aggro-esque category, Hokori, Dust Drinker isn't really poised as a solid sideboard option currently. However, the surprise factor of an obscure card like this definitely pays off sometimes, so that's just something to keep in mind. I am talking about obscure cards in general being a solid enough option if you have the extra slots, and am just using Hokori, Dust Drinker as an example. If you feel they will do enough in your meta to justify inclusion, feel free to experiment a little.
Tutor for any 0 CMC
Tolaria West + Simic Growth Chamber
Removal
Boseiju, Who Endures + Bounceland
Extra Burn damage with Dryad of the Ilysian Grove and at least 4 lands out
Valakut, the Molten Pinnacle + Hanweir Battlements
for haste (Vesuva can't copy a land entering at the same time, so fetch it after attacking along with the 2nd Valakut, the Molten Pinnacle for 3 copies). You can also target yourself with Ghost Quarter for an extra landfall trigger.
+2/0 and Haste/Vigilance (another fetch after attack)
Slayers' Stronghold + Boros Garrison
Free Plays with 10 power (if you have extra landdrops left, it gets really broken)
Mosswort Bridge + Bounceland - you can stack triggers so you can resolve and activate the hideaway before bouncing Mosswort Bridge back to your hand
Haste without Amulet
Hanweir Battlements
+ Crumbling Vestige or a Bounceland and extra land plays to replay the Hanweir Battlements
and give the titan haste
Simic Growth Chamber + Tolaria West
- Tolaria West + Simic Growth Chamber lets you transmute into a 0 CMC card
Boseiju, Who Endures + Selesnya Sanctuary
- Boseiju, Who Endures + any bounceland lets you have removal for any artifact/enchantment/land
Dryad of the Ilysian Grove + Valakut, the Molten Pinnacle
- Valakut, the Molten Pinnacle + Dryad of the Ilysian Grove allows everything to be mountains, so Valakut, the Molten Pinnacle + Hanweir Battlements
becomes one of the better fetch options
Amulet of Vigor + Mirrorpool + Worldsoul's Rage
- Worldsoul's Rage + Mirrorpool can go infinite if you are producing enough mana to keep copying the spell when bringing back the land before resolving the original spell
If you don't believe something is played out how I described it, please feel free to ask a certified judge here.
Example Hand:
2x Amulet of Vigor / The Mycosynth Gardens (at least one must be an actual Amulet of Vigor)
1x Forest or any other untapped source if both were Amulet of Vigor
1x Simic Growth Chamber or any other green bounceland
1x Summoner's Pact / Primeval Titan or in some cases Cultivator Colossus with enough lands in hand
1x Summoner's Pact / Azusa, Lost but Seeking / Arboreal Grazer / Explore
or
2x Dryad of the Ilysian Grove
Turn 1: Play an untapped land, then tap it to play Amulet of Vigor.
Turn 2 (The Mycosynth Gardens): play your green bounce and use the non-green to copy Amulet of Vigor, then use the green to play Arboreal Grazer and replay your bounce. Skip down to Turn 2 (continued).
Turn 2 (w/o TMG): Tap your first land for another Amulet of Vigor, play a bounceland, untap twice (amulet triggers) and add 4 to mana pool, then bounce that same land back to your hand (unless you have another bounce in hand) so you can use it again.
Turn 2 (continued): Now there's a few variations here, but long story short you need Arboreal Grazer / Azusa, Lost but Seeking or at least 2 other land drop cards with a Primeval Titan or Summoner's Pact to fetch missing pieces.
If you used Dryad of the Ilysian Grove to get to your first Primeval Titan, you can fetch Valakut, the Molten Pinnacle + Hanweir Battlements to grant your singular titan haste, then fetch Vesuva + Misty Rainforest (or Echoing Deeps if you already used it) to maximize your damage from Valakut, the Molten Pinnacle triggers (12 damage on the trigger after attacking + 6 more when you crack the fetch). If that's enough, you may need to go into a more complicated line, involving double Amulet of Vigor.
There's a few ways that you can go about a turn 2 "win". All of them not involving Dryad of the Ilysian Grove as a form of ramp converge to copying (or hard-casting if you have 3 extra mana to transmute Tolaria West) a second Primeval Titan and then swinging with both. After attacking with both Titans, you'll have 4 land fetches, which will branch out into any of the lines detailed below.
All lines below assume we play Primeval Titan with 2 Amulet of Vigors and float all available mana on double/triple triggers unless otherwise mentioned
- Fetch Mirrorpool + Simic Growth Chamber
- Copy Primeval Titan and return Simic Growth Chamber to hand
- Fetch Hanweir Battlements + Gruul Turf to haste both Primeval Titans
- Return Hanweir Battlements to hand
- Fetch Echoing Deeps (copying Mirrorpool) + Boseiju, Who Endures on first Primeval Titan attack trigger
- Fetch Otawara, Soaring City + Simic Growth Chamber, returning Otawara, Soaring City and leaving Simic Growth Chamber untapped
- Copy Primeval Titan with floating mana
- Fetch Gruul Turf + Simic Growth Chamber leaving both untapped and returning Boseiju, Who Endures + any tapped land
You now have an untapped Primeval Titan with Boseiju, Who Endures + Otawara, Soaring City in hand and 3 untapped bounces to pay for them (either turn).
- Fetch Mirrorpool + Simic Growth Chamber
- Copy Primeval Titan and return Simic Growth Chamber to hand
- Fetch Hanweir Battlements + Valakut, the Molten Pinnacle to haste both Primeval Titans
- Fetch Echoing Deeps (copying Mirrorpool) + The Mycosynth Gardens (copying Amulet of Vigor) on first Primeval Titan attack trigger
- Fetch Otawara, Soaring City + Simic Growth Chamber, returning Otawara, Soaring City and leaving Simic Growth Chamber untapped
- Copy Primeval Titan with floating mana
- Fetch Simic Growth Chamber/Castle Garenbrig + Gruul Turf/Misty Rainforest (3 mana after using) leaving both untapped and returning any tapped land(s)
- Activate Otawara, Soaring City with floating mana, returning a tapped Primeval Titan to hand
- Proceed to your Main Phase 2, crack Misty Rainforest for Hedge Maze leaving it untapped
- Replay Primeval Titan fetching Tolaria West + any bounce (Vesuva if going with the kill route), retuning Tolaria West to hand and leaving the bounce untapped
- Transmute Tolaria West into any of the following:
a. Engineered Explosives and play it for 0-4 ( requires Gruul Turf on last fetch)
b. Summoner's Pact to then find any "silver bullet" creature card (up tp 7 CMC), like Yasharn, Implacable Earth or Thragtusk
c. Pact of Negation
d. Summoner's Pact for Gretchen Titchwillow and using its ability to draw into Dryad of the Ilysian Grove then replaying Vesuva copying Valakut, the Molten Pinnacle and chaining all of the other extra land cards for lethal. Cultivator Colossus is a near guaranteed lethal line as well, although it requires exactly 7 mana, so if you used your Hedge Maze already, it is not possible.
- Fetch Mirrorpool + Simic Growth Chamber
- Copy Primeval Titan and return Simic Growth Chamber to hand
- Fetch Hanweir Battlements + Valakut, the Molten Pinnacle to haste both Primeval Titans
- Fetch Echoing Deeps (copying Mirrorpool) + Crumbling Vestige on first Primeval Titan attack trigger, leaving both untapped
- Fetch Simic Growth Chamber + Gruul Turf, returning 2 tapped lands and leaving both untapped
You now have to open mana to copy your Primeval Titan at instant speed, allowing you to play any two lands at instant speed. Common uses are to get around an opposing The One Ring with Valakut, the Molten Pinnacle triggers, or finding Vesuva to copy a key land at instant speed. You can also pivot into Otawara, Soaring City or Boseiju, Who Endures if needed, although there's better lines if choosing that route.
- Fetch Mirrorpool + Gruul Turf
- Copy Primeval Titan and return Gruul Turf to hand
- Fetch Hanweir Battlements + Valakut, the Molten Pinnacle to haste both Primeval Titans
- Fetch Echoing Deeps (copying Mirrorpool) + The Mycosynth Gardens (copying Amulet of Vigor) on first Primeval Titan attack trigger
- Fetch Otawara, Soaring City + Simic Growth Chamber, returning Otawara, Soaring City and leaving Simic Growth Chamber untapped
- Copy Primeval Titan with floating mana
- Fetch Simic Growth Chamber/Castle Garenbrig + Gruul Turf/Misty Rainforest (3 mana after using) leaving both untapped and returning any tapped land(s)
- Activate Otawara, Soaring City with floating mana, returning a tapped Primeval Titan to hand
- Proceed to your Main Phase 2, crack Misty Rainforest for Hedge Maze leaving it untapped
- Replay Primeval Titan fetching Tolaria West + any bounce, retuning Tolaria West to hand and leaving the bounce untapped
- Transmute Tolaria West into Summoner's Pact and find Endurance, with open mana to hard-cast it on your opponent's turn.
This is a solid way to not die to something like mill, although in that scenario, it is unlikely you still have all these key lands in your deck. Probably a fairly niche corner case that won't come up much, but it can also be used to stop graveyard decks, and this route may be preferred over the instant speed Primeval Titan route.
- Fetch Mirrorpool + Simic Growth Chamber
- Copy Primeval Titan and return Simic Growth Chamber to hand
- Fetch Hanweir Battlements + Valakut, the Molten Pinnacle to haste both Primeval Titans
- Fetch Echoing Deeps (copying Mirrorpool) + Simic Growth Chamber on first Primeval Titan attack trigger leaving both untapped and returning Hanweir Battlements to hand
- Fetch Tolaria West + Simic Growth Chamber returning Tolaria West and leaving Simic Growth Chamber untapped
- Copy Primeval Titan with floating mana
- Fetch Vesuva (copying Valakut, the Molten Pinnacle) + any land leaving both untapped (you can bounce this land to hand later with Simic Growth Chamber after playing Dryad of the Ilysian Grove)
- Proceed to your Main Phase 2
- Transmute Tolaria West into Summoner's Pact and find Dryad of the Ilysian Grove, play any land for double Valakut, the Molten Pinnacle triggers
This is a nice way to squeeze out more damage, which can double as removal, and if the land you are going to play is Misty Rainforest or Verdant Catacombs, you can actually do +12 damage post-combat, which will usually be lethal (even 6 is almost always lethal since most deck's manabases damage them). You can also find Otawara, Soaring City / Boseiju, Who Endures as your flexland in this line and have the mana to hold up Boseiju, Who Endures or use Otawara, Soaring City that turn.
In the deck's current version, I've cut Valakut, the Molten Pinnacle down to one copy since we don't naturally get to 6 lands without a Primeval Titan too often since we run lands that cash themselves in for Amulet of Vigor. The Valakut, the Molten Pinnacle and 2+ Titan routes are fairly consistent when your hand is strong enough for the turn 2 win, so replacing the second copy for Misty Rainforest has been more than welcome.
This is probably the section that needs the most updating, as I tend to neglect it and not really go into specifics on cards (I've playtested well over 200+ various options - the better options have been listed as honorable mentions in the card options or sideboarding sections). With so many colors and ways to tutor for things, there's tons of options available. Historically, I've struggled to find that final card I'm happy with, so there's always at least one slot I am constantly changing in my version of the deck. There's a few #flexslots in the deck (look at custom categories), which I generally like to fill with cards that fit at least one of the following roles:
- mainboard hate
- dig/filter/cantrip cards
- anti-hate
- game plan enablers
I have a fairly extensive list of cards I've considered/tested, so if there's any particular problems you are facing when piloting the deck, feel free to share and I'll try to give the best advice possible. If there's anything else you've found to work well or would like me to test, feel free to share that too.
Some of the more interesting options I've found are Root Maze and Hokori, Dust Drinker to shift to a more prison-style. Root Maze makes my opponents feel the pain I feel with their manabase and allows me to stack amulet triggers for any land, plus it really hits decks with lots of fetches pretty hard. However, it does next to nothing against aggro decks, which is most of the meta right now. Root Maze can almost be viewed as a reverse Amulet of Vigor for the opponent, but multiple copies don't really do much, so I found 2-3 copies to work best if going that route. Hokori, Dust Drinker can be viewed in a similar light, being more of a 1 sided Winter Orb in a lot of cases, due to our ability to produce mana without lands untapping during our untap step (extra land plays an Amulet of Vigor with bouncelands). Green also has a lot of fatty options when you get enough mana, so there's plenty of options there. I'd say that where this deck struggles the most is a nice option for turn 1 and 2 that isn't a dead draw later.
I found cards like Once Upon a Time where you can find a land or a creature to be the most valuable option (you generally are looking for either a bounceland or a creature to generate more mana/be a finisher). Track Down is one of the closest cards I could find. You also have cards like Ancient Stirrings or Incubation / Incongruity which let you do one or the other. Once Upon a Time is just super strong and was rightfully banned (any deck that could play it did). Oath of Nissa is another comparable option worth mentioning. Also, green creatures with low CMC that can find lands like Elvish Reclaimer and Elvish Rejuvenator magically transform Summoner's Pact into a pseudo land tutor as well (it's debatable if paying 4 mana next turn is worth tutoring for a land).
Also, I have found cantrip cards with decent effects to be some of the more desirable options available to us that aren't just straight banned. Some of the more obvious ones are things like Explore / Growth Spiral, but there's also some more interesting ones like Manamorphose which actually make sense too. Manamorphose can be seen as an anti-Blood Moon card, which helps us to manafix, and essentially allows us to play with less than 60 cards when it isn't relevant.
Some other interesting ideas I've come up with are Valakut Exploration and Savor the Moment. Valakut Exploration is an obscure source of card advantage, or just extra burn damage alongside its namesake counterpart, while Savor the Moment is anything from an overpriced Explore to one of the cheapest game enders ever, depending on your board presence (remember, we don't need to untap our lands to have access to lots of mana in the extra turn).
Feel free to suggest more interesting ideas or present potential problems to be addressed with my current 75, or if you'd like me to go into any specifics on cards not mentioned anywhere in the description.
Some Specific Examples - not all inclusive, just some of the better ones
Kogla and Yidaro - This fits quite well into the bulky trample and hasty creature theme. It allows a form of creature removal, or an answer to troublesome artifacts and enchantments in a pinch as well. It is a quite versatile inclusion that can swing the tide of a game if used correctly.
Eldrazi Displacer - This card is capable of a lot more than you think at first glance. Its activated ability is where we are interested, which is flexible, because it can be used on both our creatures, and our opponents creatures. Also, since we have Amulet of Vigor this can also act as a pseudo-vigilance for us, while tapping down our opponent's creatures. It is usually best served when activated on one of our creatures with an ETB trigger, but there's other combat trick / protection usages as well. Of note, you can blink your titan, finding to loop for deck thinning, basically guaranteeing a hit with Mosswort Bridge later (start with Crumbling Vestige + Valakut, the Molten Pinnacle if you have Dryad of the Ilysian Grove to sneak in some extra damage). You can also use it similarly to refill your hand, or even find protection like Sejiri Steppe or some other utility land at instant speed. This can enable a lot, while also essentially being a double blocker on its own, so it isn't strictly a combo piece. It is also capable of ramping with multiple Amulet of Vigor or drawing loads of cards with Cultivator Colossus.
Omnath, Locus of Creation / Soul of Windgrace / Thalia and The Gitrog Monster - if you can somehow support the greedy casting cost in here, these are potentially worthy of inclusion. Omnath, Locus of Creation is one of the best landfall creatures ever created, and Soul of Windgrace can be seen as a creature version of a planeswalker, and Thalia and The Gitrog Monster is the stabilizing 4 drop the deck has always wanted. I tried them for a while, but found if I could get to their mana costs, I could get to almost as easily, so I found there's generally better options by the time we have access to the casting cost. Unfortunately, the deck has shifted to more of a colorless and green build since the release of Urza's Saga, but if there was ever a way to reliably support their costs early, these would be great options.
Woodland Bellower - a pretty decent option with the variety of 3 CMC and below creatures that are viable in this deck. We are still missing enough powerful options to make this guy + whatever comparable enough to Primeval Titan to be a real choice (mainly because this doesn't come down swinging without suboptimal cards), but it is definitely something worth considering as more green creatures are printed. Some better targets are things like Endurance, Knight of the Reliquary, Renegade Rallier, Kitchen Finks, Tireless Tracker, Courser of Kruphix, Dryad of the Ilysian Grove, Cemetery Prowler, Elvish Rejuvenator, Springbloom Druid along with all the various enchantment/artifact hate options like Knight of Autumn, Cankerbloom or Tranquil Frillback to name a few.
Eladamri's Call / Time of Need - Even though this isn't quite as good as Summoner's Pact in most situations, they are solid tutors. Eladamri's Call lets you tutor for any creature, which is often the missing piece in the puzzle (solid turn 2 if manabase supports it). Time of Need does basically the same, but only finds legendary creatures. Azusa, Lost but Seeking is the obvious ramp choice, which fits into the deck perfectly, but the Legendary threat can be a trickier card to slot in. Amongst some of the top options are: Elesh Norn, Mother of Machines, The Gitrog Monster, Titania, Protector of Argoth, Dragonlord Dromoka, Atraxa, Grand Unifier, Emrakul, the Promised End, Kenrith, the Returned King, and Golos, Tireless Pilgrim.
Timeless Lotus - this works as some great color-fixing and ramp all at the same time. It coming into play tapped is actually a benefit for us, since it lets it tap multiple times thanks to stacking Amulet of Vigor triggers.
Bitter Reunion - This helps us to filter through our deck faster, is usable through Blood Moon and also gives our cards haste at the very low cost of 1 mana for all creatures. It has a lot going for it although it is a bit slower of a card.
Bring to Light - tutor for any 3 drop or lower creature, or even Scapeshift to tutor into a threat with Tolaria West. It essentially works as Eladamri's Call where you put the card into play, but instead of finding something larger than 3 CMC, we find Scapeshift instead. Without Amulet of Vigor for the Scapeshift line, we will look for an extra land creature like Dryad of the Ilysian Grove, a silver bullet sideboard card, Fae of Wishes to cast as an adventure to find the perfect card, or Valki, God of Lies / Selfless Glyphweaver to play as Tibalt, Cosmic Impostor / Deadly Vanity for value plays. Extra turn cards like Savor the Moment / Time Warp are worth mentioning as potential targets as well.
Turntimber, Serpentine Wood / Port of Karfell / Littjara Mirrorlake - Turntimber, Serpentine Wood is basically a land that doubles as a threat with any bounce later in the game. It is very comparable to Tolaria West in functionality, except it cannot be fetched by Primeval Titan and is a much preferred untapped green source when needed (notable when trying to stretch your manabase a little too much). Port of Karfell is basically recursion of a titan that's uncounterable in most situations and Littjara Mirrorlake lets you clone a copy, great for cheating in another attacker with 2+ amulets.
Gemstone Caverns - this makes being on the draw a little more desired, as you can actually ramp with it. It is fairly niche, and is potentially a hindrance if you can't do something with the colorless when it isn't in your opener.
Lair of the Hydra / Oran-Rief, the Vastwood / Turntimber Grove - Lair of the Hydra is a green land that is untapped when you need it early, so basically another Forest. However, this is a manland, which can let you pump your total power on a titan fetch, or become a threat on its own. Oran-Rief, the Vastwood is great with the prevalence of Unholy Heat in the meta, being able to protect a Primeval Titan by just leaving it untapped, or just pumping creatures, sometimes enough for a Mosswort Bridge activation. Similarly, Turntimber Grove works pretty much the same, but it is better on the titan fetch (being able to pump and tap for ), but is not reusable every turn without other support.
Lotus Field / Flagstones of Trokair - Typically these two lands are a package deal, as they are a nice fetch-combo when you need lots of mana. These are capable of producing 5 mana per Amulet of Vigor and still netting you +2 lands for your Valakut, the Molten Pinnacle triggers when fetched. Lotus Field is also capable of pumping our Elvish Reclaimer on its own (can be used after blocking). Flagstones of Trokair being a non-green source, and Lotus Field decimating your land count on their own are substantial downsides to consider, so you need enough synergy to justify inclusion of these. You'll often see these alongside Elvish Reclaimer due to the great synergy.
Crystal Grotto / Temple of Mystery / Halimar Depths - scry lands. If there's not a whole lot of early plays that need a turn 1 untapped land in your 75, the scry outweighs the slower land in most cases. Crystal Grotto is Zhalfirin Void 2.0, which can let you mana-fix as well, now giving you a relevant untapped version of the temples. Halimar Depths is similar in functionality, although not technically a scry land.
Ghost Quarter / Field of Ruin / Demolition Field - land destruction that can double as another copy of a Forest if facing hate like Blood Moon. In most cases, Boseiju, Who Endures is superior due to the added flexibility, but these are still solid options worth mentioning, especially if you have a way to recur lands from your graveyard. Ghost Quarter is especially good against something that lets you play lands from the graveyard, completely decimating your opponent's access to splash colors.
Blast Zone - This is more of a utility land to deal with the decks that pump out tons of low cost creatures/board presence. This is basically an Engineered Explosives attached to a land. It's biggest drawback is that it can't hit 0 cost permanents, since it enters with 1 counter on it already. You can also use it to blow up some big hard to remove threat with hexproof/shroud if you have enough mana.
Arena / Quicksand / Eiganjo, Seat of the Empire / Otawara, Soaring City - targeted removal with their own respective pros and cons. Notably, Arena + Sejiri Steppe have decent synergy as a Primeval Titan fetch package. However, Arena not producing its own mana is the main thing holding it back, so you should consider it as more of a fetchable creature removal than a land if trying to fit it in. Otawara, Soaring City is definitely the most flexible of the bunch.
CR = Comprehensive Rules
SR = Card Specific Rulings
Urza's Saga
CR 715.4: If the number of lore counters on a Saga permanent is greater than or equal to its final chapter number, and it isnt the source of a chapter ability that has triggered but not yet left the stack, that Sagas controller sacrifices it. This state-based action doesnt use the stack.
CR 715.2d A Sagas final chapter number is the greatest value among chapter abilities it has. If a Saga somehow has no chapter abilities, its final chapter number is 0.
First of all, CR 715.4 allows us to sacrifice/bounce a saga on it's final chapter in response to its trigger, and still resolve the trigger. The combination of CR 715.2d and CR 715.4 is why Sagas are sacrificed when they lose their abilities, which in our case, is usually to Blood Moon.
Amulet of Vigor
SR (2010-03-01): If you control more than one Amulet of Vigor, each Amulets ability triggers when a permanent enters the battlefield tapped and under your control. The first ability that resolves will untap that permanent. If the permanent somehow becomes tapped again before the next ability resolves, the next ability will untap it as well (and so on).
This allows us to tap our lands multiple times when they enter tapped with multiple amulets, by tapping them for mana between resolving triggers.
Valakut, the Molten Pinnacle
SR (2009-10-01): Valakut, the Molten Pinnacles triggered ability has an intervening if clause. That means (1) the ability wont trigger at all unless, at the time a Mountain enters the battlefield under your control, you control five or more Mountains other than that new one, and (2) the ability will do nothing if you control fewer than five Mountains other than that new one by the time it resolves.
SR (2009-10-01): If multiple Mountains enter the battlefield under your control at the same time, Valakuts second ability could trigger that many times. Each ability takes into consideration the other Mountains that entered the battlefield at the same time as the one that caused it to trigger.
Basically, this means you need 6+ lands with the mountain subtype for it to trigger/resolve, and multiple lands entering at the same time (through Primeval Titan) will see each other.
Phyrexian Metamorph
SR (2011-06-01): Any enters-the-battlefield abilities of the copied permanent will trigger when Phyrexian Metamorph enters the battlefield. Any “as [this] enters the battlefield” or “[this] enters the battlefield with” abilities of the chosen permanent will also work.
This allows us to actually get the protection trigger when copying something like The One Ring as long as we cast the card.
Spelunking
SR (2023-11-10): If a land has an ability that says it enters the battlefield tapped, you choose the order in which that ability's effect and Spelunking's effect apply. This means you can choose to have the land enter tapped or untapped. If a land you control is simply put onto the battlefield tapped without a replacement effect being applied, it always enters untapped if you control Spelunking.
This means if you are "playing" a tapped land you get to choice the order of the replacement effects, allowing you to still benefit from multiple amulets. However, if you have an effect putting a land into play tapped, like Arboreal Grazer or Primeval Titan that will not let you ignore Spelunking's replacement effect on something like Forest since there is no replacement effects to choose the order of.
Cultivator Colossus
SR (2021-11-19): You repeat the process as part of Cultivator Colossus's triggered ability's resolution. If the land you put onto the battlefield caused any abilities to trigger, those abilities won't go on the stack until after the ability has finished resolving.
This is important, because you can stack all the triggers however you want, not just in the order they entered. However, there are a few intricacies to be wary of. For example, Valakut, the Molten Pinnacle triggers as a land enters, and also checks your mountain count upon resolution. So if you would go below 6 "mountains" by bouncing lands back to your hand, the order in which you stack and resolve triggers would become very important. Additionally, Vesuva is actually capable of copying lands from the same trigger, as they are entering separately and not at the same time.
Dryad of the Ilysian Grove and Blood Moon
CR 613.1c applies
613.1 The values of an objects characteristics are determined by starting with the actual object. For a card, that means the values of the characteristics printed on that card. For a token or a copy of a spell or card, that means the values of the characteristics defined by the effect that created it. Then all applicable continuous effects are applied in a series of layers in the following order:
613.1a Layer 1: Rules and effects that modify copiable values are applied.
613.1b Layer 2: Control-changing effects are applied.
613.1c Layer 3: Text-changing effects are applied. See rule 612, Text-Changing Effects.
613.1d Layer 4: Type-changing effects are applied. These include effects that change an objects card type, subtype, and/or supertype.
613.1e Layer 5: Color-changing effects are applied.
613.1f Layer 6: Ability-adding effects, keyword counters, ability-removing effects, and effects that say an object cant have an ability are applied.
613.1g Layer 7: Power- and/or toughness-changing effects are applied.
CR 613.7 Within a layer or sublayer, determining which order effects are applied in is usually done using a timestamp system. An effect with an earlier timestamp is applied before an effect with a later timestamp.
CR 305.7 If an effect sets a lands subtype to one or more of the basic land types, the land no longer has its old land type. It loses all abilities generated from its rules text, its old land types, and any copy effects affecting that land, and it gains the appropriate mana ability for each new basic land type. Note that this doesnt remove any abilities that were granted to the land by other effects. Setting a lands subtype doesnt add or remove any card types (such as creature) or supertypes (such as basic, legendary, and snow) the land may have. If a land gains one or more land types in addition to its own, it keeps its land types and rules text, and it gains the new land types and mana abilities.
CR 305.6 The basic land types are Plains, Island, Swamp, Mountain, and Forest. If an object uses the words basic land type, its referring to one of these subtypes. An object with the land card type and a basic land type has the intrinsic ability {T}: Add [mana symbol], even if the text box doesnt actually contain that text or the object has no text box. For Plains, [mana symbol] is {W}; for Islands, {U}; for Swamps, {B}; for Mountains, {R}; and for Forests, {G}. See rule 107.4a. See also rule 605, Mana Abilities.
Basically, all of this means the last to ETB is the last layer applied. If they play a Blood Moon after your Dryad of the Ilysian Grove, you can't tap for any color. However, this also means Dryad of the Ilysian Grove is a psuedo-answer for Blood Moon allowing you to play through it if you played your Dryad of the Ilysian Grove after.
Don't hesitate to suggest something because it's off color; leave trying to fit it in to me (a few cards I've really considered are off color, can't be tutor'd for, and look like they have no place in this deck - like Trade Routes / Hokori, Dust Drinker / Pollen Lullaby).
All suggestions are more than welcome.
Suggestions
Updates Add
Comments View Archive
Attention! Complete Comment Tutorial! This annoying message will go away once you do!
Important! Formatting tips — Comment Tutorial — markdown syntax
Please login to comment
| Top Ranked |
|
| Date added | 10 years |
| Last updated | 2 days |
| Splash colors | UBR |
| Key combos | |
| Legality | This deck is Modern legal. |
| Rarity (main - side) | 6 - 1 Mythic Rares 30 - 7 Rares 14 - 3 Uncommons 4 - 2 Commons |
| Cards | 60 |
| Avg. CMC | 2.50 |
| Tokens | Beast 3/3 G, Beau, Construct 0/0 C, Copy Clone, Meteorite Token, Plant 0/1 G |
| Folders | Deck, Interesting Decks, good, Modern, Modern, pricey modern decks i want, Amazing, MDN Decks, Mono Green, Playtest |
| Votes | |
| Ignored suggestions | |
| Shared with | |
| Views |