Maybeboard


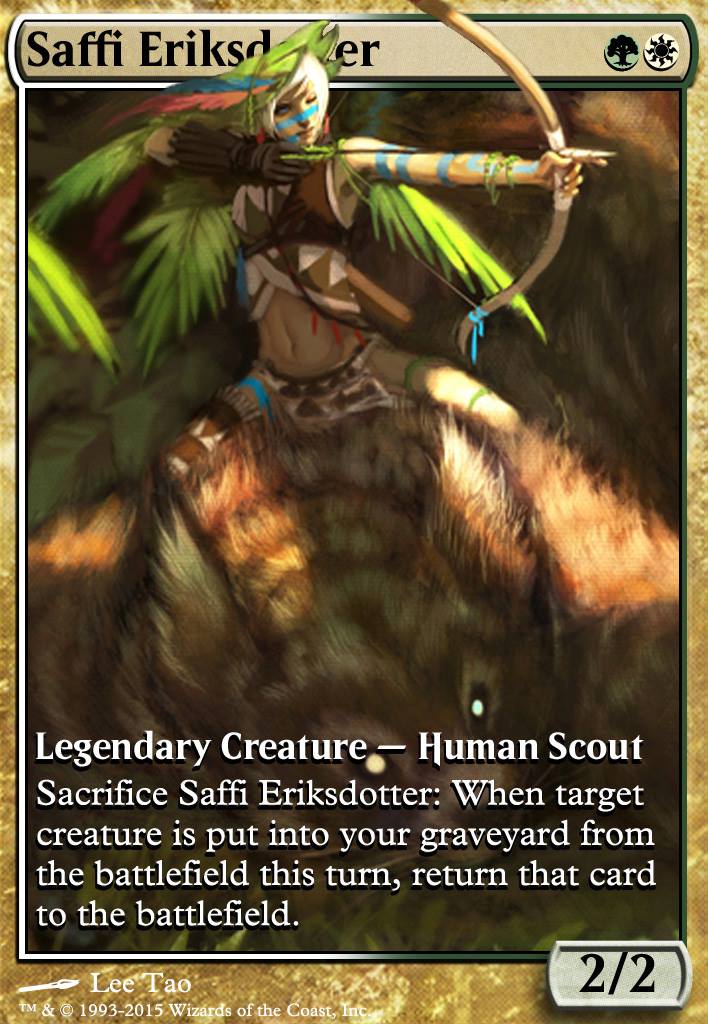
Introduction to Saffi

Saffi Eriksdotter is an interesting commander, in that she lends herself to being a graveyard recursion combo deck, which is a bit of an odditiy in Green / White. That being said, the actual deck that she leads is a fast, adaptive combo deck which is highly synergistic and is able to form many different lines to win.

Pros and Cons

Like all commanders, there are pros and cons to playing them. It is worth noting that Saffi is best suited to a combo build (talked about more in detail later) so if that's your thing then awesome, but if you're not a fan of combo this might not be the deck for you.

Pros of playing Saffi Eriksdotter as you commander:

  • Highly synergistic

  • Very resilient to removal

  • Potential to be explosively quick

Cons of playing Saffi Eriksdotter as your commander:

  • Dependency on graveyard for comboing

  • White / Green can struggle to tutor specific artifacts (our primary win condition)

Different Saffi Builds

Saffi Eriksdotter is the kind of commander who can lend herself to a few different styles of both building and playing in a competitive setting. The builds will loosely sit within 3 different spaces:

  • The first is a build that tries combo out as fast as possible and will lean into very explosive opening hands, low to the ground ramp and card advantage to get the job done. These decks can also usually carry a small assortment of silver bullets to shut down some of the more known faster combo deck (i.e the ones we are trying to race). This will usually be in the form of cards like Angel's Grace or Dryad Militant/Drannith Magistrate which don't heavily eat into the deck's available mana each turn. Other than these, the deck will effectively operate the same way in a vacuum as it will in a game.

  • The second is a stax focused build, which attempts to slow the whole game down, typically using an assortment of Rule of Law type effects in conjuction with other stax and then break parity by using combos that either play under their own stax or can remove their own stax pieces on the deck's combo turn.

  • The third is an adaptive deck, which generally sits between the first two decks. The deck is not all in on speed and runs a solid suite of interaction and stax, however the difference however is that the deck runs a higher focus on generating recurring card advantage. The deck also runs a higher synergy between combo and non-combo cards, as well as typically will run card lines which represent inevitable win conditions.

This specific build falls under the third category and the primer goes into more specifics below.

Recursion Engines

This deck wins by using two cards to form a recusion engine with a sacrifice outlet to provide the win condition. The main recursion engines are:

Primary Win Condition

The main win condition for the deck is Blasting Station. By pairing it with any recursion loop, we are able to deal an arbitrarily large amount of damage to each opponent, as well as any creature which would be prohibiting us from winning. While Blasting Station requires you to tap it to sacrifice a cerature, any of the recursion loops will untap it in the process of running the engine.

Secondary Win Condition

As a backup win condition for the deck, we run Altar of Dementia which can be used in place of Blasting Station to mill each opponent, making them lose on their next card draw. To counteract reshuffle effects, as well as opponents getting a chance to untap their permanents, Loran of the Third Path can be used to force a player to draw and deck out on the spot (this can be done for multiple players by looping Village Bell-Ringer to untap Loran if required).

Backup Win Conditions

In addition to the two primary combos, the deck also runs a few backup lines in case it loses access to the two main altars. Using either Ashnod's Altar or Phyrexian Altar, the deck is able to generate infinite mana and with the introduction of a card draw engine, you are able to draw the entire deck.

Unlike Phyrexian Altar, Ashnod's Altar is only able to generate colourless mana, however using Felidar Guardian + Reveillark + Saffi allows you to filter colourless mana into green/white mana via untapping lands.

From here, you can use a draw card engine like Skullclamp or Mentor of the Meek, or if you have access to coloured mana then even using cards like Elvish Visionary with Saffi (and putting Saffi into the command zone then replaying her), you can draw the deck.

Once the deck has access to infinite mana and its entire library, it can asemble a win condition through the following:

Drain Loops

Once the deck has access to infinite coloured mana, you can play Blind Obedience and then repeatedly cast Saffi from the command zone and then sacrifice her. This will then give you an arbitrarily large number of extort triggers which you can use to drain your opponents with. The benefit of this loop is that you don't actually have to target a player, so effects that give them hexproof can be bypassed.

Finale of Devastation

Once you have infinite mana, you can play all the creatures in the deck and then sink an arbitrarily large amount of mana into casting Finale of Devastation, giving all your creatures haste and allowing you to attack for lethal. If required, you can combine this with looping removal cards to ensure that you can connect with enough creatures.

Removal Loops

If the deck also loses access to Blind Obedience or Finale of Devastation (or if you need to remove creatures to ensure your combat damage will connect), the deck is able to loop its removal pieces to wipe each opponents' board. This can be done through the following loops:

To enable these loops, typically Saffi Eriksdotter + Reveillark + Karmic Guide is the go-to, however with access to coloured mana you can loop Saffi from the command zone to achieve similar effects. Be aware that doing this will technically make Saffi too expensive to cast without a combo loop to generate infinite mana so it's important to make sure you don't lose access to your mana altar as part of this.

Once you have established a board lock, you can use Green Sun's Zenith (failing to find and reshuffling) to ensure you don't deck yourself, while each of your opponents eventually will. To speed this up, you can also use Loran of the Third Path and loop Village Bell-Ringer with GSZ.

In addition to the combo lines for the deck, the deck has multiple ways of assembling them short of just casting all the pieces.

Yisan, the Wanderer Bard

Using Yisan, the Wanderer Bard, the deck is able to assemble a win condition with minimal boardstate. There are multiple combo lines, most of which can assemble a combo on the turn that Yisan hits 3 verse counters. This makes Yisan a very powerful creature in the deck and a good tutor target, especially if the game is starting to drag out.

Oswald Fiddlebender Line

The first of the two lines is very compact and uses Oswald Fiddlebender to in turn fetch an altar (specifically Altar of Dementia). With Saffi Eriksdotter in play, use Yisan to fetch the following:

With Oswald in play (and not suffering from summoning sickness), use Oswald Fiddlebender to sacrifice Esper Sentinel and fetch Altar of Dementia. From here, you can use the Saffi Eriksdotter + Renegade Rallier recursion loop to mill each opponent out.

Yisan Creature Loop Line

Unlike the Oswald Fiddlebender line, this line is able to both generate infinite mana and set up a card draw engine entirely through creatures. This line was designed the Kiki-Jiki line seen in some Blood Pod decks as a basis, however only uses green/white cards to do so.

To start, the combo needs Saffi Eriksdotter and Yisan, the Wanderer Bard in play. The combo leverages Priest of Titania to produce mana, however requires you to generate GGG per Yisan untap/loop. As Priest of Titania counts all elves on the battlefield this usually isn't an issue, however the deck may also need to have a mana producing elf in play. From here, Yisan is used to fetch:

With Reveillark, Saffi Eriksdotter and Village Bell-Ringer, we can form a loop by sacrificing Saffi, targetting Reveillark. From here, we can sac Village Bell-Ringer then Reveillark to Starved Rusalka (by sinking GG from an external source to kickstart the loop) which in turn brings back all three cards, untapping our dorks and net gaining a green mana per loop.

once you have generated infinite mana, you can use Yisan's Verse Six to fetch Woodland Bellower who in turn fetches either Elvish Visionary or Heart Warden, allowing us to draw the entire deck and get a win condition.

Greater Good

In addition to infinite loop altars, the deck runs Greater Good which can be used to draw the entire deck and depending on the line being used, can also get an altar into play. Greater Good also has the benefit of being tutorable via Academy Rector.

Greater Good lines fall into two different categories: assembling a combo from hand, and assembling a combo from graveyard. Depending on which creature line you're using will usually dictate if the line will be from your hand or graveyard. This is calculated by:

(Total power of creature being sacrifice to Greater Good) - (Total number of creatures being sacrificed to Greater Good) * 3

If the result is zero or greater then the combo will typically play from hand, if the result is negative then you will need to combo from graveyard. It is worth noting that you do not need to count Saffi in the creatures sacrifices as she never sacrifices herself to Greater Good.

An explanation of some of the lines are below.

Combo from Hand

One of the most common lines for comboing from hand is Sun Titan + Saffi Eriksdotter. Here, using the formula above we can see that the loop will net 3 cards each cycle. This allows us to draw our deck and then assemble a combo via one of the other altars. We can also use cards like Mana Crypt and Mana Vault which help cast an altar from hand (assuming these haven't already been played).

One of the other common lines which will be discussed is Renegade Rallier + Saffi Eriksdotter. This line is very similar to the above, however it is worth noting that each loop breaks even, meaning that you need at minimum 1 card in hand (which will be turned into your win condition altar). This also means that if you do not have mana available to cast your win condition when the loop starts (and are relying on drawing net positive mana rocks like Mana Crypt) then you will need an additional card in hand for each rock to be played.

Combo from Graveyard

If you are wanting to play from graveyard, you will either need Karmic Guide or Reveillark as part of your creature loop, with the ability to pick up the other half throughout the loop (i.e. you will eventually need access to both of these creatures). It's also worth noting that Reveillark + Saffi Eriksdotter does end up going card positive by itself, however you can use part of the "combo from graveyard" loop to get your win condition into play for free by tailoring the cards you discard.

From our creature loop, we draw-discard until we can assemble Saffi Eriksdotter + Reveillark + Karmic Guide. From here, we continue draw-discarding until we have Sun Titan in our graveyard, as well as one of our win conditions. As all of our win condition outlets cost 3 mana or less, we can loop Saffi + Reveillark to bring back Karmic Guide into Sun Titan into our win condition. From here we can combo off as required.

This line is useful in that there is no additional mana requirement, however presents a risk of decking ourselves depending on the location of Sun Titan. This can be somewhat mitigated as we can also use Renegade Rallier to specifically get back Altar of Dementia, however is still not a guarantee.

Two cards are very common to a lot of Saffi builds, these being Boonweaver Giant who forms a combo with Pattern of Rebirth, and Protean Hulk who can fetch a handful of combo creatures in one hit. This list however runs neither of these. There has been a lot of discussion regarding these two cards and their deliberate exclusion which is covered individually below:

Why no Boonweaver Giant?

For the uninitiated, the basic premise behind behind the boonweaver combo is to either play Boonweaver Giant, fetching Pattern of Rebirth, or by playing Pattern of Rebirth on a disposable creature and sacrificing them to get Boonweaver Giant which in turn gets Pattern back from the graveyard. From here and with the aid of a repeatable sac outlet, the following chain is:

  1. Sacrifice Boonweaver Giant enchanted with Pattern of Rebirth fetching Karmic Guide

  2. Karmic Guide returns Boonweaver Giant which in turn returns Pattern of Rebirth

  3. Sacrifice Boonweaver Giant enchanted with Pattern of Rebirth fetching Felidar Guardian

  4. Felidar Guardian flickers Karmic Guide, repeating step 2

  5. Sacrifice Boonweaver Giant enchanted with Pattern of Rebirth fetching Reveillark

From here you can form the loop of Reveillark + Karmic Guide + Felidar Guardian which can generate infinite mana by flickering a land, and then can cast and use Saffi Eriksdotter + Reveillark + Karmic Guide + Boonweaver Giant + Pattern of Rebirth to tutor any creature in the deck (such as an Elvish Mystic) and assemble a win condition.

While this combo seems good at first, there are a few issues with it. The first and the most glaring issue is that you need an infinite sacrifice outlet to kick off the loop. As this deck is not designed to be crammed full of sacrifice outlets which don't generate value in their own right, there are really only 5 loopable outlets to begin with. Two of these net infinite mana (which is the best selling point for the inclusion of the combo), one of these can draw the deck and the others are outright win conditions.

The second issue is that since Saffi is our commander, it is assumed that we will generally have access to her. At this point, Pattern of Rebirth and Boonweaver Giant could be any creature tutor which would in turn fetch any Saffi loop. And since the deck runs such a high density of draw/tutor effects, assembling Phyrexian Altar/Ashnod's Altar loops without a way of turning it into a win conditon where a Boonweaver loop could is quite reduced.

As a third point, Pattern of Rebirth as a creature tutor outside of combo is not an efficient tutor. The major problem with Pattern is that you need either a creature and a sacrifice outlet or a self sacrificing creature to make it work. Yes, Saffi fits that bill, however having to use Saffi in this context to not fetch a combo creature is a bit of a waste of Saffi. As well, you need some form of boardstate to make it work, unlike cards like Green Sun's Zenith, Finale of Devastation or Eladamri's Call.

Why no Protean Hulk?

Since its unbanning, Protean Hulk has been been the centerpiece of many graveyard combo decks. These typically use Flash (haha, banned now) or Necromancy to deploy Hulk which in turn gets some sort of creature based combo. Again, for the uninitiated, the line is:

  1. Sacrifice Protean Hulk fetching Karmic Guide

  2. Karmic Guide returns Protean Hulk

  3. Sacrifice Protean Hulk fetching Felidar Guardian

  4. Felidar Guardian flickers Karmic Guide, repeating step 2

  5. Sacrifice Protean Hulk fetching Reveillark

From here you can form the loop of Reveillark + Karmic Guide + Felidar Guardian which can generate infinite mana by flickering a land (as above), and then can cast and use Saffi Eriksdotter + Reveillark + Karmic Guide + Protean Hulk to tutor any 6 CMC or less creature in the deck (i.e. all of them) and assemble a win condition.

Unlike Boonweaver Giant however, Protean Hulk is able to assemble a combo from a single use sacrifice outlet with the assistance of Saffi Eriksdotter.

  1. Sacrifice Saffi Eriksdotter, targetting Protean Hulk

  2. Sacrifice Protean Hulk to a one shot sacrifice effect (eg. High Market), fetching Academy Rector and Starved Rusalka and returning Protean Hulk

  3. Sacrifice Academy Rector to Starved Rusalka fetching Greater Good

  4. Sacrifice Protean Hulk to Greater Good, stacking triggers so that you fetch before draw/discarding

From here, depending on the available mana (and the mana rocks still in the deck), use the Protean Hulk tutor to fetch either Sun Titan or Karmic Guide, both of which return Saffi, and then follow the above desired Greater Good line.

With the inclusion of some additional cards, there is also a line which doesn't rely on Greater Good:

  1. Sacrifice Saffi Eriksdotter, targetting Protean Hulk

  2. Sacrifice Protean Hulk to a one shot sacrifice effect (eg. High Market), fetching Stoneforge Mystic who in turn gets Demonmail Hauberk and returning Protean Hulk

  3. With the additional 4 CMC worth of creature tutors and to help generate the mana to cast Demonmail Hauberk, you can fetch Hidden Herbalists, Lotus Cobra and Dryad Arbor

From here, you can use the equip cost of Demonmail Hauberk as your sacrifice outlet and then follow the standard Protean Hulk line listed above.

While the above line does bring additional utility to the deck through a creature tutorable sacrifice outlet, to make the combo work requires a lot of support cards not currently in the deck, or greatly increases the cost of the combo (by the cost of Hauberk).

Because the deck does not have access to black for renamiation effects like Necromancy, either Pattern of Rebirth or Natural Order are required if you are wanting to shortcut having to hardcast Hulk. The shortcomings of Pattern of Rebirth are discussed above and unfortunately Natural Order suffers in a simliar way. While Natural Order has the benefit of not needing either a self-sacrificable creature or sacrifice outlet, it only has the ability to tutor a green creature, making it much more restrictive outside of fetching Protean Hulk.

As mentioned above, while Protean Hulk does have the ability to initiate a combo without a repeatable sacrifice outlet (unlike Boonweaver Giant), it is still a very mana intensive combo. With Pattern of Rebirth it might seem cheaper at first, but unless your sacrifice outlet is Starved Rusalka then you run into the issue of needing both a sacrifice outlet for the enchanted creature and Hulk, or need to enchant a creature like Saffi herself, which in turn causes issues in that you need Saffi in play to target Protean Hulk. While it is still possible to make this work (via fetching Karmic Guide + Starved Rusalka into Reveillark before fetching Greater Good), this then doesn't end up reducing the mana cost significantly. Additionally, if you have fetched Pattern of Rebirth with Academy Rector, you can no longer use it to fetch Greater Good, effectively Catch-22ing yourself.

The biggest selling point for Protean Hulk is the interaction with Natural Order, allowing you to turn a mana dork into Hulk. From here, you can follow either of the above lines, depending on if you have a repeatable sacrifice outlet or not. While this does lend itself to the inclusion of Protean Hulk, it is not enough of a selling point for its inclusion.

It is worth noting that between Protean Hulk and Boonweaver Giant, Hulk is generally the better choice as both lines work next to identically with Pattern of Rebirth (assuming a sacrifice outlet) however Protean Hulk does provide some additional lines which are covered above. Hulk also inteacts with Natural Order and Green Sun's Zenith whereas Boonweaver Giant does not. If however you do look to include some / all of the enchantment package in your particular build (see below), then Boonweaver Giant might provide more value for you due to its interaction with Gift of Immortality.

So why Woodland Bellower?

With the introduction of the Yisan deployment line into the deck, we saw a new high CMC creature added to the fold, Woodland Bellower. Unlike the rest of the high CMC creatures, bellower does not directly form a combo with any other creature in the deck, but was instead added as a creature tutor to specifically fulfil the role at 6 CMC. In this role, there were three main candidates: Woodland Bellower, Soul of the Harvest and Protean Hulk. Protean Hulk in fact costs 7 mana, however the requirement was only that the creature's CMC was 6 or higher, since the combo allows Yisan to untap at will, so you can simply fail to find at any given CMC and then go for the next one.

Ultimately Woodland Bellower was chosen for the following reasons:

  • As Woodland Bellower is able to fetch Renegade Rallier, it still represents a combo creature. With either Blasting Station, Altar of Dementia or Greater Good this represents an immediate win condition. With Phyrexian Altar, once you have generated infinite mana you can sacrifice Saffi targetting Bellower and putting her in the command zone (which you can then recast with your infinite mana). You can then sacrifice Bellower to get either Elvish Visionary or Heart Warden and then go from there. The only altar which presents any issues is Ashnod's Altar. Here you need an additional colourless mana sink, via something like Skullclamp or Mentor of the Meek. While the deck does not run Augur of Autumn, this can be fetched with Woodland Bellower (assuming you have GW open to recast Saffi), which can potentially be used if there is no additional boardstate.

  • Unlike Protean Hulk which has to both be hard cast and sacrificed, Bellower is one mana cheaper and only has to be cast, with no additional steps required. There is also no requirement for additional boardstate (in the form of a sacrifice outlet) meaning that ouside of combo, Woodland Bellower represents more value.

  • While Soul of the Harvest can potentially draw you more cards, it requires that you both play it and then another creature. Bellower on the other hand both gets a tutor (making it easier to assemble a combo line) and doesn't require any external input to do its thing.

Ultimately the decision was made to include Woodland Bellower in this spot as it does more for less. however, any of the three would fill the role in the Yisan line and if you prefer to play one of the other cards intead then it is an easy swap.

The Pieces We Run

When this deck was first designed, it didn't run a stax package at all, however as the list has gotten more streamlined, the addition of a stax package has been invaluable to level the playing field against faster lists.

As this list is not an all out stax list, it tries to balance the stax pieces against its own combo so that you don't end up hamstringing yourself with your own pieces. This means that the majority of stax pieces it runs are asymmetic, are selected so that they have minimal impact on us while having a much heavier toll on our opponenets. The current stax package is as follows:

  • Archon of Emeria and Deafening Silence: Both these cards provide Rule of Law (RoL) effects, helping to slow down how quickly opponents can run out mana ramp or even just storming off (or any combo that involves more than one spell). Archon provides additional asymmetric stax but is also a creature, meaning we can sac it on our turn to combo uninhibited. Deafening Silence is a bit harder for us to remove ourselves, however has then benefit of on restricting non-creature spells and since this is a creature deck, has much less impact on us.

  • Drannith Magistrate: This is one of the dumbest stax pieces recently printed. Shuts down opponents playing their commanders, shuts down graveyard lines (like Underworld Breach), shuts down playing cards from exile, and can even block a Tymna the Weaver. This is an auto-include in most decks, (even those that run no other stax).

  • Thalia, Guardian of Thraben: While Thalia also hits us, she can severly slow down non-creature focused decks. From making mana rocks harder to chain to forcing counterspells to cost more, the impact she has on most opponents' lists greatly outweighs the impact she has on ours. And the first strike is not irrelevant for both attacking and blocking.

  • Aven Mindcensor: Asymmetric tutor shutdown that also punishes opponent's fetchlands. While not as good as Opposition Agent, Mindcensor still does serious work.

  • Boromir, Warden of the Tower: Primarily added to shut down opponents' free spells, Boromir can also be used as wrath protection. The other benefit of Boromir is that we can sac Saffi targetting Boromir first, creating a temporary window while Boromir is in the yard for one opponent to counterspell another opponent, while not permanently losing access to him.

  • Blind Obedience: Another asymmetric piece which slows down the rate at which opponents can play out their hands as well as buying us more openings for combat. Having that combined with a built in win condition (via extort), the card is solid.

These stax pieces combined with the rest of the removal and protection spells in the deck is a good balance for how the deck wants to run.

The Pieces We Don't

While there is a wide array of available stax cards cards in green/white, there are a few key pieces we don't run. These, as well as the reasons for not runnign them are as follows:

  • Phyrexian Censor, Eidolon of Rhetoric, Ethersworn Canonist, Rule of Law, etc.: While the deck runs a few of these effects, it is still first and foremost a combo list and so doesn't want to get too weighed down with RoL effect that it then has to fight through to win.

  • Dryad Militant and Linvala, Keeper of Silence: While these are both great stax cards, they are much more of silver bullet pieces. So these cards are entirely a meta call.

  • Collector Ouphe: This build relies too heavily on artifacts and especially artifact altars to remove our own stax pieces to win.

  • Archon of Valor's Reach, Sanctum Prelate, Chalice of the Void, etc.: Shutting down a particular type of spell or CMC is strong, but we don't want to go all in on these effects. We already run Boromir which shuts down both X=0 as well as free spells like Force of Will and this effect is asymmetric, so we have some tech in this space already.

  • Elesh Norn, Grand Cenobite: While a very strong card, she is very expensive to play and at the same time can turn off our Skullclamp (not to be underestimated). While a great card, in this build she isn't worth the mana investment.

  • Elesh Norn, Mother of Machines: While MoM is awesome in both shutting down ETB effetcs (like Dockside or Thoracle) as well as providing additional Birthing Pod lines, she is quite the mana investment. And while being borderline worth it, without running the extra cards for the pod line, she has been excluded for now.

  • Glowrider, Lodestone Golem, Thorn of Amethyst, Vryn Wingmare, Trinisphere, Aura of Silence: The primaly goal of running Thalia is to slow down counterspells and storm lines. As such, the deck doens't want to go to heavily into this theme as these effects are symmetrical and this deck still relies on non-creature spells quite heavily. Aura of Silence is an asymmetric effect, however the deck currently runs a decent suite of artifact and enchantment removal already in conjunction with things like Thalia which generally provides enough of an impact as is.

  • Root Maze, Thalia, Heretic Cathar, etc.: These cards work well when in conjunction with lots of other stax pieces, however this list is a bit to light on stax to make these work properly.

It's worth mentioning that the balance that this list runs (and doesn't run) is what I have found works for me, so mileage may vary as stax effects are very meta dependent. But the current balance stuck is what I have found works well while having the least impact on the deck, however the list of peices I don't run gives some good mix and match options which can be adapted for your meta.

While there is a high amount of interplay between cards in Saffi, there are some relatively discrete modules that can be added to the deck to introduce themes while still preserving the overall build of the deck. These can either be a few cards which can add a combo line, or can be quite a noticable change. The below are a series of modules that the deck has either run in the past, or have been theory-crafted but not tested (so run at your discretion):

Lands Theme

There are multiple lands packages that can be added to the deck that each add a discrete function, or can all be added to swap the deck to a more lands oriented build. In addition to ther cards listed in each of the below packages, the following cards can be used to add to the overall theme:

Knight of the Reliquary, Crop Rotation, Lotus Cobra, Tireless Provisioner, Tireless Tracker, Nissa, Vastwood Seer  , Nissa, Resurgent Animist and Wasteland.

Titania Lands Loop

This combo uses Titania, Protector of Argoth, Strip Mine, Gaea's Cradle, Nim Deathmantle and Starved Rusalka and operates as follows:

  1. Tap Gaea's Cradle, producing at least 10 mana

  2. Use Strip Mine to destroy Gaea's Cradle

  3. Sacrifice Titania, Protector of Argoth to Starved Rusalka and bring her back with Nim Deathmantle twice, returning both Cradle and Mine to play

  4. Repeat Steps 1 though 3 until you have infinite 5/3 elemental tokens. At this point you will also be able to use Strip Mine to destroy all lands your opponents control.

While this combo is expensive to run at 10 mana per loop, for each loop you generate an additional two 5/3 elemental tokens. This then means that each loop Gaea's Cradle will generate an additional GG.

Lands Based Card Engine

This is not a combo, howevewr uses Dryad Arbor, Crucible of Worlds / Ramunap Excavator and Exploration / Dryad of the Ilysian Grove to provide the deck with a lot of card advantage by providing a repeatable creature for Skullclamp and offsetting the land play with an addtitional land per turn.

Ashaya Sac Outlet

This module Uses Ashaya, Soul of th Wild and Sylvan Safekeeper to provide the deck with an additional creature sacrifice outlet by using Ashaya to turn all non-token creatures into lands so that they can be sacrificed by Safekeeper. Since Safekeeper gives shroud and not hexproof, you need to target the creature being sacrificed with the ability.

Enchantments Theme

As the deck already runs a relatively high enchantment count, ther are a few additonal enchantment cards/modules whcih can eb added to the deck primarily to add draw engines. In addition to the modules, the following cards can be added to support the overall theme:

Sythis, Harvest's Hand, Vessel of Nascency and Sanctum Weaver

Gift of Immortality Card Engine

This module uses Gift of Immortality, Eidolon of Blossoms and a self sacrificing creature like Wall of Mulch to create a draw engine. By Enchanting Wall of Mulch with Gift of Immortality, we can draw a card from each sacrifice of Wall and then draw an additional card each time Gift returns to the battlefield (from Eidolon's constellation effect). We can also use Elvish Archivist in place of Eidolon if we want to run a lower cost CMC alternative (though archivist doesn't draw a card by itself). As we can activate this once per turn on both our's and our opponents' turns, we can generate a lot of card advantage once the loop is set up. Additionally, by enchanting Saffi rather than Wall of Mulch, we have the flexibility to sac other creatures at will up to once per turn.

Earthcraft Loops

This module adds Earthcraft to the deck which allows us to loop Saffi Eriksdotter + Reveillark + any other power 2 or less creature with Starved Rusalka. While each creature sacrificed to Rusalka needs to pay for itself via Earthcraft, because Saffi is self-sacrificing, this loop will net gain one mana per cycle. This then overall generates infinite coloured mana (assuming oyu have a basic Plains and Forest) and with a draw card creature, you are able to draw your entire deck.

Birthing Pod

These combos are designed to work with Birthing Pod to set up a win for the deck.

Icewind Flicker Loop

This combo uses Elesh Norn, Mother of Machines and Icewind Stalwart and assumes that you have Birthing Pod, Saffi Eriksdotter and a 3CMC creature (it doesn't matter which) in play:

  1. Pod the 3CMC creature, getting Felidar Guardian. Felidar flickers pod (untapping it).

  2. Sac Saffi targetting Felidar.

  3. Pod Felidar, getting Elesh Norn, Mother of Machines. Saffi's ability triggers and returns Felidar. Felidar flickers pod (untapping it).

  4. Pod Felidar, getting Karmic Guide. Guide returns Felidar and the 3CMC creature (thanks to Elesh Norn). Felidar flickers pod (untapping it).

  5. Pod the 3CMC creature, getting Icewind Stalwart. Stalwart flickers Guide and Felidar. Guide returns 3CMC creature and Saffi. Felidar flickers pod (untapping it) and flickers Stalwart.

  6. From here, Icewind Stalwart is flickered by Felidar Guardian and in turn flickers Felidar on its ETB. As felidar can flicker 2 things (thanks to Elesh Norn), you can flicker a land to net infinite mana. To stop this loop, Felidar flickers two non-Icewind Stalwart permanents.

  7. Pod Saffi (putting her in the command zone), getting Ranger-Captain of Eos which in turn fetches Starved Rusalka. You can also fetch Eternal Witness or Renegade Rallier if Rusalka is in your graveyard.

  8. Recast Saffi from the command zone.

  9. Sac Saffi targetting Karmic Guide. Sac Felidar then sac Guide to Rusalka. Saffi's ability triggers and returns Guide, Guide returns Saffi and Felidar (thanks to Elesh Norn). Felidar flickers pod (untapping it).

From this point you can run the loop listed in step 9 to untap pod as much as required while also having infinite mana. Using Saffi's ability (and putting her in the command zone then recasting her), you also have a creature at 1CMC through to 5CMC that you can pod (effectively giving you access to your entire deck).

Comments View Archive

Attention! Complete Comment Tutorial! This annoying message will go away once you do!

Hi! Please consider becoming a supporter of TappedOut for $3/mo. Thanks!


Important! Formatting tipsComment Tutorialmarkdown syntax

Please login to comment

Revision 172 See all

(7 months ago)

-1 March of Otherworldly Light maybe
-1 Ranger-Captain of Eos maybe
Top Ranked
Date added 10 years
Last updated 4 months
Legality

This deck is Commander / EDH legal.

Rarity (main - side)

13 - 0 Mythic Rares

55 - 0 Rares

15 - 0 Uncommons

10 - 0 Commons

Cards 100
Avg. CMC 2.34
Tokens Day, Illusion */* U, Night, The Ring, The Ring Tempts You
Folders Commander/EDH, Awesome EDH, Decks I Like, edh i like, EDH Options, Watch, Nice Decks, EDH, Personal Decks, Selvala ideas
Votes
Ignored suggestions
Shared with
Views