
Land (32)
- 1x Ancient Tomb
- 1x Arid Mesa
- 1x Badlands
- 1x Blood Crypt
- 1x Bloodstained Mire
- 1x Cascade Bluffs
- 1x Cephalid Coliseum
- 1x City of Brass
- 1x Command Tower
- 1x Exotic Orchard
- 1x Flooded Strand
- 1x Forbidden Orchard
- 1x Graven Cairns
- 1x Island
- 1x Luxury Suite
- 1x Mana Confluence
- 1x Marsh Flats
- 1x Misty Rainforest
- 1x Morphic Pool
- 1x Polluted Delta
- 1x Scalding Tarn
- 1x Shivan Reef
- 1x Steam Vents
- 1x Sunken Ruins
- 1x Swamp
- 1x Tarnished Citadel
- 1x Underground River
- 1x Underground Sea
- 1x Verdant Catacombs
- 1x Volcanic Island
- 1x Watery Grave
- 1x Wooded Foothills
Enchantment (5)
Planeswalker (1)
Instant (25)
- 1x Brainstorm
- 1x Cabal Ritual
- 1x Chain of Vapor
- 1x Counterspell
- 1x Cyclonic Rift
- 1x Dark Ritual
- 1x Demonic Consultation
- 1x Dispel
- 1x Entomb
- 1x Fire Covenant
- 1x Force of Will
- 1x Frantic Search
- 1x Intuition
- 1x Izzet Charm
- 1x Lim-Dul's Vault
- 1x Mana Drain
- 1x Mental Misstep
- 1x Mystical Tutor
- 1x Narset's Reversal
- 1x Pact of Negation
- 1x Pyroblast
- 1x Red Elemental Blast
- 1x Swan Song
- 1x Tainted Pact
- 1x Vampiric Tutor
Artifact (11)
Commander (1)

Sorcery (16)
- 1x Buried Alive
- 1x Chart a Course
- 1x Dark Petition
- 1x Demonic Tutor
- 1x Exhume
- 1x Faithless Looting
- 1x Gitaxian Probe
- 1x Imperial Seal
- 1x Ponder
- 1x Preordain
- 1x Reanimate
- 1x Timetwister
- 1x Toxic Deluge
- 1x Wheel of Fortune
- 1x Windfall
- 1x Yawgmoth's Will
Creature (9)
Sideboard
Maybeboard
Planeswalker (1)
Creature (1)
The Grixis Twin deck archetype combines a reanimator style of play with the Kiki-Jiki, Mirror Breaker and Splinter Twin combos that were popular in Modern.
The development of this deck has been an iterative process. It found its origin with Brewsday, being helmed by Sedris, the Traitor King. Through testing, it was found that Jeleva, Nephalia's Scourge was a much better match for the strategy, and now Kess, Dissident Mage helms most Grixis Twin decks.
Since that Brewsday, many players have picked up this deck, finding enjoyment in its resilience and simplicity.
Grixis Twin is a great deck for people who are just starting out in competitive play. The combos are simple to execute, and the deck has a lot of tools that makes it able to play decently against most decks you'll run into in a competitive environment.
With it having these qualities, there's been some demand for a primer. With this in mind, we're hoping that the things we've learned while piloting this list will prove useful for those wanting to pick it up.
Why Play This Deck?
As stated above, this deck has many strengths:
-
It's simple to pilot and easy to learn.
-
This simplicity provides a good test bed for a player to improve their skills.
-
The deck is resilient, and has a good selection of tools that make it pretty good against most archetypes.
-
This deck is also great for those who enjoy seeing a lot of cards and reanimating things.
Grixis Twin has a comparatively simple and straightforward combo package, involving either making infinite hasty tokens, or drawing a card with no cards in your deck.
This is our primary route to victory.
Combine A plus B to make infinite hasty tokens.
It's important to note Splinter Twin gives the creature it's enchanting the ability, meaning this will not work if Deceiver or Pestermite are summoning sick. Winning with this card almost always involves casting Deceiver or Pestermite on the opponent previous to us in turn order's end step, then casting Twin on our main phase.
Unlike Twin, Kiki can be used with Deceiver/Pestermite immediately. The triple red in his casting cost is often difficult for us given how much the deck leans towards black and blue over red in our casting costs, so it is often better to cheat him in to play with a reanimation effect than to hardcast him.
There are many bottom-halves that combo with Kiki, but these are the most mana efficient, and both have Flash, enabling us to use them endstep. Short of effects that change power and toughness, or effects that specify flying creatures, these two are functionally identical for our purposes.
While I'm currently not running this card due to slot efficiency (a third bottom-half just wasn't necessary), it's the next best Kiki bottom-half after the previous two. Due to its haste it also has the advantage of comboing with Twin immediately, however, having three red, six colorless on our combo turn is often problematic: like Kiki, this is more often reanimated than hard cast, when it's in the deck.
Buried Alive is our most compact route to assembling the Kiki combo: just this card and a reanimation spell can grant us victory for as little as two colorless; two black (with Reanimate). Our normal pile is as follows:
-
Card:Deceiver Exarch or Pestermite
We reanimate Delver, bringing back Kiki, Kiki copies Delver, Delver brings back Exarch, Exarch untaps Kiki, and Kiki copies Exarch for infinite tokens with haste.
This combo line requires us to have at minimum nine or more life, due to Delver's down side, more if painlands or Reanimate is used to bring back Delver. We are not shut off from winning if we have less than nine life, however we will need to assemble our combo another way.
Laboratory Maniac is a recent addition to this deck. It's a single-card win that nicely slots in with two tutors we run - Tainted Pact and Demonic Consultation - and any draw spell. Cast Laboratory Maniac, exile your deck, and draw a card.
The primary reason for running this is to have an alternative win that isn't shut off by popular hate pieces in the way our primary combo is, but occasionally hands will present themselves where this is the best combo line to pursue, rather than an emergency spare.
Intuition is a uniquely powerful card under Kess. Its flexibility can make using it a little difficult, so we felt it would be worthwhile to discuss some of the potential piles you can make with it.
Win Piles
- Laboratory Maniac, Demonic Consultation, and Reanimate
- Demonic Tutor, Demonic Consultation, and Yawgmoth's Will
- Buried Alive, Reanimate, and Yawgmoth's Will
- Entomb, Reanimate, and Yawgmoth's Will
These are the easiest piles to use if you're going to attempt a win. These piles require the the use of Kess's ability to win so keep that in mind, and lines involving Consultation require a draw spell in hand.
Defensive piles
If lines of victory are available to you, sometimes using Intuition to grab three counter spells isn't a terrible move.
Tutor Piles
These piles become a lot worse when Kess is on the field because we gain access to the win piles, but this is closer to how Intuition is used in other decks, so these piles still possess utility.
The deck at its core is very simple. Your goal should be to assemble one of your combos and win. However, because the combos are so compact, there's a lot of room in the deck for utility cards. This lends the deck a flexible play style that is really geared towards taking advantage of your pod's composition.
With this in mind, it seems that the most worthwhile use of this section would be to talk about evaluating the needs of a pod in the context of this deck.
Stax & Control
We're generally faster than these decks and take on more of a value oriented strategy when confronted by them. If you have a hand that allows for a fast and explosive victory, feel free to attempt it, but don't feel discouraged if you can't.
The deck plays a strong value game, and so transitioning to a more midrange approach to things is fine. If you're playing under these criteria, play defensively, and try to sneak in your combos as you eek out more advantage using your counters and fatties.
If it's a slow pod that lacks blue instant speed interaction gunning for the combo is usually the most efficient line. Aggressive openers setting up for a turn four win fit well here. Your best tutor targets in cases like this are usually Intuition or Buried Alive, as they'll allow you to assemble your combos the easiest.
If your pods are very counterspell heavy, and you're potentially the fastest deck at the table, it's very likely that you could be focused down by interaction. With our commander and plentiful reanimation, failed combo turns can be followed up with additional combo attempts, and because of our commander, we are able to not take as large as a tempo loss from having our things countered as decks that don't have ready use of their graveyard. (This however, does not mean that the tempo loss isn't present.)
There are a couple of ways to navigate permission-heavy pods. The first is to overwhelm their permission with must-answer threats. An early entomb with a reanimated Jin is a must-answer for decks that are countermagic-based. Aggressive wheels are also very problematic for decks that don't have the ability to combo as easily as us, and with our wheels giving us double usage we can effectively create tempo swings in our favor here. If they're forced to interact with these tempo cards, we have less to worry about when we actually want to win.
There are some issues with this strategy, however, as it can lead you to overextend yourself. Learning how to use tempo plays will come from playing the deck and understand the tools available to your opponents that would allow them to be punished.
Another strategy is to play into the slower pod by accumulating tempo incrementally. Kess helps this strategy as she'll allow you to get double value off of cantrips, interaction, and tutors. The goal should still to be to combo when you can, but under a permission-heavy pod, accumulated tempo can help secure the victory.
Fast Combo Decks
If the decks have a faster average speed than you, the goal should be playing a more interactive strategy while setting up for a combo win or a big tempo swing. Having interaction for potential turn 2-3s and being ready to go off turn 4-5 is most likely where you want to be here. Aggressive wheels are dangerous, and should be used with caution. It's okay to not be the first deck to go off if you're prepared to play the game of chicken.
Midrange
This is dependent on the piloting tendencies of your opponents and how the mulligans turn out, but generally, I would recommend racing here, and trying to go off with protection.
You will generally not struggle against slow, value-based strategies that fall into this category. While these decks perform really well against stax and control, they generally struggle against fast combo, especially if the pod is full of them. These decks will generally pack some hate, but we're not too terrible in the mid-game, either. So long as you play smart, and look to generate some tempo swings in the build-up phase, you should be able to achieve the combo faster than these decks.
Notable Matchup Information
Hulk Decks: We play fine into Protean Hulk decks, but being ready for early Flashes is important. Another thing to note about playing with Hulk decks regularly is that people will start slotting more hate cards that can catch your deck as well.
Heavy Creature Metas: If your meta has a heavy creature-based combo or stax presence, Grixis colors allow for a greater number of wipes. Adding more wipes to the deck can create large tempo swings in your favor while setting your opponents back a good bit.
Overall, in your mulligans, you need to figure out what role you're going to play at the table. Sometimes you're the fastest one at the table, and that frequently favors explosive opening hands where you can race your opponents to an early combo. More often, you're in a somewhat more reactive role, and want to have a mixture of answers and tutors to begin navigating yourself towards either a win mid-game, or an early tempo swing.
Not all opening hands need a avenue to win to be good. Early tempo swings like a reanimated Jin-Gitaxias, Core Augur or plays like Notion Thief or Consecrated Sphinx into a wheel can often "win you the game" despite not literally winning you the game that turn.
While Buried Alive and reanimation is our primary combo line, our fairly diverse combo suite means not all hands need to lead there. A hand with Pestermite and Splinter Twin or Laboratory Maniac and Tainted Pact will be unlikely to be lead towards a Buried line. Similarly, sacrificing combo pieces is sometimes worth it due to the reasonable amount of in-deck redundancy e.g. pitching Kiki-Jiki, Mirror Breaker to a Chrome Mox to cast a turn one Wheel of Fortune.
With those details in mind, here are seven example hands and my thoughts on them:
[Note: these example mulligans come from Sugandaraja's/Nakhla's version of the list, but the general principles discussed here are broadly applicable across similar builds with some variations.]
Mana Confluence ; Kiki-Jiki, Mirror Breaker ; Mana Crypt ; Mana Drain ; Mystical Tutor ; Vampiric Tutor ; Victimize
A very strong hand for this deck, we have acceleration, tutors, and answers all in one hand. A strong keep. There are some potential weak points worth noting, however: Kiki is in our hand, so we may want to tutor a wheel, and one land is potentially vulnerable to turn one or two artifact hate affecting our Crypt. However, it very hard to picture a scenario where we would mulligan this.
Forbidden Orchard ; Gemstone Caverns ; Underground River ; Wooded Foothills ; Exhume ; Force of Will ; Mana Vault
A somewhat risky keep, this hand is gambling on our top deck. Topdecking into the right tutor could give us a win as early as turn two, but if we keep drawing lands we could be functionally out the game. I would keep if I wasn't going first, as six mana turn two is nothing to sniff at (thanks to Vault and Gemstone Caverns), but otherwise strongly consider a mull given the lack of tutors and draw.
Command Tower ; Brainstorm ; Cabal Ritual ; Careful Study ; Consecrated Sphinx ; Mox Diamond ; Reanimate
An interesting hand with a very obvious line of play: pitch Consecrated Sphinx with Careful Study, and Reanimate it. Hopefully Study also brings us to an extra land to pitch to Diamond, too, enabling us to do this turn one. A solid hand with some vulnerabilities due to the one land and relying on the graveyard, but a hand that could allow a turn one Sphinx and definitely allows a turn two Sphinx is an easy keep.
Arid Mesa ; Flooded Strand ; Wooded Foothills ; Mana Drain ; Mental Misstep ; Mox Diamond ; Yawgmoth's Will
A control-heavy hand with few payoffs. Against a fast pod and the choice of going down to six I'd keep this, but otherwise, I'd likely mulligan.
Gemstone Caverns ; Consecrated Sphinx ; Faithless Looting ; Frantic Search ; Intuition ; Jin-Gitaxias, Core Augur ; Talisman of Indulgence
Another risky keep, only keep this if you're going second can use Gemstone Caverns on turn zero. If you are, you can pitch Jin and Sphinx turn one and hopefully dig into some additional lands. If you are facing a bunch of slow and controlling decks, you might want to mulligan this either way.
Swamp ; By Force ; Chrome Mox ; Dark Petition ; Faithless Looting ; Mystic Remora ; Windfall
There are some divergent paths with this hand: if you topdeck Dark Ritual or similar acceleration you can pitch Remora to Chrome Mox and turn one Windfall; if you topdeck a blue land you can cast Remora and turn two Windfal (depending on what you draw from Remora, of course); or if neither, pitch Windfall to Chrome Mox to cast Mystic Remora. A keep.
Blood Crypt ; Cephalid Coliseum ; Dark Petition ; Delay ; Dispel ; Faithless Looting ; Pact of Negation
Most likely a mulligan, though it could be a risky keep into a pod you want early answers in. Pact is dead until quite a few turns in here, Faithless might help us dig into more acceleration, but overall the lack of acceleration or tutors is worrying.
Let's break down the card itself.
Mana Cost: 1UBR
Kess's mana cost means we don't tend to be casting her earlier than turns three or four, and often later, depending on the hand.
Grixis color identity enables us to have the good answers, cantrips, and draw of blue; black gives us unconditional tutors, reanimation, Buried Alive, and Entomb; red gives us the Kiki-Jiki, Mirror Breaker combos and few extras like Gamble and Wheel of Fortune. We do lose out on not having some of the good creature tutors, enchantment removal, and mana dorks from green, but white offers relatively little for this strategy except Karmic Guide. Overall, Grixis color identity gives us a two of the strongest colors in the format, with relatively few weaknesses.
Legendary Creature — Human Wizard
For the purposes of our deck, Kess's creature typing does not matter.
Flying
Frequently relevant for Kess as a blocker.
During each of your turns, you may cast an instant or sorcery card from your graveyard. If a card cast this way would be put into your graveyard this turn, exile it instead.
This is the reason we run Kess: a recursion engine for all our Instants and Sorceries.
Power/Toughness: 3/4
Kess is twice as tough and one and a half times as powerful as a Forest Bear, which is quite relevant for her as a blocker. The high toughness means we can Toxic Deluge for up to -3/-3 and have her stay in play.
Kess's Role In The Deck
This list is, compared to many competitive EDH decks, much less general-focused. Indeed, the list predates Kess being printed at all, having previously been headed by Jeleva, Nephalia's Scourge, and before that, Sedris, the Traitor King. What Kess is in this deck is a consistent value engine, one that plays well with our high Instant and Sorcery count; one that fits our required colors.
Kess does enable some lines specific to her, for example casting Entomb then casting it again to assemble our combo; enabling earlier cantrips to grab to-the-top-of-the-deck tutor targets; doubling up cards like Exhume, and Reanimate, to allow us to assemble Kiki combos without Phyrexian Delver; and many more. Intuition has particularly good synergy, enabling to always have access to whatever Instant or Sorcery was tutored whether it goes to hand or is pitched to the graveyard.
That being said, keep in mind that a hand that races to cast an early Kess and has no tutors, draw, or answers tends to be a weak one, and not worth keeping. Kess shines at mid- to late-game value, and is not in and of herself a card that will take us to a win, unlike, say, Zur the Enchanter or Yisan, the Wanderer Bard can for their respective decks. We are a Grixis reanimator deck that uses Kess for value, not a Kess deck that powers her out early to try to win the game with her abilities.
The land base of this deck is reasonably flexible, but two things are worth keeping in mind no matter which options you pick:
-
You can only have one of each land if you wish to run Tainted Pact.
-
Do not base your manabase off of Grixis storm lists: we do not run the Gush / High Tide package, and we require a lot more black and noticeably more red than they do.
With that being said, here are your primary options.
Card:Arid Mesa ; Bloodstained Mire ; Flooded Strand ; Marsh Flats ; Misty Rainforest ; Polluted Delta ; Scalding Tarn ; Verdant Catacombs ; Wooded Foothills
The core part of our mana base, these let us get any of our colors into play and are essential for good color fixing. Good synergy with Sensei's Divining Top and Brainstorm, and contribute to Threshold for Cabal Ritual.
Card:City of Brass ; Command Tower ; Forbidden Orchard (Flex Slot); Mana Confluence ; Tarnished Citadel (Flex Slot)
Our five-color lands. We run some of the weaker ones such as Tarnished and Forbidden to maximize our access to all three colors, as we are a color-intensive strategy overall.
Card:Island ; Snow-Covered Island (Flex Slot) ; Snow-Covered Swamp (Flex Slot) ; Swamp
Our basic lands. The snow-covereds are in aid of Tainted Pact. We lean so heavily towards Dimir that basic Mountains are usually not worth running.
Card:Badlands ; Underground Sea ; Volcanic Island
The first - and best - dual lands. Cut these only if on a budget.
Card:Blood Crypt ; Steam Vents ; Watery Grave
The next best dual lands, the shocks are essential in fixing your mana and making full use of your fetches.
Card:Shivan Reef ; Sulfurous Springs ; Underground River
Painlands, arguably the best dual lands without basic land typing. Come in untapped and can be used right away.
Cascade Bluffs (flex slot) ; Graven Cairns (flex slot) ; Sunken Ruins (flex slot)
Better later in the game than earlier, the red ones have a nice option of filtering other colors into red mana for casting Splinter Twin and Kiki-Jiki, Mirror Breaker without sacrificing access to blue or black.
Blackcleave Cliffs (flex slot) ; Darkslick Shores (flex slot) ; Spirebluff Canal (flex slot)
Better earlier in the game than later, these excel in faster metas.
The best two-mana land, it enables some of our strongest early plays. Ancient Tomb into one of our signets can allow for some strong early plays, including a turn two Kess.
Card:Cephalid Coliseum
A blue painland early game, in the mid- to late-game it's a powerful loot effect that only costs us a land-drop.
Gemstone Caverns (Flex Slot)
Turn zero ramp in most opening hands, this can occasionally show up late-game as a colorless land, so use your discretion as to whether you wish to run it.
Urborg, Tomb of Yawgmoth (Flex Slot)
Helps considerably with fixing, at the cost of only tapping for black. Be aware it can also help your opponents.
One of the most mana efficient ways to reanimate creatures, with the downside of being able to be destroyed by enchantment removal, and not being an instant or sorcery for Kess.
- Dance of the Dead (Flex Slot)
A marginally worse version of Animate Dead. Entering the battlefield tapped is usually a minimal downside given Deceiver Exarch and Pestermite untap, and Jin-Gitaxias, Core Augur and Consecrated Sphinx are more valuable for their abilities than their bodies.
A perfect turn one play, but still strong mid- to late-game as either a tax, tempo, and draw.
- Necromancy (Flex Slot)
Reanimation with the bonus of being able to be cast at instant speed. Can be useful for reanimating Deceiver Exarch or Pestermite on the last end step before your turn.
One of the most powerful "draw" spells in the format, Necropotence tends to be a card we use less greedily than our storm counterparts, as we don't want to be exiling huge portions of our deck on our end-step, nor can we guarantee a full hand from Necropotence will win us the game. Be wary of loot effects and wheels, also. None the the less, the incredible card advantage this card provides earns it a spot.
Archetype namesake, it's important to note it gives the creature the ability, meaning you essentially never want to cast Pestermite or Deceiver Exarch and Twin on the same turn. End step Pestermite/Exarch into this next main phase is very common play for the deck.
The best cantrip in the format, it also has the nice bonus of putting targets for Buried Alive and Entomb back into our deck.
- Cabal Ritual (Flex Slot)
A considerable amount of looting and wheels in our deck means Threshold is frequently on mid- to late-game, and being able to power out a turn two Necropotence, or later on, Buried Alive, and some kind of reanimation. None the less, given the deck's overall midrange-y pace, I consider this a flex slot.
Multipurpose bounce that occasionally saves our own permanents, and occasionally can be used to ramp our mana-positive rocks as a ritual on our combo turn.
Does what it says on the box. Double-blue is occasionally a down-side, but usually we'll have that available from turn two onward.
Late-game mass bounce; early- to mid-game targeted bounce. Somewhat of a flex slot, but I've found it worth having more than one bounce effect given Grixis can't answer enchantments well.
The best ritual in the format, it powers out Necromancy, Buried Alive, and whatever else we want.
One of the strongest counters in competitive, three turns is almost an eternity is fast pods.
One of the riskiest tutors in the format, this serves a double purpose in our deck of finding the missing half of our Twin/Kiki combos for the mana efficient cost of one black, and exiling our deck to combo with Laboratory Maniac and any draw.
- Dispel (Flex Slot)
Protects our combo turn, hits Ad Nauseam and other relevant instants.
Entomb into reanimation is a powerful early play, typically for Jin-Gitaxias, Core Augur, and mid- to late-game that same route can be used to fetch one half of the Kiki combo.
With your commander out, Entomb can become a one-mana tutor for Buried Alive or card:Intution. This is usually the route you want to go with the card in the mid- to late-game.
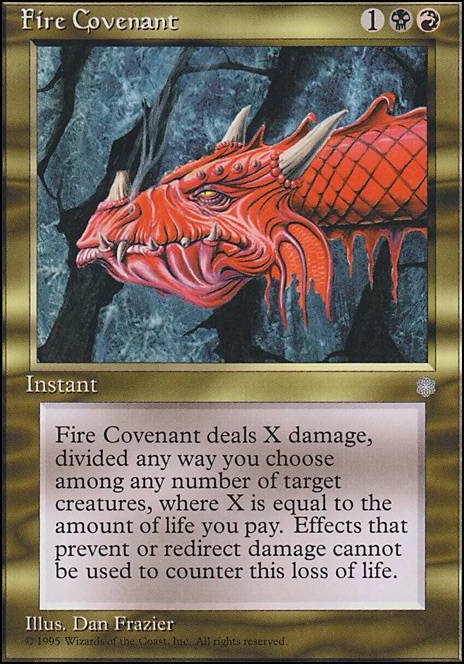
- Fire Covenant (Flex Slot)
An instant-speed, asymmetrical wrath, this card is powerful but eats considerably into our life total if the number of targets is large. Deluge is often the safer of the two, but a second wrath is welcome.
The best free counter in the format.
Free loot is exactly what our reanimation strategy enjoys. Note this can also be used to filter our mana colors, useful when we sometimes have awkward casting cost requirements like three red.
A skill-intensive tutor that lets us grab three cards from our deck. With a loot effect or a wheel, this is a second Buried Alive. With Kess, we have access to the Instants and Sorceries no matter what's chosen.
See the Combo section for more details.
- Izzet Charm (Flex Slot)
All three modes are relevant, whether it's looting, countering a spell, or removing a hatebear.
Effectively a tutor most of the time, this let's us find anything we want in our deck - eventually. Nice to reuse during our upkeep with Kess.
Part counter, part ritual, almost always welcome. Do not be afraid to counter something trivial if the mana from it will power out your combo turn.
A narrow, free counter that hits many of the most important spells in the format.
Grabs answers, draw, and everything we need to combo.
- Negate (Flex Slot)
Counters all the relevant non-creatures.
Protects our combo turn for free; stops others, late-game, for free as well. Risky, but powerful.
- Pyroblast (Flex Slot)
Hits blue spells and permanents, which make up a large portion of the meta. Marginally worse than Red Elemental Blast, so if you run just one, run Red Elemental Blast. A flex slot if your meta is unusual and blue is rare.
- Red Elemental Blast (Flex Slot)
Hits blue spells and permanents, which make up a large portion of the meta. The better of these two effects. A flex slot if your meta is unusual and blue is rare.
The best one-mana counterspell. Hits three very relevant card types.
The less risky of the two exile tutors, this serves a double purpose in our deck of finding the missing half of our Twin/Kiki combos, and exiling our deck to combo with Laboratory Maniac and any draw. Occasionally used to dig for other relevant cards, but watch what you exile when you use it for that purpose.
Special Note: this card requires no duplicate cards in your deck, so your basics need to be a maximum of two of each basic land type (one snow-covered and one note) to successfully run it.
Arguably, the best tutor in the game. Finds any card.
"Free" ramp for the cost of a card - well worth it.
Adds mana in our two most relevant colors; filters colorless into colored mana.
In almost all pods taps for blue and black; in some, red, as well.
Essentially a colorless Cabal Ritual that we can use again later.
Adds blue and red; filters colorless into colored mana.
Accelerates us by two turns. The most powerful mana rock in the format.
Essentially a colorless Dark Ritual that we can use again later.
"Free" ramp for the cost of a land from our hand - well worth it.
Accelerates us by a turn or two. The second most powerful mana rock in the format.
Adds blue and black, our two most relevant colors.
- Talisman of Indulgence (Flex Slot)
Adds red and black.
Our simplest - and most mana-efficient - win is this card, and any reanimation, to open a pile consisting of Kiki-Jiki, Mirror Breaker , Phyrexian Delver , and Pestermite or Deceiver Exarch. If one of those pieces is already in our graveyard, we can throw in an additional relevant reanimation target such as Jin-Gitaxias, Core Augur or even Notion Thief. If the combo is offline or unavailable, this can also function as a second Entomb.
- By Force (Flex Slot)
A more flexible alternative to Vandalblast, this hits more earlier in the game and can be reused effectively with Kess.
- Careful Study (Flex Slot)
This deck loves looting effects, and this is in most games our second Faithless Looting in blue. A flex slot - similar cards worth testing are Dack Fayden and Chart a Course.
- Chart a Course (Flex Slot)
Inexpensive draw and loot - or occasionally, pure draw. Enables us to pitch a reanimation target.
Most of the game effectively a second Demonic Tutor - Spell Mastery is quite easy for us. Making three black is convenient for Necromancy and Buried Alive.
Any card we want, straight to hand. One of the best tutors.
Reanimation that Kess can helpfully let us reuse. Keep a keen eye on opponents' graveyards with this one - a hidden Scavenging Ooze or similar in an opponent's graveyard can easily ruin our day.
Looting for one mana, with flashback. A handy card for pitching reanimation targets and filtering our draws.
Get anything you want for the cost of losing a card at random. Somewhat risky as a tutor, but still very strong.
- Gitaxian Probe (Flex Slot)
Free draw and free information, both good things for this deck.
A worse Vampiric Tutor, but it's still any card you want to the top of your deck.
A strong cantrip for filtering our draws and shuffling stuff we don't want in-hand away.
Our weakest cantrip, this lets effectively us dig three deep into our deck, and scry what we don't like in our top two away.
The single best reanimation spell in the deck. Return any creature for one black. Somewhat punishing on the life total, but worth it enabling lines like Entomb into Reanimate for Jin-Gitaxias, Core Augur turns one or two.
The most powerful wheel effect in the format, this is strongest early-game, though it can also come up as late-game refuel, or even recursion. Strong synergies with Notion Thief and Consecrated Sphinx.
The best wrath in the format. With Kess being a beefy 3/4 we can often use this for repeated sweeps of -3/-3 against dork-heavy decks and hatebear decks that go wide.
Reanimation that Kess can flash back, though often, Kess herself is what we sacrifice here. Choosing two targets is nice for the Kiki combo, though getting back, say, Jin-Gitaxias, Core Augur and Notion Thief is almost certainly also worthwhile.
Fast refuel that often conveniently pitches our reanimation targets. At its strongest early game, though it can be used any time. Strong synergies with Notion Thief and Consecrated Sphinx.
Fast refuel that often conveniently pitches our reanimation targets. At its strongest early game, though it can be used any time. Strong synergies with Notion Thief and Consecrated Sphinx.
A powerful yet difficult to use card, as it shuts off Entomb, Buried Alive, and loot into reanimation lines. Gets stronger as the game goes long.
- Dark Confidant (Flex Slot)
An inexpensive "draw" engine we can cast early- to mid-game for card advantage.
- Consecrated Sphinx (Flex Slot)
Our second value reanimation target after Jin-Gitaxias, Core Augur, at six mana this is also not unreasonable to hard cast mid- to late-game. Note the nice synergy this card has with wheels, drawing much of your deck in a four-player pod. Something of a flex slot.
One of our combo pieces. The high toughness is occasionally relevant, as is being able to flash in a blocker.
Our single best reanimation target, he refuels our hand, then decimates our opponents' hands. If this stays in play for a turn cycle, you are very likely to have either won or at minimum swung the tempo of the game irreversibly in your favor.
Our primary combo piece, only rarely does he serve other purposes. Typically reanimated rather than hard cast.
Our alternate win route, this nicely dodges hate on graveyards, activated abilities, and triggered abilities. The win is with Tainted Pact or Demonic Consultation and any draw, though occasionally there are other routes like two wheel effects and Notion Thief or Consecrated Sphinx.
A flash-in hatebear that conveniently combos with any wheel to draw a huge portion of our deck, while stripping opponents' hands. Also turns off a number of common win routes, like draw-x spells and Thrasios, Triton Hero.
One of our combo pieces. Flying is occasionally relevant, as is being able to flash in a blocker.
Part of our Buried Alive pile, and sometimes hard cast as reanimation. Watch your life total carefully when using this one.
- Dack Fayden (Flex Slot)
Steals our opponents' mana rocks, and acts as repeatable as a repeatable loot effect, both things this deck enjoys.
Like many three-color competitive decks, the most punishing part of building this in paper is the mana base. The easiest cuts there are the three original duals - Badlands ; Underground Sea ; Volcanic Island - which you can replace with cards like Fastlands, Filters, or some of the weaker five-color options like Exotic Orchard, depending on preference. For truly budget mana bases you'll probably want to cut Tainted Pact to allow yourself to run more basics, though that does make Laboratory Maniac lines reliant on Demonic Consultation. Mox Diamond is a painful cut but could easily be Rakdos Signet or an additional land. The more acceleration you cut for budget, the higher your land count should be, and it shifts your plays towards slower, more controlling game plans.
This deck can function without Imperial Seal and Timetwister, and Force of Will and Mana Drain can be replaced with other counters and removal.
In general, this is still an expensive deck, but with just a few cuts you can half the overall cost with only a small loss of power.
One thing I've seen done occasionally with this kind of shell that I would not recommend is playing Twin as Izzet: the lack of tutors for creatures or enchantments in that color pair makes Kiki and Twin combos worse there than in either Rakdos or Gruul colors (though neither of them I'd recommend, either). This deck truly needs all three of its colors to function.
While Kess is arguably the best general choice for this deck, there are other options:
Inalla adds relatively little to the deck overall, however, Inalla does give a one-card combo with Wanderwine Prophets that synergizes well with Entomb and reanimation effects.
Until the printing of Kess, Jeleva was the preferred general for this strategy. Card advantage in the command zone is strong, though there is a distinct downside compared to Jeleva Storm, in that any card cast during combat can't push us to a victory that turn. Jeleva is still strong, but keep that caution in mind.
This was the original general chosen for the Grixis Twin brew from Brewsday that this list originates from. However, multiple pilots working from that original list switched to Jeleva over the course of 2016 for the superior card advantage. While Sedris' interaction with the graveyard is nice, he's expensive to cast and use, and often comes down later than we want to try to win.
- Other Twin/Kiki Pieces
There are quite a few of these, but Deceiver Exarch and Pestermite suffice in almost all instances. The best one we don’t run is Zealous Conscripts, which opens up some additional lines with Splinter Twin thanks to having haste.
Given the power this card has in a forty-life format, typically the decks that don't run this have to have a good reason not too. For us, the Twin/Kiki combo suite is quite high in converted mana cost, as are many of the best reanimation targets, which means either we cut a significant portion of this deck’s best cards, or we run the risk of a very weak and painful Ad Nauseum.
- Card:Blood Moon and Magus of the Moon
The lack of mana dorks and the difficulties presented in three-color support of these cards make them somewhat unfortunate for us, despite hating out four- and five-color decks it's not worth building around these.
- Card:Doomsday
A primary win condition of Grixis storm, there are a few anti-synergies here despite both decks employing Laboratory Maniac. The first is that Grixis storm's mana base is much more heavily blue, both due to storm's suite of cards and to support Gush and High Tide, where as we require much more consistent access to red and black for our Twin pieces and reanimation cards, as well as a mana base that supports Tainted Pact. The second is that, given we're a much slower, more midrange deck rather than a deck that “storms off”, cards like Gush and Lion's Eye Diamond have very little additional utility for us, increasing the amount of potentially dead combo pieces we might draw into.
While there are some potential combo assembly loops possible with this card, the lack of green for sacrifice fodder and Life / Death or white for card:Relic Warder loops make Grixis colors less than ideal for supporting his inclusion.
Suggestions
Updates Add
Comments View Archive
Attention! Complete Comment Tutorial! This annoying message will go away once you do!
Important! Formatting tips — Comment Tutorial — markdown syntax
Please login to comment
| Top Ranked |
|
| Date added | 7 years |
| Last updated | 4 years |
| Legality | This deck is Commander / EDH legal. |
| Rarity (main - side) | 14 - 0 Mythic Rares 50 - 0 Rares 18 - 2 Uncommons 16 - 0 Commons |
| Cards | 100 |
| Avg. CMC | 2.26 |
| Tokens | Bird 2/2 U, Copy Clone, Spirit 1/1 C |
| Folders | 3a) Potential cEDH Decks, Jeleva, EDH, Kess, cEDH, splinter twin kess build. Competitive, Competetive EDH, EDH, Primers, cEDH |
| Votes | |
| Ignored suggestions | |
| Shared with | |
| Based on | |
| Views |
