Sideboard


Maybeboard


"To death all must go, and so in death lies ultimate power"


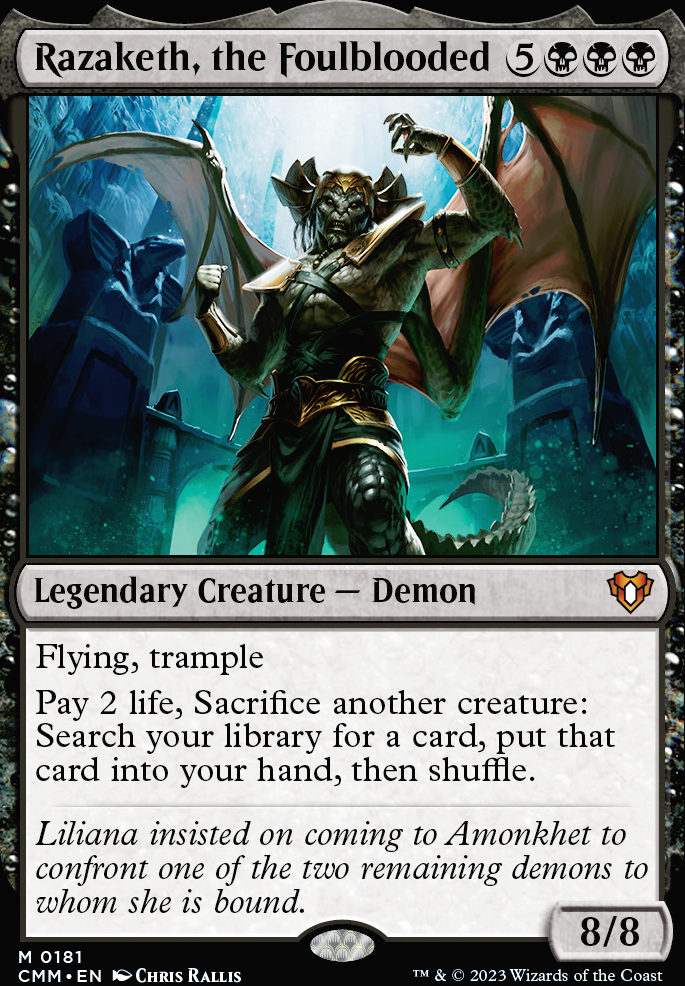
This build took influence from ShaperSavant's Razakats deck and the Anafenza "Raz-Bear-y" Jam. The deck blends together speedy Razaketh, the Foulblooded lines and an Ad Nauseam build with a bit of redundancy inbetween. With an Avg CMC sitting at 1.86, this deck aims to be able to threaten a win as quickly as possible.

This deck is trying to be FAST. It is also trying to be able to search out our win conditions with Magic's most effective tutors. There is an abundance of spells in the list that either search our library, or are able to draw us a large amount of cards effectively.

The biggest enemy to this deck is Rest in Peace effects, since our combos involve the use of our graveyard. If your meta is littered with "anti-hulk" decks, that run alot of graveyard hate, then this deck probably will have a harder time fairing in your meta.

Another hard matchup is stax-type decks. Trinisphere or Grafdigger's Cage type effects need be dealt with. Since this deck runs some of the most effective removal spells in Magic. This is surely possible.


My original goal of the build was to include the fewest amount of "dead cards" that I possibly could. I wanted as many, if not all cards to be playable at any point of the match. To either draw you cards, be an effective ramp, interact with your opponents, tutor for win conditions, or be a win condition. I feel this philosophy has lead to a highly effective build that will commonly be overlooked!


Why Ikra over Thrasios?

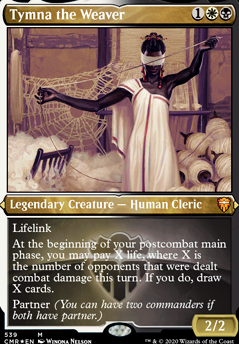
Thrasios and Tymna are a one of the most commonly used cEDH CMDR's in the contemporary competetive meta. Their versatility between the different builds is astounding. Different builds ranging from TnT Consultation decks, to various Demonic Consultation + Thassa's Oracle builds. These are all very much known to be incredibly fast concepts, which is reasonable, since their main goals are to close out the game as quickly as possible. Since the TnT partner combo is so common, it may also paint a target on your back. Opponents may intentionally save a counterspell/removal spell inorder to prevent you from comboing out.

I personally have never encountered a competetively built Ikra + Tymna deck, and I'm willing bet that for the most part, most people haven't either. This is likely because I.T. is not the most efficient partner combo available. As long as our opponents are in the same vote as I and probably many others, then in my opinion, this can lead our opponents to be fairly unsuspecting of a "closet" fast deck. Especially in a blind meta.


The main goals of the deck, revolve around four main concepts.

  1. Razaketh, the Foulblooded lines, that can pretty much win on the spot as soon as our guy gets on the battlefield.

  2. Assembling the Ad Nauseam + Angel's Grace combo.

  3. Assemble the Heliod, Sun-Crowned + Walking Ballista combo

  4. The back up plan if all else fails is ourHermit Druid line, that is trying to get our entire library into our graveyard and then recurring Necrotic Ooze, essentially being able to win on the spot as well.

To quote ShaperSavant

1.

Eye Witness:

Summon Razaketh (2 creatures)

Sacrifice for LED, cracking for

Sacrifice for Eternal Witness, recurring LED and cracking for

Sacrifice Witness for Reanimate

Reanimate Witness, recurring LED and cracking for in pool

Sacrifice Witness for Animate Dead

Dead recurs Witness recurs LED and cracking for in pool

Sacrifice Witness for Auriok Salvagers, cast, in pool

Activate Salvagers recurring LED -- looping for infinite colored mana

Sacrifice salvagers for Walking Ballista, machine gun opponents down with an arbitrary large amount of damage.

If Walking Ballista is not an option to search for, you can inter change it with Bitter Ordeal and exile every opponent's library with an arbitrarily large gravestorm count.

2.

Animate Dead + Leonin Relic-Warder is the core loop that offers unbounded tutoring (gated by life), infinite bodies to utilize, and infinite death/ETB triggers which can be converted into a win condition. It minimally requires 2 tutors and 0 mana to assemble the loop, which can begin from 1 creature if proceeding through the Life Line.

Simple Leonin Loop: Summon Razaketh (3 creatures)

Sacrifice for Warder

Sacrifice for LED, cracking for and discarding Warder

Sacrifice for Animate Dead, reanimating Warder

Warder exiles Animate, trigger to sac Warder goes on the stack

Respond to the trigger by sacrificing Warder to Razaketh

Razakath's tutor goes on the stack, then Warder's death trigger goes on the stack

Warder's death trigger returns Animate recurring Warder

Loop to stack up infinite tutors gated by life (6 life spent before entering loop)

There are some key things to note about this loop:

You do not need Raza to sac Warder; if you allow the Animate Dead LTB trigger to resolve, Warder's LTB will return Animate returning Warder, creating an infinite death loop that costs no life.

You can use the reanimation enchantment that you used to reanimate Razaketh to perform the loop.

Sacrifice warder for Bitter Ordeal and exile every opponent's library with an arbitrarily large gravestorm count.

3.

Leonin Loop off Razaketh's Animate Dead: Summon Razaketh (2 creatures)

Sacrifice for LED, cracking for

Sacrifice to get and cast Warder

Warder exiles Raza's Animate

The trigger to sacrifice Raza goes on the stack

Respond to the trigger by sacrificing Warder to Razaketh

Put Warder's death trigger on the stack, then put Razakath's tutor on the stack

Tutor a card

Warder's death trigger returns Animate recurring Warder

Loop for infinite tutors as above. (4 life spent before entering loop)

The initial Animate Dead sacrifice trigger will remain on the bottom of the stack until after you've used the unbounded tutoring of the loop.

Sacrifice warder for Bitter Ordeal and exile every opponent's library with an arbitrarily large gravestorm count.

4.

Low-creature, high-life Leonin Loop: Summon Razaketh (2 creatures)

Sacrifice for LED, cracking for

Sacrifice for Eternal Witness, recurring LED and cracking for

Sacrifice Witness for Reanimate

Reanimate Witness, recurring LED and cracking for in pool

Sacrifice Witness for Warder, casting with left in pool

Sacrifice Warder for Animate, casting with left in pool

Loop for infinite tutors as above (13 life spent before entering loop)

You can shortcut the life loss by 3 if you use another reanimation, such as Dance of the Dead.

Then, we break the loop by reanimating another creature (ideally our Witness recurring LED), put Blood Artist into play, and cast a new/recycled reanimation enchantment on Warder.

This win condition is a quick and effective one. The goal is to cast the Ad Nauseam + Angel's Grace combo. These two, when played together allow us to draw our entire deck. Once we have the entirety of our deck in our hands, we cast Sickening Dreams, discarding enough cards to wipe the table. Since Angel's Grace esentially prevents us from dying from damage, this will win the game for us on the spot.

The play goes like this

  1. Cast Ad Nauseam

  2. Cast Angel's Grace in response to the Ad Nauseam

  3. Let both spells resolve, drawing our whole deck since our life total cannot go lower than 1 with Angel's Grace

  4. Cast Sickening Dreams discarding enough cards to wipe the table in one fell swoop.

A backup plan for this route is to play Necrotic Oozewhether by casting from hand, discarding and reanimating, or to reanimate it if it is already in our graveyard. After we have our deck in hand, then we discard our deck with LED, allowing us to initiate the loop as long as Auriok Salvagers was in our hand or already in the graveyard, generating an arbitrarily large amount of mana, then dumping it into Walking Ballista's ability on the oozes body.

The Hermit Druid line serves as a back up to our Razaketh lines, incase of possible disruption to our other win cons. This win condition is a little more niche since it requires a reanimator spell to be in hand, with mana available to play the spell, and to have an extra to be able to initiate the combo. In a worst case scenario, this route costs , to initiate the combo.

The synergy between Hermit Druid and our Razaketh lines, is quite astounding. They both work out of our graveyard. So it seems like a natural fit.

The line runs like this

  1. Cast Hermit Druid.

  2. Use ability to put our entire deck into our graveyard.

  3. Reanimate Necrotic Ooze which has all activated abilities of all creature cards in graveyards.

  4. Spend the available on reanimating Lion's Eye Diamond with the Auriok Salvagers activated ability on Necrotic Ooze body. Crack LED for, recur LED again.

  5. Loop for an arbitrarily large amount of mana.

  6. Dump the arbitrarily large amount of mana into Walking Ballista's activated ability on Necrotic Ooze's body, essentially machine gunning our opponents life totals down to zero.

1)

Edit replaced Final Parting when I switched commanders from anafrenza to IT

A. Cast Final Parting, search for Razaketh to go into the graveyard and Loyal Retainers to go into hand.

B. Cast retainers

C. Sac retainers for razaketh

D. Run Razaketh line to victory!

2)

Life / Death paired with razaketh in play is bonkers for value. It turns all your lands into sac able creatures to tutor for one of our various win conditions!

3)

Buried Alive sets us up for multiple different situations. The most notable one is, it helps our LED loop to get set up. Search for Razaketh, the Foulblooded, Auriok Salvagers and whatever creature you want. Reanimate razaketh and start Eternal Witness line.

Or

If you have a way to get Blood Artist out or play Bitter Ordeal. You can recur relic warder with one of the enchantment reanimators, and do the loop for infinite enter the battlefield and death triggers

4)

Green Sun's Zenith for zero on turn 1 for Dryad Arbor

5)

Edit *(Replaced Painter's Servant line with Arcane Signet and Sylvan Tutor) If you pick green when Painter's Servant comes into play. You can Green Sun's Zenith for any creature in the deck since they will be green creatures.

6)

After an arbitrarily large amount of mana is made with the Auriok Salvagers + Lion's Eye Diamond , you can dump enough into Finale of Devastation to give your creatures a high enough power and trample to swing for a fringe type victory.

It is imperative to know what kinds of cards you should be looking for in your starting hand. Since the deck consists of mostly 1-2 CMC spells, there is a wide range of options, to which cards ideally you would want to see together.

Generally though, two lands is about as many as you would want. A one land hand, with some ramp spells can work as well. Either way, ideally you would play a mana rock or dork on turn 1.

Other cards to look for are some tutors, or possibly removal spells if your meta has other fast decks to worry about.

You don't need your win conditions in your opening hand, since there are plenty of ways to draw cards and search our library.

What you DO need, is to be able to ramp or interact during the first few turns. Almost always, you should have a first turn play. Sometimes things happen and you might have to miss a first turn play. Ideally a plan should be set for turns 1-3 from your opening hand though. If you cant play any spell until turn 3 then it's a clear sign you should mulligan.


If you have any additional idea's, leave a comment. I would love to discuss any possible additions!


IF YOU LIKED THIS PRIMER, SLAM THAT +1 UPVOTE BUTTON


Suggestions

Updates Add

Comments

Attention! Complete Comment Tutorial! This annoying message will go away once you do!

Hi! Please consider becoming a supporter of TappedOut for $3/mo. Thanks!


Important! Formatting tipsComment Tutorialmarkdown syntax

Please login to comment

Date added 4 years
Last updated 3 years
Key combos
Legality

This deck is Commander / EDH legal.

Rarity (main - side)

15 - 0 Mythic Rares

55 - 3 Rares

19 - 1 Uncommons

11 - 1 Commons

Cards 100
Avg. CMC 1.87
Tokens Spirit 1/1 C, Treasure
Votes
Ignored suggestions
Shared with
Views