Maybeboard


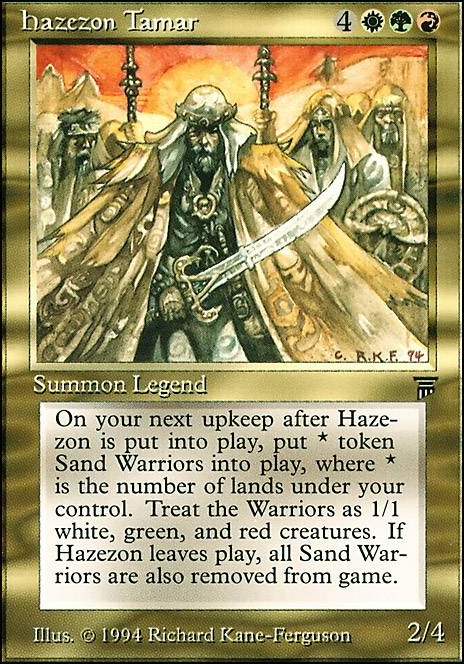
Hazezon's Always Got It

This is my favourite multiplayer EDH deck - designed to win group games entirely at once, often without warning, yet is still interactive enough that my friends/opponents actually enjoy going up against it!

It relies on three things: Ramp, Tokens, and Pumps.

Named after a frequent warning passed between opponents.

Hazezon Brings The Beer But Can't Join The Party

Unlike most other generals, Hazezon craves the grave. As long as Hazezon dies sometime between when he enters play and when the delayed trigger resolves, the Sand Warrior tokens will not be threatened by his 'leaves-play' effect. This deck employs the best at-will sacrifice outlets to make sure that happens; chosen not only to kill Hazezon, but to get the most value whenever an opponent inevitably wipes the board out of fear. In addition, Hazezon can be cast, sacrificed, and recast repeatedly to multiply his delayed triggers before the next turn.

Dance, You Dry Bones! Dance!

It takes a while to be able to cast Hazezon, and even then, only getting 6 or so Sand Warriors can be very underwhelming. That's why this deck has a new secret Partner Commander: Field of the Dead! Field interacts with all the same cards that Hazezon does for maximum synergy and an easy passing of the torch from mid to late game. While Field cannot put out the same potential volume of tokens as Hazezon, it does so faster and steadier and for FREE. This provides defensive blockers, sac outlet fodder, and a creeping offence to put opponents on their back-foot when once they had free reign to wail on poor Hazezon as he was getting set up. The only issue is finding Field of the Dead, so that's why there's now a greater focus on adding the best nonbasic-type land ramp to fetch this fair and balanced card into play.

Exponential Pumps

Finite pumps are not enough. This deck relies on pumps that will win the game in one decisive attack. Anthems are a trap - they're too slow, are more easily removed and telegraph my threat level. Why pump for +1 when I can pump for +10? +20? With exponential pumps, this deck can easily deal hundreds if not thousands points of damage, often after beginning the turn with zero board presence (other than land).

Every Land Counts

Because each additional land means another Sand Warrior token, which in turn means another degree of exponential pump, this deck never curves out. There is no such thing as too many lands or too much mana. The more land ramp is cast the more powerful Hazezon's triggers become and age-counters are no longer a problem. Artifact ramp is avoided since it is the second easiest permanent to remove after creatures.

No Lightning Rods

No one wants to waste spot removal on a token, so these cards tend to rot in the hands of opponents. This wastes their card draws, but this also means they'll always have an answer once a lone threat ever pops up (or even worse, if I don't have a sac outlet for Hazezon). So this deck specifically avoids any creature cards that require remaining on the field to generate value.

Who Needs Removal?

My opponents, that's who. Hazezon is so fast and so threatening it doesn't need so much removal - my opponents will do it for me. An explosion of tokens and the looming threat of an exponential pump will force most opponents to reluctantly cast their board wipes, taking out any threats opposing me as well. Once the board is wiped clean, Hazezon will bounce back faster than its competition.

Haste Enablers

I don’t particularly mind when board wipes happen, but why give my opponents the choice? Relying on my troops' summoning sickness, my opponents plan on and expect a full round to respond to my threats, thinking they can safely leave themselves open and indulge in building their offence. As long as I keep my haste enablers in hand (I never cast them early), this flawed logic is often their undoing.

Mulligan until I have 3 lands (Boundlands, eg. Gruul Turf count as two) + at least one early CMC 3-or-less ramp (Ancient Tomb and Krosan Verge and Urza's Saga count).

Must have a green source. The other colours and all other cards are mostly optional. With steady land growth my ramp will fix my manabase and I'll draw into gas. Hand fixing like Bitter Reunion and Sylvan Library are great.

Mulliganing is a discipline. Yes, shuffling sucks (the official unofficial EDH mulligan rules help with this), but most games are lost from keeping a hand that looks "good enough". That's lazy, I should almost never settle for my opening hand, and need to keep mulliganing until the above criteria is met even if I go down to 5 cards, because when I do properly mulligan my win-rate skyrockets.

Play tap lands when opportune. Fetch for Surveil lands (eg. Commercial District) for consistency, otherwise find Alpha lands (eg. Taiga) for immediate use.

Ramp, ramp, ramp. Turn 2 ramp (eg. Farseek) into CMC 4 ramp (eg. Map the Frontier) is a great start. Outracing my opponent with big mana is key, and the sooner I get Field of the Dead online the better.

Prioritize fetching and ramping for mountains to slowly work towards Valakut, the Molten Pinnacle. Green sources will come naturally with all the non-basic dual ramp.

Getting Field of the Dead is the priority.

The following cards will make this happen:

If FotD is already in play, then priority #2 is Gaea's Cradle, then #3 is Vesuva copying FotD for 2x Zombie 2/2 B, then #4 is Valakut, the Molten Pinnacle.

Remember, ramping into FotD and Vesuva at the same time will not work, and using Vesuva to copy FotD doesn't increase my count of unique land names, so if I'm still trying to get FotD online I might hold off.

However, if I'm up against someone with some land destruction, copying FotD early is good proactive defence.

In some contexts, finding Krosan Verge for a burst of mana and zombies or Lazotep Quarry if I'm desperate for a sac outlet or a Bounceland (Gruul Turf) for landfall shenanigans might be the right move.

With little resistance, this deck can win turn 6 or 7 fairly consistently.

A steady supply of zombies alone can win some games.

I prioritize playing the cards in my hand to continually grow my value engine, and only when I have 7 mana to spare do I cast my General, Hazezon Tamar.

Often I find Academy Rector and sac it for either Mana Reflection when I'm on curve for a massive leap in mana and I still have a full hand, or Perilous Forays when I have FotD online.

With enough tokens, any of the mass pump (usually Craterhoof Behemoth) should finish off the entire table.

Any of the bombs (Reshape the Earth, Genesis Wave, Tooth and Nail, White Sun's Twilight, Insurrection, Scapeshift) will also do the trick.

Reshape the Earth - finds Field of the Dead / Vesuva and Gaea's Cradle and Valakut, the Molten Pinnacle and all that good stuff. BUT! If I'm able to cast this before playing my land drop for the turn, I can also find a Bounceland (Gruul Turf), bouncing Gaea's Cradle back into my hand, I play it for my land drop, and now that I've made 10 or 20 zombies it now taps for net positive mana - making this bomb absolutely free!

Scapeshift - same as above, but even easier to net positive mana. Just wait until Field of the Dead is online (7+ lands).

Perilous Forays - I've always loved this card and now I love it even more. It only requires basic land type, so it can find all my non-basics. With Field of the Dead online, it can ramp repeatedly for 1 CMC each, doubling my land base in one turn and emptying my deck in two turns. With Vesuva copying FotD, this nets me an additional Zombie 2/2 B each time. With Valakut, the Molten Pinnacle, it gets me a free Lightning Bolt each time. Feels great.

Hour of Promise & Titania's Command - usually gets Field of the Dead and Gaea's Cradle. FotD witnesses them both come into play simultaneously, meaning I can jump from 5 to 7 lands and still get 2 Zombie 2/2 B tokens (or 4 with Vesuva). If FotD is already in play, then swap for Vesuva if I already have enough lands to get FotD online -or- Krosan Verge if I don't (if FotD is not online, then Gaea's Cradle does nothing, so I must make it happen).

Omenpath Journey - DO NOT find valuable utility cards (eg. FotD). Instead, find bog standard dual-lands. This way, if my opponent removes it they won't have exiled my most useful lands for the rest of the game. Instead, they can either use their removal... meaning they won't have that removal for my next even better enchantment. Or they can wait, letting me ramp 2-5 lands (value depends on timing). As long as I don't put anything too critically juicy under this, it's almost never the right play for them to get rid of it - meaning solid steady value for me.

Sowing Mycospawn & Reap and Sow - waiting for the kicker is almost always worth it. Will usually find FotD, which comes into play tapped. But if played late game with FotD and tokens already in play, the land these find comes into play untapped - which means it can find Gaea's Cradle untapped gaining additional or even net positive mana. Can also put Strip Mine into play untapped if I want to be really really mean.

Fires of Invention - lots of great CMC 4 spells can be cast the turn this is played. Works great with tapped lands. If drawn late and the deck's engine is churning then it sometimes might not be worth playing, but otherwise it frees up the lands for Entwine costs (Tooth and Nail) and Kickers (Sowing Mycospawn) and other activation costs (Perilous Forays), effectively tripling my mana.

Gruul Turf & Boros Garrison & Selesnya Sanctuary - basically count as two lands in the hand. Can bounce Vesuva back to hand to change target. But most critically, if Field of the Dead is online, they can be played and bounce themselves back into hand - guaranteeing a land drop each turn. Mid/late game, if another land is drawn and mana is strong, play all other lands first and save this one in hand.

Shields of Velis Vel - sac Hazezon Tamar and then cast this targeting my opponent. Plague Wind that exiles for CMC 1.

Divine Visitation - replaces the Sand Warrior 1/1 RGWs with Angel 4/4 W w/ Vigilances, meaning Hazezon Tamar leaving play doesn't exile them, making this a pseudo "sac outlet" for this deck's purposes. Also allows me to cast Hazezon turn after turn, adding to my army instead of replacing it.

Lithoform Engine - copies a lot of big sorceries and is in general a lot of fun, but it can also copy Hazezon Tamar's trigger when he enters play and then copy it again when the delayed trigger resolves the next turn's upkeep. Triple Sand Warrior 1/1 RGW.

Map the Frontier - can get Lazotep Quarry and Scavenger Grounds.

Into the North - can get Highland Forest and Alpine Meadow.

Eladamri's Call - unlike the other creature tutors (which usually grab early game Academy Rector or late game Craterhoof Behemoth), this one works with Sowing Mycospawn's cast effects.

Escape to the Wilds - don't play my land drop before casting if possible, and play as many lands from this as I can over 2 turns.

Nature's Lore & Three Visits - puts the non-basic forest into play untapped, so if I can keep going, I can grab a Taiga - making the ramp cost CMC 1. (Otherwise, I'll grab Commercial District.)

Skyshroud Claim - similarly puts the non-basic forests into play untapped, so often costs only 2 CMC. (Otherwise, grab Commercial District + Jetmir's Garden or a mix of tapped and untapped.)

Open the Way - if ever there's a choice and I have multiple ramp spells to cast, I should save this for last to better my odds of ramping into valuable non-basic utility lands.

Rite of Harmony & Nature's Rhythm - great for ditching into the bin with Surveil lands (Commercial District). Rite can be cast the turn after Hazezon in response to tokens entering play, and if a hail mary draw-or-die is needed it can be cast with flashback immediately again to draw two cards per creature and dig deep.

Academy Rector - can find all sorts of things, but most often Mana Reflection (on curve) or Perilous Forays (FotD online).

Tooth and Nail - usually grabs Avenger of Zendikar + Enduring Courage. Or Craterhoof Behemoth. Or Academy Rector tricks.

Gamble - finds what other tutors can't, often mid-game Hour of Promise / Titania's Command (getting both Field of the Dead and Gaea's Cradle is huge), or late-game Reshape the Earth.

Three Tree City - usually names "Warrior". "Zombies" are rarely in enough numbers to be worth naming them, but sometimes they are, as well as "Plants", "Soldiers", or "Mites".

Krosan Verge - usually gets Jetmir's Garden and Elegant Parlor, since it's not often worth it to Surveil twice.

Urza's Saga - finds Sol Ring, otherwise Skullclamp.

Dollmaker's Shop / Porcelain Gallery - careful, if put into play without casting (ie. via Academy Rector or Genesis Wave), then it comes into play with both doors "closed". With enough mana that shouldn't be a problem.

Final Fortune - do it, coward.

Suggestions

Updates Add

  • Added Flashback, cutting Glimpse the Core. Trading the weakest CMC 2 ramp for something that could be anything - it could even be CMC 2 ramp! A little riskier for the early game if I don't have other ramp for it to copy, but becomes a powerful toolbox with each turn going forward. EDIT: This will immediately be replaced with Stingcaster Mage come October.

  • Added Borrowed Knowledge, cutting Faithless Lootingfoil. Love FL's art (it'll find a home in my Zurgo), but just not the right fit for this deck. While powerful with the potential to course correct a bad hand, it's too much of a tax most of the time. Hazezon isn't picky, if it has cards in hand the goal is to play them. Meanwhile, Borrowed Knowledge has a low floor (replace dead-end cards with a fresh hand) and a high ceiling (draw 7). Insane potential.


  • Added Scavenger Grounds, cutting High Market. Lazotep Quarry does everything better than High Market and I don't need the redundancy since my sac outlet situation is in a good place. Some risk making this cut, but I'm adding extreme graveyard hate that can be found with every one of my land tutors (plus Map the Frontier). I let my opponent's graveyard shenanigans skate by for too long, that ends now.

  • Added Strip Mine, cutting Sanctum of Eternity. Sanctum of Eternity was the worst of my sac outlets, it stuck around for the dream of keeping my commander's costs down but that never was really a concern once I got my mana going and it never worked the way I imagined. Strip Mine is another tool to add to my toolbox just in case, and while Hazezon loves its lands, hobbling my opponent out of tempo as I ramp ahead should work out in the long run.

  • Added Conduit of Worlds, cutting Showdown of the Skalds. Showdown of the Skalds was good, not great, and awkward to play on-curve when it wanted to be played before the land drop in case it drew two lands. Conduit of Worlds also fuels my land drops from Fetchlands, Krosan Verge, and Surveil - oh and the new Strip Mine I'm adding. It protects Field of the Dead and my other key lands.

  • Added Bala Ged Recovery  Flip, cutting Snow-Covered Forest. I'm not hurting for basics or snow-covered ramp targets. Comes into play tapped, but can bring back important lands and spells. Can also be played as a land early-game and then bounced by a Bounceland to use the sorcery late-game.

Comments

Revision 30 See all

(6 hours ago)

-1 Bala Ged Recovery  Flip maybe
-1 Commercial District maybe
-1 Glimpse the Core maybe
-1 Lush Portico maybe
-1 Majestic Genesis maybe
-1 Map the Frontier maybe
-1 Scapeshift maybe
-1 Sowing Mycospawn maybe
-1 Stingcaster Mage maybe
-1 White Sun's Twilight maybe