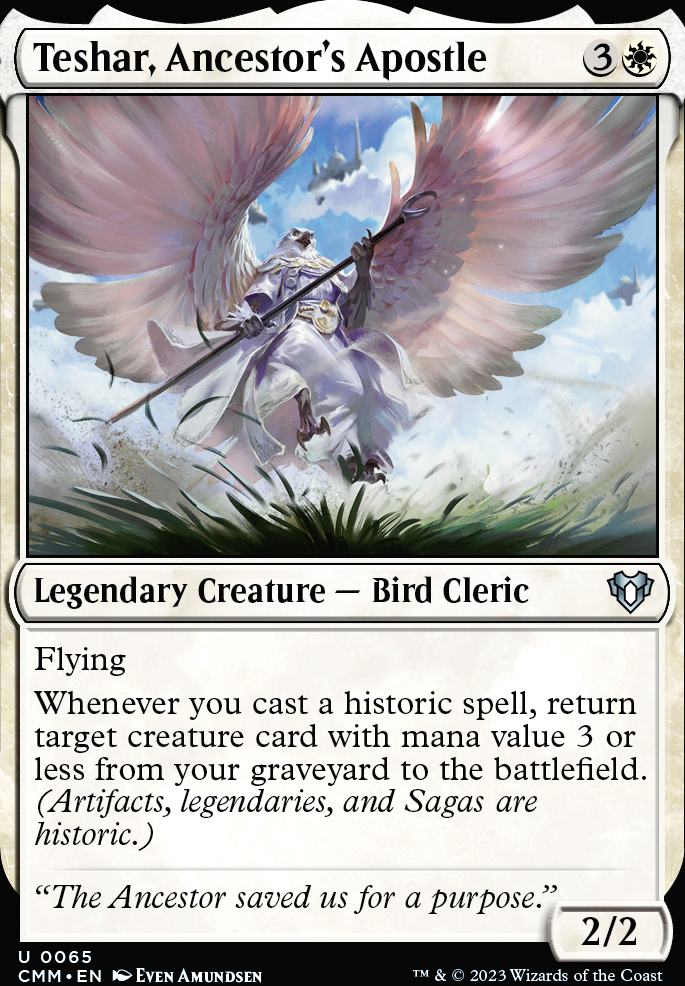
Hey guys! This is my Teshar, Ancestor's Apostle deck, and it is so much fun! It durdles and flies under the radar until you can assemble the right combination of cards to combo off for the win. It’s a really powerful deck for its cost, and it is a ton of fun to play! I’d love any and all suggestions. If you want to and you like the deck, leave an upvote. Thanks!

So the combo for this deck is a little convoluted, so I decided I would walk you guys through it. The goal of the deck is to have Teshar, Ancestor's Apostle in play and then loop a mana neutral or mana positive artifact - a cheerio - and a card that will return an artifact from the graveyard on ETB or LTB - a retriever. Using a sac outlet like Altar of Dementia will allow you to loop the cheerio and the retriever until you mill all of your opponents to death.
There are a lot of different low costed artifacts in this deck. In the combo, any of the zero cmc (mana value) artifacts will work as a Cheerio for your combo. Also, Sol Ring , Springleaf Drum (under the right conditions), and Basalt Monolith are mana neutral or mana positive, meaning you can loop them easily.
There are a couple cards in the deck that turn a lot of your 1 or 2 cmc artifacts into Cheerios: Starnheim Courser , Foundry Inspector , Cloud Key , and Semblance Anvil . I won’t go as far to say that these cards are the best cards in your deck, but they certainly are competing for that top spot. They turn any 2 cmc mana rock into a cost neutral artifact or even mana positive. These cards make it really easy to combo off with a lot more variation of cards.
There are 5 main types of Cheerios. I’ll rate them from 1-5 with 1 being the best and 5 the worst.

  1. 0 to play and 0 to sacrifice. The best Cheerios are going to be the free artifacts that are self sacrificing with no cost to sacrifice. An example is Urza's Bauble . These cards offer the most versatility of which other cards they combo with.
  2. 0 to play, but they have a cost to sacrifice. These cards aren’t as common in my list, but they are cards that are free to play and can self sacrifice, but only if you’re willing to pay something for it.
  3. 1 to play, 0 to sacrifice. These cards are the third best. They have a cost to cast, but they are self sacrificing for free. These work really well with a cost reducer. Conjurer's Bauble is one of the better Cheerios of this kind.
  4. 1 to play, 1 to sacrifice. These cards are still definitely playable, but they better draw you a card or do something of the sort when they are sacrificed. They have a cost to play and are self sacrificing, but only when you pay a cost. Chromatic Star is a good example of this.
  5. Lastly, any of the rest of the artifacts that do not self sacrifice. The ability to self sacrifice in the deck is huge. It allows you to be able to combo off with a creature only sacrifice outlet. However, when combined with both a creature and artifact sac outlet, these cards still have a place in the combo, allowing us to play them in our deck. ornithoper and any other 0 cmc artifact creature is probably the best option for this slot.
The retriever cards in this deck get there name from the card Myr Retriever . This card - as it dies - allows you to return an artifact card from your graveyard to your hand. Then with Teshar’s ability, you are able to cast said artifact to return the retriever from the graveyard to the battlefield. You can continuously loop this to win. This deck plays various retrievers, and they are divided into 4 categories.

  1. LTB Retrievers. These are retrievers that return an artifact from your graveyard to your hand when they die. These are the easiest ones to combo off with because they have the fewest limitations. These consist of Myr Retriever , Junk Diver , Scrap Trawler , Workshop Assistant , and Leonin Squire .
  2. ETB Retrievers. These are retrievers that retrieve an artifact on ETB. These retrievers are still very good, but they need a second cheerio artifact to make an infinite loop with because they will enter the battlefield off of Teshar’s ability before the cheerio used to trigger said ability ever resolves. This means you cannot sacrifice the same cheerio in response to the retriever’s ability because the cheerio will not be in the battlefield. These consist of Trusty Packbeast and Treasure Hunter .
  3. Self-Sacrificing LTB. There is only one of this kind of retriever in this deck, and that card is Salvager of Ruin . The important thing to remember is that this card has to be sacrificed to its own ability to gain the retriever effect, meaning you cannot use it with a creature sac outlet to win. If you are using Altar of Dementia or Ashnod's Altar , you better find another payoff to win. However, this card has the ability to combo off with a self sacrificing cheerio or with only an artifact sac outlet.
  4. ETB Bounce. While this doesn’t technically retrieve an artifact from your graveyard, I still include this card in the retriever section. The one and only ETB Bounce retriever I play is Glint Hawk . This card returns an artifact from the battlefield to your hand. Again, like the ETB Retrievers, this card only works with two Cheerios for the same reason. The ETB trigger resolves before the cheerio ever enters play.

There are other retrievers you can play, but in my opinion these are the best.

These cards are the fourth part to our combo. In addition to Teshar, a cheerio, and a retriever, we need a sac outlet to be able to complete the loop - i.e. getting cards into the graveyard for when we need them there. There are 4 types of Sac outlets in this deck.

  1. Free Creature Sac Outlets. These are key to winning. You can occasionally get away with only a creature sac outlet or an artifact outlet, but it’s easiest to win if you have both. These are also your payoffs to win. Possibly the best of the creature sac outlets is Altar of Dementia . This allows you to mill yourself for value until it comes time to mill everyone else to win. Ashnod's Altar allows you to generate loops that result in infinite mana. Spawning Pit will allow you to flood the board with a lot of tokens. Blasting Station will allow you to ping your opponents to death.
  2. Free Artifact Sac Outlets. As mentioned above, with the right combination of cards you might be able to go off with only an artifact sac outlet. However, it’s much more likely you’ll use one of each. Grinding Station is the best of the artifact sac outlets because it allows you to mill yourself until it comes time to mill your opponents for the win. It is also the only artifact sac outlet that is a payoff. Piston Sledge is in the deck purely to sacrifice artifacts. However, you sacrifice to use an equip ability, meaning it can only be used at sorcery speed. It is the worst of the artifact sac outlets. Thermal Navigator allows you to sac artifacts at instant speed. Good for sacrifice, the value it gives otherwise is minimal.
  3. Land Sac Outlets. There are two lands that can sacrifice a creature or an artifact. High Market can sacrifice a creature and Phyrexia's Core can sacrifice an artifact. These cannot combo in this build, but they can still offer good protection against exile effects.
  4. Costed Sac Outlets. There is only one of these in the deck because sac outlets being free is so important. However, the ability to sacrifice any permanent is what makes this card playable, and it has the benefit of occasionally functioning as a cheerio as well. The card is Claws of Gix .

Sac outlets are good for value, but extremely important for our combo. It’s okay to play them early on to grind some value but make sure to be hesitant and cautious.

Suggestions

Updates Add

Comments

Attention! Complete Comment Tutorial! This annoying message will go away once you do!

Hi! Please consider becoming a supporter of TappedOut for $3/mo. Thanks!


Important! Formatting tipsComment Tutorialmarkdown syntax

Please login to comment

Casual

99% Competitive

Date added 2 years
Last updated 2 years
Legality

This deck is Commander / EDH legal.

Rarity (main - side)

15 - 0 Rares

41 - 0 Uncommons

25 - 0 Commons

Cards 100
Avg. CMC 1.88
Tokens 2/2 C Artifact Creature Spawn, Elephant 3/3 G
Folders CMDR
Votes
Ignored suggestions
Shared with
Views