The Gitrog Monster Titanloop Combo

DISCLAIMER: Deck inspiration: Leptys and overall cEDH Gitrog deckbuilding path.

Hello! My name is Max, and this is a shy attempt on a primer for The Gitrog Monster Titanloop Combo deck in Leviathan Commander format.

I have been playing Gitrog since early 2019. Until January 2020 I had used this list, but I decided the time has come for a little switcheroo. I delved into my old unfinished TappedOut projects and found this bad boy. After a few thousand changes and hours of rethinking and considering each particular card choice, I've come up with this. The combo itself is very similar to the one used in competetive EDH (cEDH) Froggo lists.

  • It is a very complex combo deck with a high skill cap, possibly one of the highest in the format due to all little intricacies and game rule "abuse" you can pull off.

  • It's supersonic fast with certain draws (Turn 2 wins are definitely possible).

  • Paradoxically, the combo is almost fully gavehate-proof (more on that later).

  • The deck is capable of instant speed wins; (In fringe cases it's possible to win during your cleanup step!)

  • If you prefer to win than have friends, this deck is made for you.

  • You're not well familiarised with the concept of priority, stack and cleanup step.

  • You don't feel like someone capable of going through between 250 and 500 standalone actions in a single turn and not messing it up a single time (Though don't worry, some mistakes I've encountered myself are reversable once you get used to the way the deck plays).

  • You prefer more linear strategies. This deck is nowhere close winning with combat damage (though there is a semi-valid combat damage winning path)

  • You can't afford particular key cards or a stable manabase. This deck is one of the most demanding when it comes to mana fixing among the two-coloured commanders. Bad news: Bayou is useful. Very useful.

The deck is entirely built around a powerful interaction between Gitrog and Dakmor Salvage, or dredge overall. Dredge is an absurd keyword, and even WotC realised this after they released some cards with it. It's arguably the best graveyard filling mechanics and combo enablers, which Gitrog uses the best of all existing Legendaries in the Format. So, for those of you who don't know what dredge is, or don't understand it very well, here's a simple definition:

If a card with 'dredge X' is in your graveyard, whenever you would draw a card, you may put EXACTLY X cards from the top of your library into your graveyard instead. If you do, return the dredge card to your hand.

Note, that dredge is a so-called replacement effect, which effectively means that you decide whether to use it or not upon resolution of the draw trigger. For example, if you have a draw trigger on the stack and your opponent wants to respond to it by casting a spell, after their spell resolves you are THEN allowed to choose if you want to draw or 'dredge the draw'. This allows you to make decisions based on more information, and makes it impossible for your opponent to deprive you of your card by grave exile effects in response to the draw trigger.

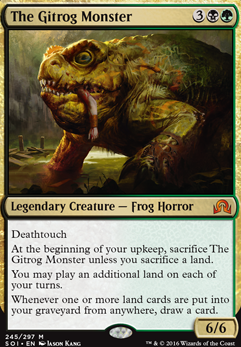
Now, once we've covered dredge let's take a look at our commander herself. The Gitrog Monster is a (3BG) 6/6 legendary Frog Horror with deathtouch. She doesn't die to Lightning Bolt, she doesn't die to fatal Push or Dismember, overall she's not that easy to kill for some decks.

What makes Gitrog particularly interesting though, are her last 3 abilities. The first one states:

At the beginning of your upkeep, sacrifice The Gitrog Monster unless you sacrifice a land.

When you first read it you might think 'Okay, it's fair. She's an undercosted 6/6 with deathtouch, she has to have some downsides.' Well, when you read the second ability, you realise it's actually okay, because Gitrog has a built-in Exploration effect. Seems unfair already? Well, the best about the Froggo though is the last ability, which is precisely the one which, paired with Dakmor Salvage's dredge, enables our combo. The ability states:

Whenever a land is put into your graveyard from ANYWHERE, draw a card.

In case you didn't realise, this is absurd. With this beast on the battlefield, your fetch lands become cantrips as well, Lake of the Dead isn't as painful to play as before, and cycling lands become almost Ancestral Recalls, drawing 2 cards for 1 mana on instant speed.

The last component of our combo is a discard outlet, in other words an effect that allows us to discard cards from our hand for free at instant speed. There are numerous effects like this in the game, and the list currently uses 4 of the best (though I originally started with 5, with an addition of Oona's Prowler).

Some of you might already see where this is going, but I'll go through it step by step. Once you've assembled the pieces (Gitrog + Discard outlet on the battlefield and Dakmor Salvage in your hand) you're ready to go off.

A good way to start any combo is drawing your entire deck. As it turns out, you don't need Enter the Infinite to do that. All you have to do is repeatedly discard Dakmor Salvage using your discard outlet, and dredge the draw you get from Gitrog's last ability.

The pattern is:

  • Discard Dakmor Salvage, putting a draw trigger on the stack.

  • Dredge the very same draw, milling 2 cards into your graveyard.

  • If you milled 2 nonland, non-reshuffling cards, discard Dakmor Salvage again

  • If you milled one land and one nonland, non-reshuffling card, or two land cards, (which puts a draw trigger on the stack), respond to the draw trigger by discarding Dakmor Salvage again.

  • If you milled into a reshuffling card, with a land or nonland, resolve the reshuffle trigger before the possible draw trigger, and then respond to it by discarding Dakmor Salvage again.

Following this pattern will slowly accumulate draw triggers on the stack, eventually reaching the number of cards in your library (+graveyard) or exceeding it. As this happens, after the next reshuffler you mill into, reshuffle and then resolve a number of draw triggers equal to the number of cards in your library. If you have any additional X draw triggers on the stack, just respond to them by discarding (X-1) nonland cards and Kozilek, thus reshuffling that many cards and draw them. This way you end up drawing your entire library for no mana at all. From now on we can proceed to actually shortcuttable loops that lead to winning the game.

Note: The pattern above is NOT shortcuttable, even despite the fact that every possible order of cards in your deck will eventually lead to you drawing your entire library. It will happen at a different pace though, which effectively means that you have to manually go through the process. It should take between 3 to 10 minutes if you get really unlucky.

Once you have your entire deck in your hand, proceed to this shortcuttable loop:

  • Discard Kozilek, and allow it to reshuffle itself

  • Discard any land, drawing Kozilek back

  • Discard Kozilek, and allow it to reshuffle itself and the land back

  • Play Lotus Petal

  • Discard and dredge Dakmor Salvage, putting a draw trigger on the stack and a reshuffle trigger on top of it

  • Resolve the reshuffle

  • With the draw trigger on the stack, discard and dredge Dakmor Salvage again, ordering the triggers the same way

  • Resolve the reshuffle, then dredge Dakmor for the final time, but this time before the reshuffle trigger resolves, sacrifice Lotus Petal for mana (usually black, but for safety add green as well so that you have Veil of Summer and Autumn's Veil backup if necessary for whatever reason).

  • Resolve the reshuffle trigger

  • Resolve 3 draw triggers

You're back where you started but with one mana more in the pool. Repeat the loop for 'infinite' mana.

Now it's time for the final killing loop:

  • Cast Collective Brutality, draining your opponent for 2 life

  • Cycle any 2 of your cycling lands

  • In response to 4 draw triggers, discard Kozilek

  • Resolve the reshuffle trigger

  • Resolve 4 draw triggers

  • Repeat previous steps

Congratulations! You've just killed your opponent! But it's just the beginning of Gitrog's capabilities.

Since your discard outlets allow you to discard cards at instant speed, you can use Dakmor Salvage to draw your deck whenever you like. Note, that Oblivion Crown has flash, and your creature discard outlets can be flashed in via Savage Summoning. But how do you gain infinite mana via Lotus Petal and cast Collective Brutality in your opponents turn to kill them? Well, the answer is, unless you have excess mana and Emergence Zone on the battlefield, you don't. But here is where another, quite convoluted loop comes in. So for it to work you need one black mana available, one green mana (Elvish Spirit Guide in hand/somewhere in the deck will do) and both Crop Rotation and Twilight Mire in your hand or deck.

The combo goes like this: Draw your entire deck just as you would while going off at sorcery speed. Once you've done that, do the infinite mana loop, but instead of casting and sacrificing Lotus petal, cast Dark Ritual for one black mana at the very same moment you would be sacrificing Lotus Petal in the original loop. This way, you can gain infinite black mana at instant speed. Here is where green mana (Elvish Spirit Guide) comes in handy. The loop I'm about to present basically allows us to 'reforge' our black mana into green:

  • Discard any land

  • In response to the draw trigger, discard Kozilek, and let the reshuffle resolve

  • With the draw trigger still on the stack, dredge Dakmor Salvage 3 times (reshuffling after each dredge) , to accumulate a total of 4 draw triggers

  • In response to 4 draw triggers, cast Crop Rotation sacrificing any land (or Twilight Mire if it's on the battlefield) thus putting the spell itself and another draw trigger on the stack

  • In response to the top draw trigger, discard Twilight Mire (or any land if Mire is in your graveyard already). At this point the stack consists of 4 draw triggers, Crop Rotation and 2 draw triggers on top.

  • Resolve 2 draw triggers, drawing Kozilek and a land

  • In response to crop Rotation, discard Kozilek, and resolve the reshuffle.

  • Resolve Crop Rotation fetching Twilight Mire to the battlefield.

  • Resolve 2 draw triggers

  • Discard Kozilek and resolve the reshuffle trigger

  • Resolve 2 draw triggers

  • Tap Twilight Mire for one black to gain double green

  • Repeat

This loop allows us to gain green mana using black we've gained before via Dark Ritual loop. Now, the kill condition in this situation is the very same Crop Rotation loop, but while executing it replace every instance of 'Twilight Mire' with 'Sunscorched Desert'. This way, you will repeatedly fetch the desert back to the battlefield, pinging your opponent for one each time.

Earlier I mentioned 'game rule abuse' which makes this deck trully remarkable. To understand the following paragraph, let's see what cleanup step is.

So, here is a paragraph taken from the game's rules:

During the cleanup step, the active player discards down to his or her maximum hand size (usually 7), then simultaneously, all damage marked on permanents is removed and all "until end of turn" and "this turn" effects end. The game then checks for any state based actions that need to be performed or if any triggered abilities are waiting to be put on to the stack, if there are, all state based actions are performed and then all triggered abilities are put on to the stack and the active player gets priority. once the stack is empty and all players pass priority, a new cleanup step begins. If there are no triggered abilities put onto the stack during the cleanup step, no player receives priority during the cleanup step, so no spells can be cast and no activated abilities can be activated.

Now, the interaction between the Gitrog Monster and cleanup step is quite interesting. If you happen to have 8 or more cards in your hand, and the Frog on the battlefield, look what happens during the cleanup step. You discard to handsize, and if among the discarded cards there is one or more land cards, Gitrog's draw trigger is put on the stack. After resolving it, you get back up to 8 cards in hand. This way, as long as you have lands in hand, you can infinitely sculpt your hand to the 7 you find good enough to keep as your hand. But, since Dakmor Salvage is so broken, we can use it to combo off during our cleanup step. For this to happen, repeatedly discard Dakmor while discarding to hand size, and dredge itself back to your hand. Sometimes the dredge will hit a land, thus allowing you to draw an extra card. You are looking for a way to flash in a discard outlet (be it Oblivion Crown or Savage Summoning + creature discard outlet). Once you've found the flashable discard outlet, during the next cleanup step discard Dakmor again, and since you get priority after Gitrog's draw trigger hits the stack, flash in the discard outlet. Once you've done that, proceed to combo off just the way explained in 'Instant speed combo' panel.

Note: Cleanup step hand-scultping should not be considered slow play, since it is the game rule that 'stops' you from passing the turn to your opponent. Obviously, we are quite happy it does, but it might be frustrating for your opponent to watch you go through a few hundred cleanup steps, just to die 10 minutes later as you go off. It takes a while, but should not be considered slow play, provided that you go through the motions at a reasonable pace.

  • Crucible of Worlds

Too slow, and if I really need it I have an easily tutorable effect like this in form of Ramunap Excavator.

  • Toxic Deluge

I felt really bad about myself removing this card from the list, but it's just... Unnecessary. You're faster than most aggro decks, and you can often outrace them before you'll need a massive removal spell. Besides, it often gets stuck in your hand because you have mana dorks on the battlefield.

  • Sylvan Safekeer

Worth considering, but with City of Solitude, Defense Grid and Veil of Summer, it seems unnecessary.

It is always fun to see your opponent play out Relic of Progenitus or Tormod's Crypt with a smile on their face. But it's even better when they realise that single use grave hate is useless against this deck most of the time. If they want to respond to your draw trigger when Dakmor Salvage is in your graveyard, just discard another land card, dredge Dakmor Back and keep going off with the grave exile effect on the stack. The things get tricky when your opponent plays an effect like Rest in Piece or Leyline of the Void. Then it is necessary to get rid of the problematic permanent using Abrupt Decay (or Assassin's Trophy).

So there is one more way to abuse dredge in this deck. Essentially, it allows you to use any dredge card to find Dakmor Salvage, if you don't have it yet. What you need is Gitrog + discard outlet on the battlefield, and a dredge card + land card in hand. Discard the dredge card (Life from the Loam, or preferrably Golgari Grave-Troll since it has a bigger dredge) and discard a land card. Replace the draw trigger with dredge, milling cards. If you hit a land card, in response to the draw trigger, discard the dredge card again. You'll eventually mill into Dakmor Salvage and combo off from there, or brick on lands in your dredge. You might also dredge into a reshuffler, but as long as you also hit a land, just resolve the reshuffle first and then discard the dredge card in response to the draw.

Note: Always switch to the 'bigger dredge'. If you start the dredge tutor with Life from the Loam, and mill into Golgari Grave-Troll, switch to the troll.

I'm constantly experimenting to find the best possible concoction of cards (tweaking the number of lands for example). I'm considering testing out/coming back to some of these cards:

  • City of Traitors

  • Gemstone Caverns

  • Autumn's Veil

  • Three Visits

  • Lion's Eye Diamond

  • Rain of Filth

  • Final Parting

  • Necromancy

  • Oona's Prowler

  • Vines of Vastwood

  • Blossoming Defense

  • Command Beacon

  • Restore

  • Search for Tomorrow

  • Edge of Autumn

  • Regrowth

  • Golgari Charm

  • Cultivate/Kodama's Reach

  • Rain of Filth

  • Cabal Ritual

  • Shred Memory

  • Crystal Vein

  • Nature's Claim

  • Elvish Reclaimer

  • Wall of Roots

  • Eternal Witness

  • Sakura-Tribe Elder

  • Lotus Cobra

  • Unmask

  • Nissa, Vital Force

  • Manabond

  • Slippery Karst

  • Plunge into Darkness

Note: Some of these are very loose ideas, without much reasoning going on. It's just a list of cards that could possibly fit into the deck when built in a particular way.

Suggestions

Updates Add

Comments

Attention! Complete Comment Tutorial! This annoying message will go away once you do!

Hi! Please consider becoming a supporter of TappedOut for $3/mo. Thanks!


Important! Formatting tipsComment Tutorialmarkdown syntax

Please login to comment

Date added 5 years
Last updated 3 years
Legality

This deck is Leviathan legal.

Rarity (main - side)

7 - 0 Mythic Rares

41 - 0 Rares

20 - 0 Uncommons

21 - 0 Commons

Cards 100
Avg. CMC 1.95
Folders Ideas for Later
Votes
Ignored suggestions
Shared with
Views