
Lantern Control [A Beginner's Guide {in Progress}]
Modern Artifact BUG (Sultai) Competitive Control Five Color Prison
Artifact (25)
Land (18)
Sorcery (12)
Planeswalker (1)
Instant (4)
Sideboard
Artifact (5)
Instant (4)

What is Lantern Control?
Lantern Control is a prison deck that attempts to lock down your opponents and deny them resources that is needed for them to win the game. Instead of just trying to counter everything they play, the Lantern player tries to keep the opponent from getting the cards they need at all. When you have the "lockdown," the game goes at your pace, and your end goal is to either mill out your opponent or have them scoop due to you controlling most, if not all, of the cards they draw.
Lantern Control is a more skill-intensive deck, and requires more knowledge of other decks being played and the current meta compared to more linear decks like Burn and Dredge. The player, through practice and study, ultimately will decide which cards, given the current board state, for their opponents to keep (e.g. lands and dead cards) and which to pitch away (e.g. creatures, combo pieces, etc.) during the course of the game when trying to win.
What's very nice about Lantern Control compared to a lot of other decks is the sheer amount of customization and personalization you can do with your list. Pretty much all cards outside of the main lockdown combo can be changed if you so desire, either to account for a different meta or for your own playstyle. This isn't something that is very common with Modern decks, especially ones with a more linear line of play.
Over the course of this primer, I will show you the main core of the deck, required cards and personalization and the reasons to play them, sideboard options, matchups, and maybe a few tips and tricks to help you out.
In the early game, cards like Inquisition of Kozilek and Thoughtseize help tear apart our opponent's early game plans, and something like Collective Brutality can take care of early game creatures that get through our early disruption.
Over the course of the game there are many utility cards that are at your disposal to help stop the opposing deck (e.g. Ensnaring Bridge for creature decks or Pithing Needle for decks like Tron) as we assemble our lock.
As the game progresses, we are able to build up more mill pieces to speed up the process and to have more shots at milling important cards away from our opponent. By the end, we would have eventually milled out our entire opponent's deck by making correct choices on what to allow our opponent to draw and what to mill away. Choosing what to mill away takes practice and will depend on the matchup.
Maindeck
These are the pieces needed to stifle our opponent's resources. Note that we don't need each of these 4 cards to create that lock. Having multiple mill rocks + Lantern of Insight on the field is ideal.
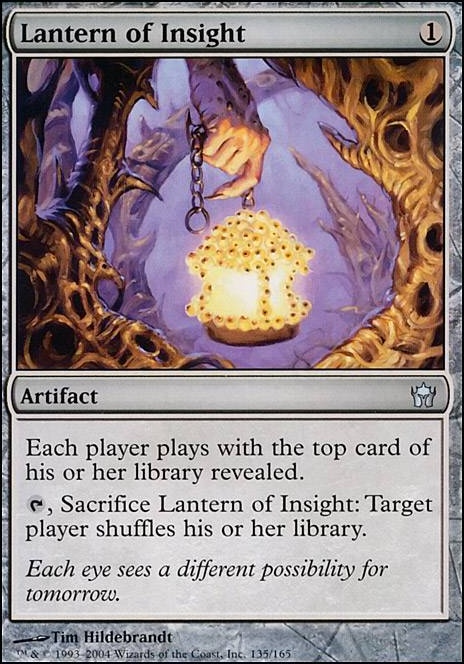
Lantern of Insight - Arguably your most important piece. Without it, you're just blindingly milling your opponent, which can be a huge problem with the number of graveyard decks and recursion that is in the format currently. It also just provides us the information we need on when to pull the trigger on an activation from one of our mill rocks. The shuffle ability should be used only as a last resort, though Academy Ruins makes sacrificing it a little less painful.
Codex Shredder - One of our main mill pieces. The second ability can be handy when an important piece got milled or destroyed.
Ghoulcaller's Bell - Another main mill piece. Bell can get around something like Leyline of Sanctity due to it not targeting, which you might see after your opponent sees all of your discard.
Pyxis of Pandemonium - Similar to Ghoulcaller's Bell, though exiles instead of milling. It's very helpful against graveyard decks and Snapcaster Mage , though it goes against Academy Ruins , so do use with more caution. The second ability is rarely used, though if you're clever enough you might be able to get it to work in your favor.
These cards are used to find utility pieces, Lantern of Insight, and as many mill pieces as we can. The more the better!
Ancient Stirrings - A pretty self-explanatory card. Helps dig a few off the top to help find a key piece or a land.
Narset, Parter of Veils - A reusable pseudo-Ancient Stirrings, minus the land clause. Her static ability can be problematic for decks like Phoenix, U/W Control, and Storm.
Whir of Invention - Due to all but 2 of our lands creating blue mana, the in the mana cost is no problem. Our artifacts can help pay for the spell, getting a key piece we need straight out of the library.
Inventors' Fair - Having pseudo-Metalcraft, sacrificing it gives us a one-time tutor for any artifact in our deck.
These cards are great early-game plays and help throw off our opponent, or at least slow them down a bit.
Inquisition of Kozilek - A lot of Modern decks have a majority of cards that have a converted mana cost of 3 or less, so Inquisition can catch a lot of cards without the loss of 2 life that comes with Thoughtseize.
Thoughtseize - Our catch-all discard spell. Great for stripping away problematic cards that Inquisition of Kozilek can't catch. Inventors' Fair helps regain back the 2 life lost.
Collective Brutality - Great against decks with small creatures, burn spells, or counter spells. It can take care of annoying X/2 creatures that come out before we can discard them away ( Meddling Mage being a great example).
These cards are match-specific and give us an edge against other decks.
Ensnaring Bridge - A majority of Modern decks use creatures as their win condition, and because we can dump our entire hand pretty quickly, we can have our opponent locked out from attacking turn 3.
Use against: Humans, Dredge, Phoenix, Amulet Titan, Hogaak Bridgevine, Death's Shadow, Eldrazi, Hollow One, etc.
Grafdigger's Cage - It doesn't hurt to have better game 1 chances against graveyard decks, does it?
Use against: Dredge, Phoenix, Hogaak Bridgevine, Grishoalbrand
Pithing Needle - One of our best utility cards, it can shut down many plans. (Good choices against each matchup will be outlined in the matchup section of this primer)
Use against: Tron, Dredge, Amulet Titan, Affinity, U/W Control, etc.
These cards give us more value, more mana, or help protect our stuff from interaction from our opponent.
Mishra's Bauble - A multi-use card, it turns on Mox Opal , acts as a single-use Lantern of Insight , and just replaces itself when you need an extra card.
Mox Opal - An effective mana-producer, it helps us go a bit faster in setting up our lock, or getting out something like Ensnaring Bridge before our opponent has a chance to kill us with their creatures, for example.
Welding Jar - Artifact destruction is going to imminent against this deck. Ancient Grudge , Kolaghan's Command , and Nature's Claim being the biggest. Jar also helps turn on Mox Opal
Academy Ruins - A very handy land that helps us get pieces back that were either milled, discarded, or destroyed.
Botanical Sanctum - U/G fastland that provides fast green mana for a potential turn 1 Ancient Stirrings .
Darkslick Shores - U/B fastland that provides fast black mana for a potential turn 1 Inquisition of Kozilek or Thoughtseize .
Glimmervoid - As long as you play Glimmervoid correctly (e.g. not playing it when you only have 1 artifact to play), you typically don't have to worry about the downside. Provides any color of mana for the myriad of different spells in the deck.
Inventors' Fair - Having pseudo-Metalcraft, the extra 1 life per turn can be very handy, and as previously mentioned, has the tutoring effect.
Island - Blue mana. Luckily we don't have a lot of Blood Moon floating around currently.
Spire of Industry - A mixture of Glimmervoid and Mana Confluence .
Personalization:
Glint-Nest Crane - Use this over Ancient Stirrings if you prefer paying an extra mana for a 1/3 flier. One downside to Crane is it cannot grab lands.
Surgical Extraction - This card can permanently take care problematic cards or combo pieces.
Infernal Tutor - Due to this deck emptying its hand quickly, you could possibly have a turn 3 Demonic Tutor .
Pyrite Spellbomb - Another possible small creature removal spell. Pairs nicely with Academy Ruins .
Mikokoro, Center of the Sea - Some lists run one of these as an extra way to draw a card, and, combined with a mill rock, could force your opponent to draw a dead card, therefore giving you all the benefit.
Mana Confluence - If your build runs a lot more colored cards that span the color spectrum, you might consider one or two of these to be able to reliably cast them.
Nephalia Drownyard - Another mill piece that could be useful if your opponent is somehow able to deal with all of your mill rocks.
Alternate Win Conditions:
Thopter Sword combo - The classic combo of Thopter Foundry and Sword of the Meek . Have both on the field, sacrifice Sword to Foundry by paying , create a 1/1 flier and gain 1 life, Sword then returns to the field attached to the token, then rinse and repeat for as much mana as you have.
Tezzeret, Agent of Bolas - Not only does he dig for more pieces, he can also just turn your artifacts into 5/5 beaters, then win through his ultimate.
Mirrodin Besieged - Paired with something like Arcbound Ravager , this could potentially create a very spicy alternate win-con.
Sideboard
The sideboard in this decklist is a good all-around 15 for if you're unsure of the meta at your particular tournament or at Magicfests or Mythic Championships. Feel free to play around with the numbers or use alternates (listed in the next panel) to work with your meta. The "Use against" section of each card is just for examples, and don't represent all of the potential matchups that card might be usable against.
Ancient Grudge - A good catchall to problematic artifacts, namely Chalice of the Void , as Chalice is typically set at 1, and is a card that can singlehandedly shut us down. Flashback gives it another use if another Chalice is played after the first is destroyed.
Use against: Tron, Amulet Titan, Affinity, Lantern Control, Prison
Ghirapur AEther Grid - A great backup plan against decks with small creatures or Planeswalkers, and provides us an out to cards like Stony Silence and Collector Ouphe .
Use against: Humans, Affinity, Spirits, Infect, Tron
Leyline of Sanctity - Discard spells, burn spells, or anything that targets us are pretty annoying, so Leyline helps us avoid those. They can also be good fodder for Collective Brutality if you draw one after the start of the game.
Use against: The Rock, Jund, Burn, Titanshift, Storm
Assassin's Trophy - A good catchall spell for any problematic permanent.
Use against - U/W Control, Tron, Amulet Titan, Titanshift, Jeskai Saheeli
Nihil Spellbomb - This is my personal go-to graveyard removal piece, because it can be dug for or searched up with Whir of Invention . Drawing a card off of it is handy, too.
Use against - Dredge, Phoenix, Hogaak Bridgevine, Storm
Pithing Needle - An extra one for those decks that have a lot of activated abilities.
Pyroclasm - Another good card against small creature decks.
Use against: Humans, Dredge, Phoenix, Infect
Torpor Orb - A great card against cards like Snapcaster Mage , Primeval Titan , or Humans
Use against: U/W Control, Humans, Amulet Titan, Titanshift
Witchbane Orb - An artifact Leyline of Sanctity , mainly in the sideboard to be searched up with Whir or Ancient Stirrings.
Use against: The Rock, Jund, Burn, Titanshift, Storm
Damping Sphere - Great against decks like Tron, Amulet Titan, and Storm.
Rest in Peace - If you prefer enchantment-based graveyard removal. It has that "get out and stay out" thing going.
Tormod's Crypt - Use this over Nihil Spellbomb if you prefer it being free over getting a cantrip.
Leyline of the Void - If fast graveyard decks are very rampant in your meta.
Nature's Claim - If you require very mana-efficient enchantment or artifact removal. The lifegain is irrelevant unless you're playing against Martyr Proc or Soul Sisters.
Surgical Extraction - Permanently deals with problematic cards that have already hit the graveyard. Useful against graveyard decks or other cards that mess with you.
Liliana's Triumph - For Griselbrand and Emrakul-based combo decks. Better than Diabolic Edict due to it not targeting.
Anger of the Gods - Use over Pyroclasm if you play more lands that tap for any color.
By Matchup
Here is a list of 10 decks you're more likely to come across. In each section, I will list the more important cards to pitch away with your mill rocks (sideboard cards won't be listed, due to variance), what utility cards are handy, what to name with Pithing Needle (if applicable), and some sideboard tips for games 2 and 3.
Humans has a lot of abilities that make our job quite a bit harder. Cards like Meddling Mage , Thalia, Guardian of Thraben , Deputy of Detention , Kitesail Freebooter , and Collector Ouphe in the sideboard make setting up our lock fairly difficult even game 1. As such, saving your Collective Brutality until the right moment is going to be key, though you might need to either use it quickly before Thalia's Lieutenant gets it out of range or power out your artifacts while they're trying to set up. Ensnaring Bridge is going to buy you quite a bit of time, but watch out for Noble Hierarch as it can attack under it, even when you have an empty hand. I would prioritize putting out Lantern of Insight over a mill rock turn 1 if you have both in hand, as that would probably be their first target with Meddling Mage and Freebooter. If Lantern is taken out, however, typically you're safe by milling away blind, as Humans doesn't usually run recursion.
Cards to mill away:
Which card to pitch will depend if you have Ensnaring Bridge on the field. If you don't, pitch any creature. If you do:
- Meddling Mage
- Thalia, Guardian of Thraben
- Kitesail Freebooter (unless you're empty-handed)
- Deputy of Detention
- Noble Hierarch
What to Needle:
Game 2 and 3:
Torpor Orb is going to be your godsend. Most of the effects used against you are going to be ETB effects, but do keep Academy Ruins at the ready if at all possible because artifact removal or counter spells are possible. Ghirapur AEther Grid helps out a lot in taking down pesky creatures, and Assassin's Trophy can also be a very handy pull-in for an all-around hitter.
Bring in:
Take out:
Three words: Kill Eidolon immediately (referring to Eidolon of the Great Revel ). Because you don't win by damage, Eidolon is going to be all bad for you and no bad for your opponent. Inventors' Fair is going to be a big help as to give you a bit of a buffer. Other than that, your primary objective is just to survive until you can stabilize. Unfortunately there really isn't a way to deal with direct burn spells, so a mainboard Witchbane Orb might be handy if you have a heavy Burn meta. Other than that, Ensnaring Bridge is going to help you take the least amount of damage from creatures, though they will probably get one or two attacks in before you can drop it.
Cards to mill away:
This is another matchup that depends on if you have Ensnaring Bridge . If you do:
- Any burn spell
- Eidolon of the Great Revel
What to Needle:
Game 2 and 3:
Do expect artifact and enchantment removal, namely Smash to Smithereens , Wear , and Destructive Revelry if you play against a Naya variant. Typically, that's really the only out that Burn has against you. When you sideboard against Burn, Hexproof will save you the most, so Leyline of Sanctity and Witchbane Orb are auto-includes. Pyroclasm will take down their creatures no problem, though they might try to save Monastery Swiftspear . You might also consider Assassin's Trophy and Ghirapur AEther Grid if you feel like you need more targeted removal, again, typically for Eidolon of the Great Revel .
Bring in:
Take out:
There's no sugarcoating it. Tron is tough. They have many cards even in their original 60 that are good against you. While you definitely need to watch for all of their threats, your 3 biggest problem cards against Tron in the mainboard are definitely Karn, the Great Creator , Oblivion Stone , and Blast Zone . If KGC (Karn, the Great Creator) comes down against you game 1, you probably shouldn't waste your time and should probably scoop, so having a Thoughtseize against them is going to be your best bet. If they don't have any of those cards, you might go after Expedition Map as that can find their Blast Zone. Ulamog, the Ceaseless Hunger can take care of your Ensnaring Bridges so they can get at you, and they can recur World Breaker from the graveyard.
This is a matchup where you really need to evaluate the opponent's hand when deciding what to choose to take away with Thoughtseize. KGC is probably a top priority, because it's one of their cheaper spells in their deck so they can cast it pretty easily even when Tron is not active, not to mention it completely stops your deck. If you've noticed they kept a slower hand, taking away things that get them lands should give you enough time to settle in. Likewise, if they can get Tron on turn 3, you might start taking the more impactful threats. Pithing Needle is an all-star in this matchup, as it can stop their Planeswalkers, Walking Ballista , Oblivion Stone, and Blast Zone.
SOMETHING TO NOTE: Chromatic Sphere is a tricky card. Because its ability is a mana ability, you cannot respond to it, so you cannot mill their top card when they try to crack it to draw.
Cards to mill away:
- Walking Ballista
- Ulamog, the Ceaseless Hunger
- Emrakul, the Promised End (if applicable)
- Karn, the Great Creator
- Karn Liberated
-
Ugin, the Spirit Dragon

- Chromatic Sphere
- Expedition Map
- Oblivion Stone
- Blast Zone
What to Needle:
- Any Planeswalker
- Walking Ballista
- Oblivion Stone
- Blast Zone
Games 2 and 3:
Suggestions
Updates Add
Comments
Attention! Complete Comment Tutorial! This annoying message will go away once you do!
Important! Formatting tips — Comment Tutorial — markdown syntax
Please login to comment
Revision 3 See all
(5 years ago)
| +3 | Assassin's Trophy | side |
| -1 | Ensnaring Bridge | side |
| -2 | Nature's Claim | side |
| Date added | 5 years |
| Last updated | 5 years |
| Legality | This deck is Modern legal. |
| Rarity (main - side) | 10 - 1 Mythic Rares 28 - 8 Rares 15 - 4 Uncommons 5 - 2 Commons |
| Cards | 60 |
| Avg. CMC | 1.24 |
| Folders | Cool decks |
| Votes | |
| Ignored suggestions | |
| Shared with | |
| Views |