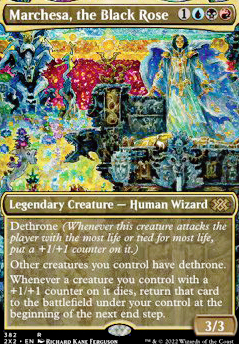

Marchesa's Grave Affair
Commander / EDH Aristocrats Infinite Combo Primer Reanimator Sacrifice Treasure UBR (Grixis) Value Engine


Land (32)
-
1x
Ancient Tomb

- 1x Arid Mesa
- 1x Badlands
- 1x Blood Crypt
- 1x Bloodstained Mire
- 1x Cephalid Coliseum
- 1x City of Brass
- 1x Command Tower
- 1x Exotic Orchard
- 1x Flooded Strand
-
1x
Island
- 1x Luxury Suite
- 1x Mana Confluence
- 1x Marsh Flats
- 1x Misty Rainforest
- 1x Morphic Pool
-
1x
Mountain
- 1x Phyrexian Tower
- 1x Polluted Delta
- 1x Reflecting Pool
- 1x Scalding Tarn
- 1x Steam Vents
-
1x
Sulfurous Springs
-
1x
Swamp
-
1x
Underground River
- 1x Underground Sea
- 1x Urborg, Tomb of Yawgmoth
- 1x Urza's Saga
- 1x Verdant Catacombs
- 1x Volcanic Island
- 1x Watery Grave
- 1x Wooded Foothills
Enchantment (8)
Creature (26)
-
1x
Aether Channeler
- 1x Atsushi, the Blazing Sky
- 1x Baleful Strix
-
1x
Body Launderer
-
1x
Braids, Arisen Nightmare
- 1x Carrion Feeder
- 1x Dauthi Voidwalker
- 1x Dockside Extortionist
-
1x
Glen Elendra Archmage
- 1x Grim Haruspex
- 1x Imperial Recruiter
-
1x
Iron Apprentice
- 1x Junji, the Midnight Sky
-
1x
Kalain, Reclusive Painter
-
1x
Matter Reshaper
- 1x Metallic Mimic
- 1x Midnight Reaper
- 1x Opposition Agent
- 1x River Kelpie
- 1x Ruthless Technomancer
-
1x
Sage of Fables
- 1x Spellseeker
-
1x
Tribute Mage
-
1x
Viscera Seer
-
1x
Yahenni, Undying Partisan
- 1x Yawgmoth, Thran Physician
Sorcery (9)
Commander (1)

Artifact (14)
- 1x Altar of Dementia
-
1x
Arcane Signet
- 1x Ashnod's Altar
-
1x
Dimir Signet
-
1x
Fellwar Stone
- 1x Mana Crypt
- 1x Phyrexian Altar
-
1x
Pyre of Heroes
-
1x
Rakdos Signet
- 1x Skullclamp
- 1x Sol Ring
-
1x
Talisman of Creativity
-
1x
Talisman of Dominance
-
1x
Talisman of Indulgence
Instant (9)
- 1x Brainstorm
- 1x Cyclonic Rift
- 1x Deadly Rollick
- 1x Fierce Guardianship
-
1x
Fire Covenant
-
1x
First Day of Class
- 1x Mana Drain
- 1x Swan Song
- 1x Vampiric Tutor
Planeswalker (1)
Marchesa's Grave Affair is a midrange combo deck for high power, casual EDH. It looks to grind value in the early turns by using Marchesa to repeatedly reanimate creatures while also making our boardstate hard to interact with; and then turning that advantage into a combo win during turns 5-7.
Average CMC when counting free spells like Deadly Rollick is 2.28
You can also find this deck on Moxfield. This is also where this primer was made so the formatting will be a lot better on there and I recommend viewing it on there as opposed to here.
The Pinnacle of Ambition
Marchesa's Grave Affair
You take everything, and you give nothing back. Every moment is an opportunity, and everything within your reach is at your disposal. Ambition waits for no one, so neither should you.

-
You enjoy infinite combos
-
You like making risky plays
-
You like messing with the graveyard
-
You like creature based strategies
-
You don't enjoy decks that rely on the commander more heavily
-
You don't like being on low life and close to death
-
You don't like infinite combos
-
You don't like creature based strategies

This is a great opening hand that will be kept every time. It's got everything I need and Feed the Swarm for interaction that can hit enchantments is really useful to have in the opening hand. This hand is also very "self-contained" i.e. it is not relying on draws during the early turns to set up for the mid game; I can turn 1 Viscera Seer, turn 2 Talisman of Dominance, turn 3 Marchesa, the Black Rose and turn 4 will depend on what's been drawn and played by the opponents but there's card draw and removal still in hand when needed.

Another good hand to keep. Kalain is an all star as having a turn 3 Marchesa with a counter is very strong. It is relying on drawing that third land to do so but missing that, I am still able to play Rhystic Study turn 3 to dig through the deck. One of the sac outlets is redundant as they are both able to kill so it would usually be better off being something else like a tutor or a combo piece but it still has use as it's quite often that I'll have a sac outlet blown up so being able to play a second one when its needed is useful; not the best hand, not the worst either.

Another keepable hand. It is a bit slower and looks a lil clunky with 3 two drops, and Grave Pact is also not that great to have in the opening hand as I would much prefer some form of card draw. However I would still keep because with Arcane Signet we still have all 3 colours, Metallic Mimic is a great card to protect Marchesa the turn she enters, and Imperial Recruiter can get either a sac outlet or card draw depending on what we've drawn. The first few turns with this hand will likely be: nothing turn one unless we happen to draw a 1 drop, turn 2 i would usually arcane signet, turn 3 if I drew a third land would probably be Talisman of Indulgence and Metallic Mimic to allow for turn 4 Marchesa with a counter, if I didn't draw a third land I would probably Imperial Recruiter for card draw like a Baleful Strix.

Initially this looks like a keep; all 3 colours, card draw, ramp, sac outlet, tutor. However we actually are not able to play Kalain, Reclusive Painter on turn 2 so after the turn 1 Carrion Feeder, it is completely reliant on draws making this a very risky hand and considering you get a free mulligan in commander, there are a lot better keepable hands. I would probably keep this after a mulligan or two as the chances of getting another land or a 2 mana rock are high which makes the hand playable albeit slow. It is close to a keep but just not quite there.

Turn 1 Sage of Fables is amazing, however this hand is just a classic example of missing a colour so it should not be kept, even more so that it's missing black as that is the most used colour in this deck. Again after turn 1 this is completely reliant on draws as there is no way to guarentee getting that third colour so you could just be sat there drawing and passing, even when untapping with 5 mana on turn 3.

Another hand that is too reliant on draws. It's got a great mana base, a sac outlet, interaction, protection and hate to slow down opponents that use the gy all of which are decent cards but also some are not really needed in the first few turns of the game and would be much better off being ramp, card draw or both. After turn 2 it's very awkward what you might play and nothing that really gives us enough advantage to accelerate our midgame either.

- Cards: A Persist Creature (Glen Elendra Archmage/River Kelpie) + Metallic Mimic + Sac Outlet
- Mana:
- The persist creature and sac outlet on the battlefield; Metallic Mimic in hand
Sequencing
-
Pay to cast Metallic Mimic.
-
Name any of the creature types on the persist creature you have out for Metallic Mimic.
-
Sacrifice the persist creature to a sac outlet.
-
Persist will trigger and bring back the persist creature.
-
The persist creature will enter with a -1/-1 counter due to persist, and a +1/+1 counter due to Metallic Mimic's ability which will cancel each other out.
-
Repeat from step 3.
Cards: Glen Elendra Archmage + Sage of Fables + Sac Outlet
Sequencing
-
Pay to cast Sage of Fables.
-
Sacrifice Glen Elendra Archmage to a sac outlet.
-
Persist will trigger and bring back Glen Elendra Archmage.
-
Glen Elendra Archmage will enter with a -1/-1 counter due to persist, and a +1/+1 counter due to Sage of Fables' ability which will cancel each other out.
-
Repeat from step 2.
Cards: A Persist Creature (Glen Elendra Archmage/River Kelpie) + First Day of Class + Sac Outlet
Sequencing
-
Pay to cast First Day of Class.
-
Sacrifice the persist creature to a sac outlet.
-
Persist will trigger and bring back the persist creature.
-
The persist creature will enter with a -1/-1 counter due to persist, and a +1/+1 counter due to First Day of Class which will cancel each other out.
-
Repeat from step 2.

- Cards: Ruthless Technomancer + Dockside Extortionist + Sac Outlet
- Mana:
- Ruthless Technomancer and a sac outlet on the battlefield; Dockside Extortionist in hand and there being at least 5 artifacts or enchantments under opponents' control.
Sequencing
-
Pay to cast Dockside Extortionist.
-
Dockside Extortionist enters and creates 5 treasures.
-
Sac Dockside Extortionist to the sac outlet.
-
Cracking 3 treasures, activate Ruthless Technomancer's ability to sacrifice the other 2 treasures and bring back dockside from the graveyard.
-
Repeat from step 2.
Cards: A Persist Creature (Glen Elendra Archmage/River Kelpie) + Thran Vigil + Sac Outlet
Sequencing
-
Pay to cast Thran Vigil.
-
Sacrifice the persist creature to a sac outlet.
-
Persist will trigger and bring back the persist creature.
-
The persist creature will enter with a -1/-1 counter due to persist, and Thran Vigil will trigger.
-
Choose the persist creature as a target for Thran Vigil's triggered ability which will put a +1/+1 counter on it, cancelling out the -1/-1 counter.
-
Repeat from step 2.
Notable Inclusions
-
Urza's Saga: It can tutor for Iron Apprentice, Skullclamp, Mana Crypt and Sol Ring making it incredibly versatile as it can be turned into protection/support, card draw or ramp depending on what I need more.
-
Ancient Tomb: Amazing mana acceleration that can put you a turn ahead which is huge most of the time.
-
Phyrexian Tower: Again another example of amazing mana acceleration and it sacs creatures which is what I want to be doing most of the time.
Notable Exclusions
-
City of Traitors: While it is an amazing form of mana acceleration, this deck can't abuse this land that well as it isn't looking to combo off really early on which is when this land would be most useful, and drawing it a bit later could have a huge downside as this deck has a low land count so if i needed to paly another land, putting myself down a land can really hurt going into the late game.
-
Xander's Lounge: Just not a huge fan of taplands, it might make it's way into the deck one day but atm just don't like it that much.
-
Flooded Strand/Marsh Flats/Wooded Foothills: I only run 6 fetchlands since I don't have the ABUR duals. Once I get all 3 shocklands out, the fetchlands become worse than any of the duals I'm running as they can then only fetch basics. It's basically giving up a lil bit of early game consistnecy to make sure i have enough different colour pips for the mid and late game as there are quite a few cards that need multiple colour pips.
Notable Inclusions
- Kalain, Reclusive Painter: An absolutely amazing turn 2 play, gives you a turn 3 Marchesa with a counter which is so strong as she is instantly protected rather than having to wait a turn.
Notable Exclusions
- Dark Ritual/Cabal Ritual/Culling the Weak: These are very good for a sudden burst of mana acceleration, but this isn't really what this deck is looking to do as it doesn't tend to have sudden explosive turns, it's much better at exponentially grinding value until I'm able to attempt a win with protection.
Notable Inclusions
-
Atsushi, the Blazing Sky: I love this card, mana when its needed, card advantage when it's not. The versatility combined with the value it gives is so good
-
Sage of Fables: While technically she can be draw, I don't rely on her to be a draw engine since it's very inefficient as I've got to sink mana into her; she is much more of a combo piece and also protection than reliable draw.
Notable Exclusions
- Wheel of Fortune/Windfall/Wheel of Misfortune: Similar to why I don't include rituals; this deck just isn't looking for sudden explosive turns which makes wheels very dangerous as you effectively are just refilling opponents hands without using most of the cards you just drew.
Notable Inclusions
-
Step Through: For 2 mana at instant speed it is able to get pretty much anything you would need like card draw, a combo piece, a sac outlet, ramp and removal.
-
Pyre of Heroes: Pod effects are really strong, especially when I can get the sacrificed creature back too. This deck does have some strong pod lines, most notably turning a Sage of Fables into a Glen Elendra Archmage which can then be infinitely sacrificed when Sage of Fables comes back.
Notable Exclusions
- Mystical Tutor: As strong as it is, this deck's combos are more creature based and I have Spellseeker to repeatedly tutor most of the relevant cards this can grab anyway.
Notable Inclusions
- Aether Channeler: Amazing value and versatility from this card; removal when needed, card draw when not.
Notable Exclusions
-
Damnation: I feel like I have enough boardwipes already, and with the number of tutors, finding one when necessary shouldn't be an issue, adding this would just bloat up the deck a little I feel.
-
Vandalblast: It's a cute effect I guess, i wouldn't really wanna pay 5 mana for the overload as I don't think it's that good unless against an artifact creature based deck. This deck doesn't run any specific artifact destruction on a similar basis; there aren't really any artifacts that are commonly played that cause a pain for this deck.

Humans: Kalain, Reclusive Painter --> Aether Channeler/Grim Haruspex/Imperial Recruiter/Opposition Agent/Spellseeker/Tribute Mage --> Ruthless Technomancer/Yawgmoth, Thran Physician
Wizards: Aether Channeler/Grim Haruspex/Sage of Fables/Spellseeker/Tribute Mage --> Glen Elendra Archmage/Ruthless Technomancer
Rogues: Dauthi Voidwalker --> Opposition Agent --> Body Launderer
Dragons: Atsushi, the Blazing Sky --> Junji, the Midnight Sky
Join the Marchesa, the Black Rose discord to discuss all the different ways to brew her, and also get feedback on certain cards/starting hands/combos etc:
Suggestions
Updates Add
Comments
Attention! Complete Comment Tutorial! This annoying message will go away once you do!
Important! Formatting tips — Comment Tutorial — markdown syntax
Please login to comment
| Top Ranked |
|
| Date added | 2 years |
| Last updated | 1 year |
| Legality | This deck is Commander / EDH legal. |
| Rarity (main - side) | 10 - 0 Mythic Rares 63 - 0 Rares 13 - 0 Uncommons 11 - 0 Commons |
| Cards | 100 |
| Avg. CMC | 2.57 |
| Tokens | Bird 1/1 W, Bird 2/2 U, Construct 0/0 C, Emblem Dack Fayden, Morph 2/2 C, Shapeshifter 3/2 C, Treasure |
| Folders | Inspiration, interesting, Stealing, Marchesa, the Black Rose Thoughts and ideas |
| Votes | |
| Ignored suggestions | |
| Shared with | |
| Views |