pie chart

Return Of The Ur-Dragon: A Budget Dragon Primer

Commander / EDH Battlecruiser Budget Casual Dragons Flying Haste Midrange Primer

Decidares


Maybeboard


This Primer is also...

  • Available and being updated on Moxfield: https://www.moxfield.com/decks/Lb57UKphDkS9bPGniSXzGg
  • Available in a super budget form on Moxfield: https://www.moxfield.com/decks/DqLH3gVZnkShkoE_0fsQrA
  • Available in a budgetless and high power form: https://www.moxfield.com/decks/wwXorU_-WEyfRkN5vRvIlg
  • Regularly updated to preserve budget in the face of draconic price inflation.
  • Constantly being playtested; see the decklist I am currently using and playtesting here: https://www.moxfield.com/decks/9bg5_e1EzEy1KSAw1rmEuA

Background

"I am the blood of the Ur-Dragon, coursing through all dragonkind".

My interest in Commander (and Magic the Gathering, really) began with dragons, headed by the mighty The Ur-Dragon. The deck was very enjoyable, and won quite a few games, but I realized it was lacking. Among other qualities, it lacked the speed, consistency, and intricacy that opposing commanders tended to field. It didn't take long before I realized my success was primarily due to commander politics, without which my deck would inevitably lose, especially against decks with combo potential and consistent removal.

So I sought power, and my quest for power transformed my original deck into one headed by Scion of the Ur-Dragon. My upgraded Scion of the Ur-Dragon deck was potent, but my newfound power was cursed [1]. My first game scarred my playgroup with the dreaded "30 Damage" combo (Scion of the Ur-Dragon + Scourge of Valkas + Rite of Replication). Stunned by the power spike, I refused to play Scion of the Ur-Dragon until my friends had upgraded their decks. I thought I had the patience to wait, but I couldn't resist: I released Scion of the Ur-Dragon against my unprepared significant other and her kin. After having their life totals reduced by 1 damage increments an essentially infinite number of times (Scion of the Ur-Dragon + Niv-Mizzet, the Firemind + Curiosity) over a game or two or several, my significant other now has an irrational hatred of dragons regardless of whether they be aligned with or against her. Needless to say, I seldom get to play my Scion of the Ur-Dragon deck.

I had alternative decks, but they paled in comparison to Scion of the Ur-Dragon; and more importantly, I missed playing dragons. Realizing my Scion of the Ur-Dragon deck now had little resemblance to the original Draconic Domination precon it began as, and realizing a desire to return to my roots, I used the dilapidated shell of my original The Ur-Dragon deck to create a deck headed by Wasitora, Nekoru Queen. I enjoyed using Wasitora and her adorable dragon-kittens, but I couldn't help but notice the deck was inferior to my original The Ur-Dragon deck in every aspect... It was missing something, and I sought to capture the original joy I felt when playing commander. As I sipped upon a fruity boba green tea, I experienced an epiphany, recalling a conversation with a student of mine that revolved around the following quote:

“I wish there was a way to know you're in the good old days before you've actually left them.” - Andy Bernard

My good old days were spent with me turning a wide yet tall variety of mighty dragons sideways. My good old days were characterized by me casting cost reduced dragons. My good old days were spent creating storms that spawned dragons! I took out The Ur-Dragon from my haphazardly reused matte black Dragon Shield sleeve, I stared at the primordial essence of all dragonkind... and The Ur-Dragon stared back. Seemingly blind yet penetrative, it pierced through illusion and darkness to reveal a deep truth concealed in a well of infinite time. A faint yet bellowing roar transcended entire planes to echo:

"Burn away the burdens of mortality."

"Scatter the seeds of devastation and sweep away all opposition!"

"For you are the blood of the Ur-Dragon, coursing through all dragonkind!"

And so I sat down, deconstructed a deck or two, and began shaping a relatively budget deck that would embody the Return Of The Ur-Dragon.

In all seriousness, I forget what adaptations I made to the original precon, but I just wanted to make a good, casual dragon deck within the upper limit of my playgroup's budget. I've come across several lists that seem reputable, but are also far outside of my budget. This deck is an attempt to reconcile budget and efficacy.

Deck Strategy

"The fear of dragons is as old and powerful as the fear of death itself".

I do not consider anything I write here to be novel, rather they are common strategies that work in my playgroup that I have accumulated over many games of watching and playing Magic, Hearthstone, and Starcraft.

I see each game as having three broad phases: the early game, the mid game, and the late game. The early game consists of land drops and mana acceleration. The mid game consists of sparring between players as they strive to either win or set up for the late game. And the late game is the stage where each turn can be the game's fiery culmination.

In my playgroup, this deck excels just as the late game begins, but before true control decks can take the reign, so my key to success is to persevere until then. It's challenging to survive against targeted removal or concentrated attacks, so I strive to not be perceived as the most powerful player at the table. Yes, I try to be as efficient as possible, and at least have blockers so as not to be the early game punching bag, but I would hesitate to, for example, use a turn 1 Sol Ring unless I have a clear need for the mana next turn (e.g. ramp).

People have a natural albeit justified fear of dragons, and my playgroup has learned to respect it. Although well earned, this fear of dragons frequently leads to poor threat assessment, so I hesitate to play as many dragons as I can each turn (even if it's mana efficient to do so), unless I can see a short path to victory. Not playing dragons each turn is also useful, because it is too greedy to over commit to a board state where each player can be expected to have board clears and answers. Two exceptions are when I need to summon dragons for card draw (e.g. The Ur-Dragon, Elemental Bond, Garruk's Uprising, or Temur Ascendancy) or have negotiated an attempt to defeat an archenemy.

Despite my attempts not to be perceived as the #1 most dangerous player at the table, becoming #1 in both name and reality is inevitable. Ideally this happens just after a group effort to dethrone an archenemy, after which I can cinch a win by out-valuing my opponents through card advantage and high yield spells (i.e. Dragons!). Furthermore, I can rely on using one of the particularly powerful synergies listed in the Deck Synergies section to (re)build a board, apply pressure, or go for the win. It's important to prioritize knocking out players at this point over spreading out damage.

Meta side note: Interestingly enough, I have noticed that the first archenemy almost never wins in my playgroup. So many of my wins have anecdotally taken place just after a group effort to dethrone an archenemy that I actively try not to become the first archenemy unless it cannot be helped (everyone else has a slower deck or has a bad start). In fact, I frequently try to help other players become the first archenemy while ingratiating myself with the group and while preserving my most threatening cards (leaving enough in hand and off the board so that I am not the archenemy) so that I can be in a stronger position after the archenemy is dethroned.

Deck Synergies

"If it comes for you, die boldly or die swiftly--for die you will".

Just like any dragon deck, this deck too will involve setting up our board so we can cast and attack with dragons. Along the way, we will inevitably be able to set up dragon synergies powerful enough to triumph over our opponents. All of our reliable wins will generally fall within 3 types of deck synergies that I will highlight in the following section * How to Chain Ur-Dragon (Greater Good + Sneak Attack) * Dragon Storm (Dragon Tempest + Ancient Gold Dragon) * Other Dragon Synergies

How to Chain Ur-Dragon | Greater Good + Sneak Attack

"There's wisdom to be gained in death--whether it be one's own or someone else's."

This combo has several tiers of power depending on how many pieces we are able to assemble, with the most powerful variant being a combo win.

While having any card draw engine out is synergistic, Sneak Attack is acutely synergistic with Greater Good on the board to the point where it can win most games on the spot. Sneak Attack overperforms if we have Greater Good on the board, because we can sacrifice sneak attacked creatures that are as good as dead (for the greater good) to draw many cards (hopefully more creatures that we can summon to continue digging deep through our deck). The amount of cards we can draw through this synergy is gratuitous, and if we are fortunate enough to draw the cards needed to enable our other win conditions then this ascends from a synergy into a winning combo line. All this is before we even attack with our sneak attack dragons. If we are able to summon Old Gnawbone before combat then we can produce an absurd amount of treasures to continue the Sneak Attack feedback loop. Furthermore, if we are able to summon Knollspine Dragon after combat then we can continue to draw an exorbitant amount of cards.

  • This is one of the scenarios where a relatively unlikely Patriarch’s Bidding win becomes very viable. To clarify, the winning combo line involves drawing into key reanimation cards (e.g Living Death, Patriarch's Bidding) and key protection spells (Stubborn Denial, An Offer You Can't Refuse); during our discard phase we will fill our graveyard with key dragons (e.g. Terror of the Peaks, Scourge of Valkas) to win by casting Patriarch's Bidding or Living Death during our next turn.
    • A Patriarch's Bidding win executed this way is a turn delayed (because we rely on the discard phase to fill our graveyard) graveyard dependent combo, however, so it is relatively fragile; but the fact that it doesn't rely on the combat phase makes it immune to fog effects and niche board states.
    • I elaborate more on this win condition in the following section regarding Patriarch's Bidding.

While Sneak Attack and Greater Good is arguably one of our most potent synergies, the addition of Ganax, Astral Hunter turns this synergy into a winning combo line. As mentioned above, Sneak Attack and Greater Good allow us to summon any creature in our hand for and then sacrifice it to draw deep into our deck to continue the chain. As liberating as this is, we can be limited by the amount of we have at our disposal. Ganax, Astral Hunter removes this limitation by producing 1 treasure token for each dragon that we sneak attack onto the board, removing our limitation. Now that we are not limited by mana, we can continually summon, sacrifice, and draw dragons to the point where we can draw our entire deck and summon each dragon in it with Sneak Attack and Greater Good!

  • Because you can draw into and summon every dragon from your deck, you will eventually be able to summon enough indirect damage dealing dragons (e.g. Scourge of Valkas, Terror of the Peaks) to win off triggers alone.
  • If necessary, we can still cast net a positive amount of mana through Goldspan Dragon (which allows each treasure to be worth two mana) to cast key noncreature spells like Dragon Tempest to still win off indirect damage or Patriarch's Bidding if key dragons are in the graveyard instead of your deck/hand.
  • The addition of Phyrexian Reclamation to this combo allows us to recast the same dragon we just sacrificed. In other words, we can double dip with dragon triggers and ensure we always have a dragon to sacrifice for the greater good.
  • This combo allows us to draw into all the counterspells necessary to protect itself if we have the right colors of mana.
  • Two caveats to this combo, however, is that it can fail if...
    • You are unfortunate enough to not draw into any dragons that you can continue to summon and sacrifice. However, odds are likely that you will be able to draw into and sneak attack out token producing dragons (e.g. Lathliss, Dragon Queen, Miirym, Sentinel Wyrm) that you can sacrifice instead before combat begins. Furthermore, the addition of Phyrexian Reclamation can trivialize this caveat, because we could then recast creatures from our graveyard.
    • You don't have enough cards in your library (or you don't have the right dragons in your library) to execute this combo. If this is true then you must rely on the Patriarch's Bidding win described above or attain victory through conventional means.

I’ve had many games where Greater Good alone was able to draw into Sneak Attack, which allowed me to execute the above lines of play and win the game, which is all the more satisfying if your opponents considered you to be dead in the water and expected you to lose on the next upkeep.

Dragon Tempest + Ancient Gold Dragon

"Gold dragons are the greatest of the metallic dragons in size, power, and wisdom, and often take it upon themselves to safeguard motal communities from evils that might threaten them."

This synergy will not guarantee a win, but it provides a minimum of a 50% chance at a win assuming our opponents are at full health and assuming that we have no developed board state. At this stage of the game, chances are high that board states and life totals are low enough that this will win the game for all intents and purposes regardless of whether it be through the destruction of our opponents board states, their life totals, or some combination of both.

Dealing combat damage to an opponent with Ancient Gold Dragon while Dragon Tempest, Scourge of Valkas, or Terror of the Peaks is out can produce up to 20 dragon tokens that can deal damage proportional to the number of dragons produced. This damage can be distributed as optimally as needed depending on the number of dragons produced. This synergy is so potent, that it can end games on the spot if we high roll enough to produce enough dragon tokens. Assuming that opponents are at 40 health each just prior to combat damage from Ancient Gold Dragon alone, we would need to produce at least 12 dragon tokens to defeat each opponent. At the stages of the game that Ancient Gold Dragon can be summoned, however, it is not unreasonable to assume that less than 10 dragon tokens would need to be produced, and you easily would have a >50% chance of winning the game on the spot. Even if you low roll or have Terror of the Peaks out instead of Dragon Tempest or Scourge of Valkas, the amount of damage produced has the potential to clear the board of key creatures as needed.

Patriarch’s Bidding and Living Death

"Death arrives on tattered wings and stolen bones."

Successfully casting Patriarch's Bidding (or Living Death if you're running it) with many key dragons in our graveyard will win enough games on the spot that I would consider Patriarch's Bidding to be a win condition in this deck. However, this win condition is not reliable enough to justify highlighting as a primary deck strategy, because we do not have reliable ways to get many dragons into the graveyard. It is exceedingly useful to execute this win condition and it can be integral to at least one deck strategy in the following sections, however, so I think it deserves an honorable mention here at the very least.

Using Patriarch's Bidding while Dragonlord Kolaghan is in the graveyard or another haste enabler (e.g. Temur Ascendancy) is on the battlefield, while a large number of dragons are in the graveyard, can revitalize our board with hasted dragons that can deal a nontrivial amount of combat damage. The amount of damage possible becomes further compounded by all the additional synergies provided by resurrected dragons.

Using or Patriarch's Bidding while Dragon Tempest is in in play and/or Scourge of Valkas/Terror of the Peaks is in the graveyard, while many dragons are also in the graveyard, can generate a surprising amount of indirect damage. The damage this synergy can deal can be overwhelming in the late game, making it one of our most powerful win conditions if we can set it up.

  • If only Scourge of Valkas or Dragon Tempest is available, then we can calculate the amount of indirect damage we can deal through the equation

P = D x D

where P is the amount of indirect damage possible and D is the number of dragons in our graveyard. For example, resurrecting 7 dragons (D = 7) can deal 49 damage (P = 49) indirectly, enough to KO an opponent from 40 to 0 with extra damage to spare. * If both Scourge of Valkas and Dragon Tempest can be online, then we can calculate the amount of damage possible through the equation

P = D x D x 2

Using our second equation, we need only 5 dragons (D = 5) to deal 50 damage (P = 50) indirectly with extra damage to spare. In the late stage of the game, I can easily have >5 dragons in the graveyard, and life totals are low enough that ~50 damage can end games on the spot if optimally distributed. * The damage Terror of the Peaks can deal is dependent on the creatures summoned, but it is more than capable of dealing a considerable amount of damage. * Finally, the number of dragons produced can be increased dramatically if Lathliss, Dragon Queen is in the graveyard so that each additional dragon resurrected will produce a dragon token to further fuel Terror of the Peaks and/or Scourge of Valkas and/or Dragon Tempest.

Honorable Mention: Hellkite Courser + Friends

"The hellkites are artists with flames, painting the world with fire."

Hellkite Courser isn't a win condition, but I can't help but highlight Hellkite Courser, because it advances our game plan so much that it is the #1 dragon I tutor for in a vacuum. Hellkite Courser is one of the best cards in our deck, and for good reason: so many of our win conditions will organically develop from playing Hellkite Courser. To that end, I highlight some particularly excellent permanents to prioritize (or tutor for) when playing Hellkite Courser.

Summoning Hellkite Courser while Old Gnawbone is in your hand can produce a lot of mana that will facilitate many synergies. Summoning Hellkite Courser will allow us to summon and attack with The Ur-Dragon for the turn. After declaring attacks, we can have The Ur-Dragon place down Old Gnawbone as our free permanent, which will produce at least 10 treasures as The Ur-Dragon deals combat damage. This synergy becomes even more potent if we had previously set up dragons in advance to capitalize on The Ur-Dragon's effect, and this synergy becomes gratuitous if Hellkite Courser was summoned through Sneak Attack. Finally, this synergy is potent enough that I would consider Old Gnawbone and Hellkite Courser to be among the best dragons to tutor for in any scenario, especially if mana is not a concern.

Summoning Hellkite Courser while Greater Good is in your hand can allow us to draw many cards, and hopefully find cards to enable other key synergies. Summoning Hellkite Courser will allow us to summon and attack with The Ur-Dragon for the turn. After declaring attacks, we can have The Ur-Dragon place down Great Good as our free permanent. The Ur-Dragon will return to the command zone regardless, so we can sacrifice it to Greater Good after The Ur-Dragon deals combat damage to draw at least 10 cards. If necessary or possible, we can sacrifice other dragons to continue drawing cards that can enable other synergies.

Summoning Hellkite Courser while Miirym, Sentinel Wyrm on the battlefield allows us to create a free The Ur-Dragon token that we keep and enjoy two The Ur-Dragon triggers. This is very useful even on an empty board, because we can draw twice the amount of cards we normally would've drawn and place down two permanents.

Honorable Mention: Majestic Genesis

*Watch out for its teeth, tail, claws, wings, back, and front."

I can barely justify making one card an honorable mention in our deck strategy, since one card doesn't make a combo or synergy. However, Majestic Genesis is as close to a one card win condition as we can get, because successfully casting this card at the stages of the game where casting it is plausible generally means the game will end with your victory of defeat within the next couple turns.

Casting Majestic Genesis allows us to produce a powerful board state with little effort. I goldfished 30 games with this card the moment it was spoiled, and I recorded the data below: * I had an average of 7.03 permanents produced each cast with a high of 9 3/30 times and a low of 5 (1/30 times). Of those permanents, I had an average of 3.46 lands, 2.36 creatures, 0.8 enchantments, 0.4 artifacts, and 1.97 instants/sorceries. This decklist has evolved since I collected that data, but the main point stands: this decklist can expect to place down an average of 7 permanents with each cast.

Producing 7 permanents with one card is enough to win the game, which means it is also enough to become archenemy. In other words, while I would not hesitate to cast this card, I would be prepared to win or lose within the next couple turns. To maximize the chances of victory, it would be ideal to have some form of setup to capitalize on any of our other strategies (e.g. Dragon Tempest, Greater Good). Post-Majestic Genesis board states can vary dramatically, but even the less ideal results (e.g. 7 lands allowing us to cast additional spells that turn or set up for next big turn) are not the worst. The best can win the game from an empty board (e.g. Dragon Tempest, Scourge of Valkas, Old Gnawbone, Hellkite Courser, Scourge of the Throne, Terror of the Peaks, Greater Good).

Other Dragon Synergies

"An apocalypse in dragon form."

The above win conditions are the primary ways in which we can essentially win the game on the spot. While those are very viable deck strategies, many of our wins can simply be a result of many dragon synergies overwhelming our opponents. Being able to simply cast and swing with massive dragons is one of my greatest joys, and their triggered abilities deliver excellent results. While there are countless dragon synergies, I highlight the noteworthy ones below, many of which I encourage to be combined.

  1. Attacking with Utvara Hellkite while Scourge of Valkas and/or Dragon Tempest and/or Terror of the Peaks are on the battlefield can establish a board full of dragons that can grow exponentially. Left unchecked, Utvara Hellkite can get out of hand quickly. More importantly, Scourge of Valkas and/or Dragon Tempest can deal an amount of indirect damage to opponents proportional to the number of dragons we can generate with Utvara Hellkite.

  2. Using Sneak Attack while we have Garruk's Uprising, or Temur Ascendancy is out will enable us to have a very powerful swing turn. Being able to summon any dragon in our hand for only one mana is advantageous, because of the number of combat based triggers that our dragon synergies rely on. While losing our board presence and card advantage for short term gain can be detrimental over the long run, it would be worthwhile if we have a way to draw cards or want to quickly fill our graveyard for reanimation shenanigans (e.g. Living Death, Patriarch's Bidding). That said, I would advise against doing this if you lack a way to follow up on this (holding dragons in reserve to summon normally and maintain board presence or have reanimation spells). Losing your hand for one bursty swing turn may not be worthwhile if you lack a way to refill your hand and/or cannot thoroughly crippled your opponents.

  3. Summoning Knollspine Dragon after dealing a lot of damage to an opponent can draw a gratuitous amount of cards. While this is possible after any combat phase, this synergy becomes a lot more potent when combined with other damage dealing synergies listed in this section. The high mana value of Knollspine Dragon makes it hard to cast, but having Monster Manual or Sneak Attack out makes this synergy accessible enough that Knollspine dragon is worth tutoring for in the right circumstances.

  4. Summoning dragons while Lathliss, Dragon Queen and Scourge of Valkas or Terror of the Peaks or Dragon Tempest is out can produce a lot of indirect damage.

  5. Making combat damage more efficient by giving dragons double strike with Atarka, World Render or Sylvia Brightspear. Although I may prioritize more mana efficient spells by the time we can do this, summoning Sylvia Brightspear with a The Ur-Dragon trigger can surprise opponents with double strike dragons when they least expect it.

  6. Ganax, Astral Hunter synergizes extremely well with token producing dragons such as Dragon Broodmother, Utvara Hellkite, Lathliss, Dragon Queen, Miirym, Sentinel Wyrm, and Ancient Gold Dragon. Dragon Broodmother would enable Ganax, Astral Hunter to produce at least 4 treasures each turn cycle. Ganax, Astral Hunter essentially turns Ancient Gold Dragon into Ancient Copper Dragon. And of course just about any dragon synergizes extremely well with Miirym, Sentinel Wyrm, but that is especially true here. As honorable mentions, Goldspan Dragon will also notably make each of our treasures worth 2 mana. And Gadrak, the Crown-Scourge can be turned online with Ganax, Astral Hunter too.

  7. Drawing a lot of cards with Dragonborn Champion is easily accomplished with many of our dragons. Scourge of Valkas, Terror of the Peaks, Dragon Tempest are notable ways to draw cards through Dragonborn Champion that are not combat dependent. Furthermore, it's possible to drop Dragonborn Champion as our The Ur-Dragon trigger to unexpectedly draw a nontrivial number of cards.

  8. Having Dragon Broodmother create dragon tokens to serve as blockers or synergize with Kolaghan, the Storm's Fury, Dromoka, the Eternal, or The Ur-Dragon attack triggers.

  9. Summoning key dragons while Miirym, Sentinel Wyrm is in play can produce a powerful board state that augments the potency that all of the above synergies provide very quickly and dramatically. For example, Synergy 1 listed above becomes exponentially more powerful if the dragons were summoned while Miirym, Sentinel Wyrm is already in play.

  10. Having Dragonlord Dromoka out on the battlefield can protect any of these synergies from spells your opponents may be preserving.

Cut Synergies

  1. Attacking with Hellkite Charger and Savage Ventmaw allows for an additional number of combat phases equivalent to the amount of available mana we have. This works by having Savage Ventmaw generate upon declaring attack, which we can use with one additional mana to fuel Hellkite Charger's ability to create additional combat phases at the cost of . This synergy can be even more powerful if we have enough dragons with haste on the battlefield to deal lethal damage, especially if we capitalize on the attrack triggers of dragons like Kolaghan, the Storm's Fury, Dromoka, the Eternal, or The Ur-Dragon. The primary problem is the mana investment and the lack of haste on Savage Ventmaw, which can be circumvented by summoning Savage Ventmaw the turn prior.

  2. Using Sarkhan the Mad's -4 ability with enough dragons on the battlefield to KO an opponent with indirect damage. This has actually been an out for me from board states where I never would have been able to win through conventional damage (e.g. endless fog effects).

  3. Summoning Bladewing the Risen while Lathliss, Dragon Queen or Miirym, Sentinel Wyrm is in play can rebuild a board state very quickly. Assuming Bladewing the Risen can resurrect another dragon, we can create a board of 5 dragons from just 2.

  4. Having Dragonlord Dromoka out on the battlefield can protect any of these synergies from spells your opponents may be preserving.

  5. Having Scion of the Ur-Dragon tutor for any dragon can expedite any of the above synergies.

The Ur-Dragon Turn

"The bane of countless shattered weapons, each a failure to slay her."

Attacking with The Ur-Dragon out on the battlefield is advantageous for obvious reasons, but I consider it important enough to highlight. The ideal hand consists of a healthy amount of ramp that seamlessly transitions into summoning relatively cheap dragons to serve as blockers and disincentivize attacks. After using most of my cards to ramp from the early game to mid game, however, I usually only have a few cards in hand to enter the mid game with. At this stage, my priority is card draw so that we can set up for our time to shine: the late game. If I have Temur Ascendancy, Garruk's Uprising, Elemental Bond, or Greater Good then I continue enjoying the game. At times that I unfortunately lack card draw, however, I must rely on The Ur-Dragon to compensate in what I call The Ur-Dragon Turn.

The Ur-Dragon Turn is the turn where I hard cast The Ur-Dragon with the primary purpose being to draw cards and the secondary purpose being to deal damage with it. The high cost of The Ur-Dragon means it will likely be the only significant spell you can cast this turn, so it is critical to make the most of this turn by spending the prior turn setting up at least 2 dragons on the board to capitalize on The Ur-Dragon's effect. Setting up for The Ur-Dragon Turn to maximize the likelihood that The Ur-Dragon can draw a respectable number of cards (at least 2) is another reason why I attempt to preserve the number of dragons in my hand or board. Summoning The Ur-Dragon onto an empty board just to have it die to single target removal is one of the worst feelings in the world. The Ur-Dragon is an understandably non-discrete target, however, so I am willing to rely on a reasonable amount of commander politics to preserve its presence so that I can maintain some means of card draw (e.g. promising not to attack with it or letting other players "control" what my dragon(s) do next). That said, I seldom expect The Ur-Dragon to survive a turn, so I am content drawing at least a couple cards to occupy me while I set up for the next The Ur-Dragon Turn, which ideally includes some form of reanimation.

While The Ur-Dragon Turn can be a watershed moment in many games, I begin each game under the assumption that I will never be able to execute it for several reasons:

  • The main benefit of The Ur-Dragon is its eminence ability. If everything is going well, I really should be able to win the game purely with cost reduced dragons.

  • My meta is relatively slow, but commander games can still end quickly enough that I may never get to cast a meaningful 9 CMC spell.

  • The Ur-Dragon Turn as I've described above is largely a means of card draw (and desperate card draw at that). Outside of that, The Ur-Dragon is more likely to be a spell I cast to win more or a spell to cast when I'm truly desperate.

Tutors

"Careful. A drop of blood here means death for us all."

Budget vs Actual Tutors

If budget were not a concern, then the most obvious inclusion in any deck would be the best of tutors magic can offer (Vampiric Tutor, Demonic Tutor, Grim Tutor, Enlightened Tutor). Budget is a concern in this budget primer, however, so the only tutors we run are Sarkhan's Triumph, Eladamri's Call, and possibly Diabolic Tutor. This raises an important question, however: what do we tutor for? Firstly, there’s not really a wrong choice depending on your play style. That said, the most optimal tutor depends greatly on the information we have on our opponents and the stage of the game we are in. I outline below some common scenarios below you may find yourself in and solid creatures to tutor for:

No tutors? Let's go digging

  • If we lack tutors, then we simply have to draw as many cards as we can in the hopes of finding key cards needed to win. The most efficient ways to draw cards is through Greater Good or Hellkite Courser/The Ur-Dragon. As you can tell, Greater Good is such a synergistic card in our deck, that any premium tutors I may add in a budget-less version of this deck would more likely than not be dedicated to tutoring for Greater Good (or Sneak Attack).

Land Tutors/Ramp

Land ramp is so ubiquitous that they may not be considered tutors for the purposes of deck building, but they are still technically tutors. More importantly, land is one pillar of deckbuilding I've compromised on in order to make the most of the budget limitations I've placed upon this deck. Because we've compromised on land so much, it's necessary to optimize land tutoring to smooth out our mana base in game.

We run the classic basic green ramp package of Sakura-Tribe Elder, Rampant Growth, Cultivate, and Kodama's Reach. We have 1 copy of Plains, Island, and Swamp and several copies of Forest and Mountain. Because of this, it's worth noting that we will be unable to use these ramp spells to search for 2 copies of Plains or Swamps that may be needed for Farewell and/or Crux of Fate. That said, we will mostly be using these ramp spells to primarily search for mountains, because most of our spells and abilities (especially Sneak Attack) require or are limited to red mana.

The other more premium and useful ramp spells we run are Farseek, Nature's Lore, and Three Visits. When using these ramp spells, we usually want to search for Ziatora's Proving Ground, Ketria Triome, or Indatha Triome depending on what cards we have in hand. Some spells to keep in mind are any dragons that require 3 pips of red mana (e.g. Dragon Broodmother, Scourge of Valkas) and board clears like Farewell and Crux of Fate. If we desperately need the mana, however, we can simply tutor for our one shock land, Stomping Ground. Investing more in shock land and fetch lands would obviously be optimal and void this section, but it's challenging if not impossible to create a budget decklist that simultaneously includes the best of dragons, fetch lands, and shock lands.

Notable Cuts

"The dragon has no false pretense of compassion, no false mask of civilization--just hunger, heat, and need".

Notable Inclusions

"No Machinations, no puppet strings. Just pure, sweeping death."

A list of cards that I realized were integral to the deck, regretted cutting at one point, may seem counterintuitive/suboptimal and/or over performed follow. My eyes light up whenever I draw these cards.

  • Glorybringer - I only included Glorybringer because I needed dragons to fill my list initially. I knew Glorybringer was good when it was in standard, but I was skeptical about how powerful it would be in commander. I didn't think 4 damage on a body would be sufficient, but I was always happy to draw Glorybringer, because this decklist lacks targeted removal in a format where there are a plethora of good targets to take out. Yes, we could always add more removal, but we want as many of our cards to advance our game plan as possible, and Glorybringer does just that while simultaneously being a form of removal.

  • Farewell - Farewell is critical in games with artifact heavy decks and it can be a clutch board wipe. The versatility of Farewell makes me always happy to have it just in case things go south for us.

  • Living Death and Patriarch's Bidding - These mass reanimation cards allow us to return all our dragons back to the board for a huge tempo play. Being a tribal deck, Living Death and Patriarch's Bidding usually benefits us more than our opponents. More importantly, Living Death and Patriarch's bidding can become our win conditions, if the right dragons are in the graveyard. And to top it off, Living Death can be an emergency board wipe when all else fails.

  • Crux of Fate - Crux of Fate is a low CMC, one sided board wipe. There isn't much not to like about this card, especially when our deck needs board wipes to persevere through the early stages of the game and set up for our dragon's triumphant arrivals in the mid to late game.

  • Sneak Attack - The main disadvantage and obstacle to our dragons and their synergies are their high CMC. Sneak Attack fortunately allows us to circumvent their high CMC to enable synergies that normally would not be feasible without an unrealistic amount of mana. Games where I draw Sneak Attack are vastly different from games where I don't draw Sneak Attack; in fact they are different enough the first thing I would add if this weren't a budget primer would be enchantment tutors specifically for Sneak Attack.

  • Greater Good - Greater Good is such a good draw engine for us, especially as insurance for slain dragons, that I immediately begin to think about whether it's worth sacrificing dragons to risk drawing into win conditions like Sneak Attack and Living Death or Patriarch's Bidding. It would be ideal to sacrifice dragons in response to them being removed, but the potential card draw offered is so promising that I would still consider sacrificing my dragons to draw more cards if Greater Good was targetted instead of my dragons. The fact that I can even consider such a risk highlights how valuable Greater good is as a means of card draw. Being able to synergize well enough with Sneak Attack that this card turns into a win condition is also a massive boon.

  • Phyrexian Reclamation - Phyrexian Reclamation may not seem as good in a vacuum to justify in a dragon deck, but it synergizes very well with Sneak Attack, which is a core card that augments every card in this list. Being able to recast the same dragon turn after turn is not to be underestimated, especially considering our plethora of powerful dragon synergies. Furthermore, Phyrexian Reclamation synergizes with the Greater Good + Sneak Attack win condition this deck runs by allowing us to recast dragons from our graveyard the same turn we sacrified them. As an added bonus, it also makes our concern with drawing into dragons a nonissue.

  • Ganax, Astral Hunter - I was skeptical of how useful this card would be when it was first spoiled, but I planned to try it out as I do most dragons, and I am glad I did. Ganax is similar to Dragonlord's Servant in that it essentially discounts all our dragons by 1 mana, but it is far superior in that it is a dragon itself. While a discount is not the same as a rebate (which is what Ganax essentially provides), the treasures produced can be saved for future turns unlike cost reducers. Furthermore, the treasures can be augmented with Goldspan Dragon and the treasures can be produced in absurd amounts with token producing dragons in play. I still didn't think too much of it, however, until I realized that I began tutoring for it when mana was a problem and when I had the Greater Good + Sneak Attack synergy on hand.

  • Knollspine Dragon - This dragon flew under the radar for me, but I quickly realized its potential after my first game with it. While its effect is conditional upon dealing damage and while we have to discard a hand, this card simply enables us to draw so many cards that it’s worth it. Knollspine Dragon allows me to draw into the key cards or tutors needed to win the game within the next couple turns so consistently that Knollspine Dragon becomes a borderline key dragon for me too.

  • Klauth, Unrivaled Ancient - Klauth, Unrivaled Ancient is fantastic, because it provides us with lots of mana to cast additional spells the turn it is cast. However, Klauth has a relatively high CMC, and its ability notably does not synergize with Aggravated Assault. Furthermore, Klauth can allow us to empty our hand of spells, but this becomes less meaningful if we don't have cards to cast in the first place. There are clearly some pros and cons here, but Klauth's pros have outweighed its cons in practice for me. After generating mana with Klauth, I almost always have something meaningful in my hand to cast. Even if I don't spend all the mana as optimally as possible, it is usually still a good idea to be able to generate more board advantage. The primary con is overextending, but that isn't as much of a problem if we have proper draw engines set up (e.g. Temur Ascendancy, Greater Good). Furthermore, we frequently have high CMC cards in hand that normally would be too challenging to conventionally cast (e.g. Majestic Genesis, Knollspine Dragon, Mirari's Wake) while maintaining tempo, and Klauth allows us to circumvent this concern. Finally, we can always hard cast The Ur-Dragon if we really have that much excess mana.

  • Monster Manual - This artifact may seem suboptimal at first glance, but I've found that it can really pull its weight throughout a game, especially if we run into early mana problems. While being able to summon any dragon for 2 mana is fantastic, Monster Manual really shines when we are in the position to place at least 2 dragons onto the battlefield (e.g. being able to summon another dragon following Miirym, Sentinel Wyrm produces a dramatically different board state than if we were to summon Miirym alone). Furthermore, we can activate Monster Manual during our opponent's turn before our upkeep, which effectively gives us a surprise blocker and a surprise dragon (our opponents would not have had a turn cycle to plan for) that will effectively have haste during our next turn. Finally, note that Monster Manual allows us to place any dragon onto the battlefield for 2 mana which circumvents counterspells.

  • Gadrak, the Crown-Scourge - I really only have Gadrak in the deck for 3 purposes: (1) to serve as an early blocker, (2) to activate dragon enter the battlefield triggers (e.g. Scourge of Valkas, Terror of the Peaks), and (3) to sacrifice to Greater Good. Being able to attack with Gadrak or activate its secondary ability is a bonus. While this dragon may seem lackluster compared to other dragons on the list, I have been satisfied drawing and casting Gadrak during most games, especially in the early game.

  • Reckless Barbarian - This dragon won't be delivering Death by Dragons by itself, but it can be cast early, and it scales well into the late game by providing mana when we need it, and by activating all the juicy dragon triggers we love (e.g. The Ur-Dragon, Dragon Tempest (again for only 1 mana).

Notable Exclusions

"The justice of dragons demands more than just an eye for an eye".

  • Counterspell, Anguished Unmaking, etc. - I think it goes without saying that dragons have high mana values, which means it's relatively challenging for us to hold up mana for interaction. Counterspell is one of the best forms of interaction in magic, and isn't bad, but I think being able to drop the mana value of a counter spell (or interaction spell) to (Stubborn Denial, An Offer You Can't Refuse) (or one mana (e.g. Swords to Plowshares, Bolt Bend)) makes a big difference. We lose out on the ability to counter creatures with Stubborn Denial, but I am not concerned with that because I view interaction primarily as ways to protect our board state and game plan rather than stopping an opponent's (although it is critical to stop them when necessary) and most forms of interaction are tied to instant and sorcery spells rather than creatures. Furthermore, I primarily want to protect our board state during our turn, especially during our winning turn (e.g. Aggravated Assault + Old Gnawbone) during which noncreature spells will be our primary concern, since opponents are unlikely to cast creatures with flash.

  • Atsushi, the Blazing Sky - This dragon is without a doubt excellent in that it's a low CMC beater that provides excellent upsides when it expires. However, I've found it challenging to have this dragon die when I want it to, which effectively turns it into a 3 CMC 4/4 beater for multiple turns. I simply wanted a dragon with an immediate impact that I could reliably trigger.

  • Obsidian Charmaw - This is a dragon I would undoubtedly include if I played in a meta where I need to remove problematic lands, but I simply don't play in such a meta at this point in time. I would recommend including this dragon if you do play in such a meta.

  • Nicol Bolas, the Ravager   - A 3 CMC 4/4 beater that causes our opponents to each discard a card is good, but I don't think it's good enough unless I wanted to lower my mana curve as much as draconically possible. The opportunity to transform it into a powerful planeswalker is excellent, and I am positive it would have made the difference between victory and defeat in some games, but it's simply something I don't count on being able to pull off. Instead of investing mana into a planeswalker I would have difficulty defending, I would much rather spend that mana drawing more cards or casting more dragons.

  • Wrathful Red Dragon - Wrathful Red Dragon is one of those cards that I really want to add, but I simply don't have the room to fit it into the deck list. Furthermore, if I had Wrathful Red Dragon in the deck then I would feel the constant temptation to fit in Blasphemous Act or Chain Reaction which I would definitely struggle with.

  • Silumgar, the Drifting Death - Silumgar, the Drifting Death is a card that used to be in this decklist until so many good dragons were printed that I had to start making cuts. Silumgar will earn its spot if you are in a meta with many opponents who like to flood the board. I haven't encountered too many token swarms in my meta that require constant removal, however. Furthermore, I feel that I would need many dragons attacking to truly capitalize on Silumgar's effect, and if I had several dragons attacking then I figured I would already be in a winning position regardless. Additionally, if there are many flying tokens then I usually rely on burn damage through Dragon Tempest or Scourge of Valkas or Terror of the Peaks to finish off that player while focusing my efforts on the remaining opponents.

  • Balefire Dragon - Balefire Dragon suffers from the same cons as Silumgar, the Drifting Death in that I really wanted to add it in, but I simply needed to make room for better dragons. I think Balefire Dragon would shine in a token-heavy meta, but I simply don't encounter those many. Furthermore, the fact that Balefire Dragon has such a high CMC and needs to connect for its ability to trigger makes me less excited about it. Again, I would consider this to be more of a meta pick.

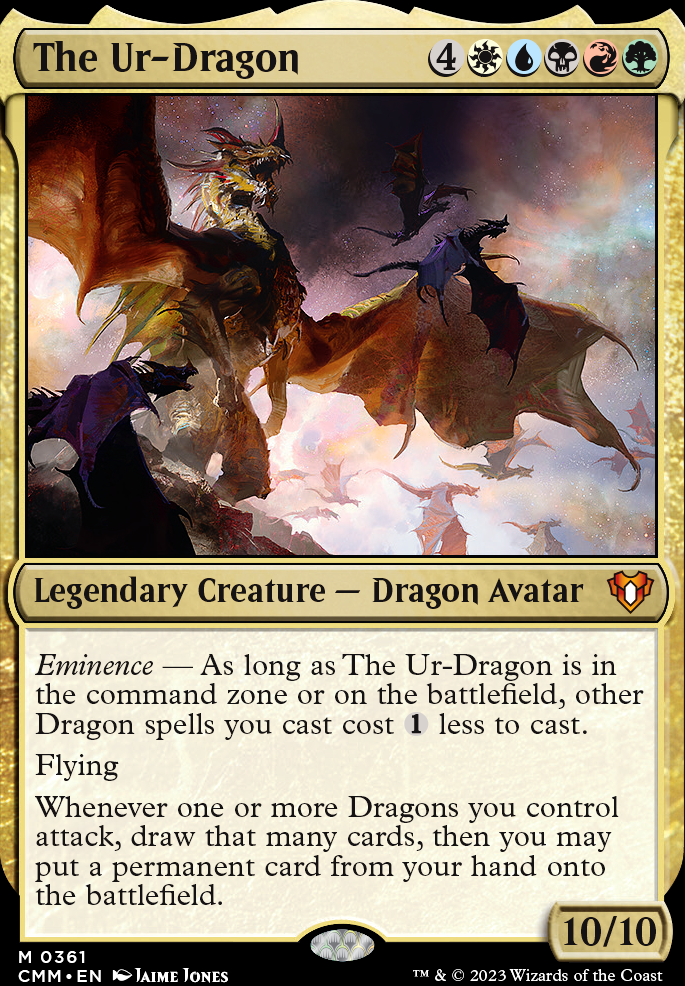
  • Morophon, the Boundless - I would really enjoy playing Morophon if this decklist ran more cards (e.g. Two-Headed Hellkite, but this list primarily run and dragons with a heavy emphasis on the latter. Outside of summoning The Ur-Dragon (for which Morophon is excellent, Morophon essentially acts as a 6 cmc Dragonspeaker Shaman give or take for almost every dragon we run. I would more strongly consider this card if we ran a Fist of Suns or Jodah, Archmage Eternal combo to win the game, but at that point I think I would prefer to run Tiamat as our commander instead.

  • Two-Headed Hellkite - I really enjoy everything this card provides, especially it's flavor text. However, the color intensive mana cost this card makes me hesitant to use it, especially considering that this budget deck runs a budget mana base. I would strongly consider including this dragon if I also ran Morophon, the Boundless, however. Overall, I certainly like Two-Headed Hellkite, but I think we have other cards that synergize just slightly better.

  • Scion of the Ur-Dragon - Scion of the Ur-Dragon was a favored card of mine for the longest time, but I ultimately realized that it was a pet card that underperformed. Because we don't take advantage of our graveyard the vast majority of the game, Scion of the Ur-Dragon is in many ways a 5 to 7 mana tutor at minimum. Five mana (of each color too) is a nontrivial mana investment required to set up a heavily restricted tutor. Even when using Scion of the Ur-Dragon's ability optimally, a healthy understanding of the stack can still render Scion of the Ur-Dragon vulnerable to removal. When playing it, I realized that it did too little too late for too much. In comparison, something like Monster Manual is able to cheat in dragons far more effectively and permanently, albeit only from hand.

  • Lozhan, Dragons' Legacy - I like Lozhan, because it’s removal on a dragon, and it really works when it works, but I ultimately cut it because it didn’t do anything the turn it came out and was therefore bad tempo. I frequently found that optimal play was to play or set up another more meaningful and proactive dragon instead of Lozhan despite the temptation to extract value out of Lozhan, so it sat in my hand until I ran out of better dragons to play at which point it lost its value. Finally, the fact that Lozhan didn’t synergize well with Majestic Genesis and Sneak Attack, among other noncasted dragons (e.g. Utvara Hellkite, Dragon Broodmother, Monster Manual), was a larger deal than I expected.

  • Bladewing the Risen - Bladewing the Risen was a card that was on my list for a long time. When looking for cuts, however, I realized that Bladewing the Risen is irrelevant most of the early game. And more importantly, I never cared about Bladewing the Risen itself; all I cared about was the dragon permanent it brought back. In comparison to other reanimation spells (e.g. Fearsome Awakening, Unburial Rites), Bladewing the Risen essentially becomes a heavily color restricted ( is a bit much) 2 or 3 CMC 4/4 dragon stapled onto a 4 or 5 CMC reanimation effect. There's a pump effect, yes, but I've never used it once. The dragon is fat attached to the effect we really cared about.

  • Atarka, World Render - Atarka, World Render is a powerful dragon that I included for many years, but I realized that I was never really happy to draw or play it, unless I already had a big board. The double strike upon attack trigger was also upsetting when summoning Atarka after attacks were declared (e.g. The Ur-Dragon, Klauth, Unrivaled Ancient, Old Gnawbone). Other than double strike, which Atarka doesn't even inherently have, it was just a 6/4 beater. Because double strike was the main benefit of Atarka, I opted to replace it with Sylvia Brightspear, which can provide double strike at all times rather than only after combat. If double strike is the priority and you have the room, then including Atarka, World Render in addition to Sylvia would be ideal.

  • Ancient Silver Dragon - Ancient Silver Dragon has the potential to be an all star dragon in any list, but it will simply take too long to be summoned conventionally. By the time you summon Ancient Silver Dragon, assuming you can attack with it, you may not have enough turns left in the game to capitalize on them. Furthermore, having too many cards in hands isn't really a problem in this deck, and being able to discard to hand size can benefit us when attempting a Patriarch's Bidding or Living Death play. On top of that, being able to connect with Ancient Gold Dragon can offer us the opportunity to win the game through Scourge of Valkas triggers whereas Ancient Silver Dragon prolongs it.

  • Silumgar, the Drifting Death - This dragon was in my list for the longest time, but I ultimately opted to cut it, because I wasn't able to optimize its ability to clear boards as consistently as I would have liked to. While it could help control boards at times, I usually only managed to attack with one or two dragons, and simply wasn't good enough in most cases. If I did have multiple dragons out, I was usually already winning or I would have rather invested the mana into another dragon (e.g. Kolaghan, the Storm's Fury, The Ur-Dragon, Scourge of Valkas) to capitalize on all the dragon triggers.

  • Intet, the Dreamer - I had Intet in my deck originally when I didn't have any better dragons, and what I found was that Intet often just became a big 6/6 beater. I may have used his ability once out of all my games. More often than not, most of our mana is spent during our main phase summoning dragons so we seldom have leftover mana to pay for effects like Intet's, which isn't even guaranteed to trigger. Furthermore, any mana we do have leftover is usually better saved for any instant removal, protection, or counterspells that we may have drawn. Getting Intet's ability to trigger through combat damage is another complication that makes this card not as appealing as our current roster of dragons.

  • Crosis, the Purger - Crosis suffers from the same problem as Intet, the Dreamer. Discarding cards with Crosis' ability also feels bad and can draw the ire of the inflicted player.

  • Steel Hellkite - I initially thought Steel Hellkite was an auto include in every deck, but I came to realize that this card suffers from the same problems as Intet, the Dreamer in that his ability only gains traction when you have leftover mana, which we seldom have. While I like Steel Hellkite, I seldom got to use his ability except as a way to remove tokens, and that simply wasn't good enough as I gained access to more powerful dragons.

  • Wasitora, Nekoru Queen - I wanted Wasitora to work, I really did. I wanted Wasitora to work so much that I created an entire deck revolving around her [3]. However, Wasitora also suffers from the same problem as Intet. Furthermore, giving opponents the choice of what to sacrifice diminishes her value, and she almost never gets to create cute tokens (which, to be clear, is the main reason to play Wasitora), because our opponents almost always have something to sacrifice.

  • Boneyard Scourge - I thought Boneyard Scourge was a powerful addition, because it was a low CMC dragon that we could play early which also had the potential to stay relevant in the late game. In practice, however, I seldom drew Boneyard Scourge early enough for it to be useful when it mattered, and I seldom had the leftover mana to make use of its situational abilities in the late game. Whenever I did draw Boneyard Scourge, more often than not in the latter half of the game, I wished I had drawn another more impactful dragon instead.

  • Karrthus, Tyrant of Jund - This card seems powerful, and it is especially because haste is so powerful in our deck, but I refuse to play Karrthus for two reason: (1) it is financially expensive and (2) Karrthus makes our deck needlessly susceptible to cloning effects which would hard counter our deck.

  • Ryusei, the Falling Star - The only thing Ryusei brings to our deck is his ability to clear the board which sounds good. The problem is that his board clear is conditional, predictable, and at times insufficient. I would gladly remove this card for more consistently powerful board clears or dragons.

  • Crucible of Fire - I consider this to be a "win more" card that relies on dragons being on the board when our deck really just needs more ways to get dragons onto the board in the first place. Larger dragons are helpful, yes, but our deck seldom gets the opportunity to go wide in ways that make this card excel. Furthermore, +3/+3 seldom gets our dragons large enough to compete against decks dedicated toward pumping individual creatures very tall.

  • Kaalia of the Vast - This card can be very potent, but it's also very vulnerable to removal, and Kaalia is a removal magnet. The high cost, in both cash and CMC, also makes me hesitant to use Kaalia.

  • Thunderbreak Regent - I see Thunderbreak Regent in many decklists, but I just don't see how it earns its spot. It has a low CMC, yes, but its effect also seems lackluster to me in a format where health is just a resource that people have in abundance. I would reconsider this exclusion, if I wanted to go all in on lowering the CMC curve of the deck to increase power level, but that would involve losing a lot of the high CMC dragons that are the heart and soul of any The Ur-Dragon.

  • Sarkhan Unbroken - Even though Sarkhan, Unbroken's ultimate is potentially game winning, we will never get to reliably use it enough to justify Sarkhan exclusively for his ultimate. Instead, we would use Sarkhan primarily for its +1 and -2 abilities, which are fair for Sarkhan's high cost. Unfortunately, most players tend to look straight at Sarkhan's ultimate and decide to kill it. Sarkhan draws a disproportionate amount of hate/attention towards us and we seldom have a board state powerful enough to protect it.

  • Sarkhan, Fireblood - This planeswalker is full of upsides no matter how you look at it. However, it has one major flaw I cannot ignore: it's a planeswalker. I am simply biased against planeswalkers in this deck, because I have personally had bad experiences playing one. Planeswalkers draw a disproportionate amount of hate in playgroups I've sat at, I find it challenging to defend planeswalkers with a relatively small number of dragons on board (at least until we reach a critical mass of dragons), and our dragons are usually tapped out from attacking, and cannot defend regardless. That said this planeswalker is probably our most playable planeswalker aside from perhaps Kiora, Behemoth Beckoner.

  • Darigaaz Reincarnated - Darigaaz looks good because of its built-in recursion, but out of all my games I have only been able to take advantage of it twice. And both times Darigaaz came back too late to make a notable difference. Darigaaz is so expensive, and his ability is so delayed, that it comes out too close to the conclusion of the game for its reincarnation to make a meaningful enough impact.

Budget Cuts

"Those dragons grow fast. For a while they feed of squirrels and goblins and then suddenly you're missing a mammoth."

I purchased the original cards in the Draconic Domination pre-con for approximately $100 and I originally intended to upgrade it with about $100 worth of cards over time. The deck's price has clearly exceeded my original budget, and while I do not regret doing so, I do want to offer my insights on making this deck more affordable for those interested in soaring with dragons on a budget. I highlight the more expensive items in this deck and cheaper alternatives to replace them with. Super Budget Return Of The Ur-Dragon ( https://www.moxfield.com/decks/DqLH3gVZnkShkoE_0fsQrA ) is an example of a deck that that has incorporated the following budget cuts.

Any Decent Dragon are hyper budget dragons that are mediocre compared to their recommended counterparts, but useful enough to earn a spot if we simply need to field more dragons. I recommend including any of the following, in order of preference:

Dragons I might consider in a pinch

Other Budget Cards in no particular order

"Eons ago, The Ur-Dragon roared. Its descendants still carry the echo across the Multiverse."

If you enjoyed reading about it, please support the Return of the Ur-Dragon with an upvote by clicking here.

Suggestions

Updates Add

Comments

Attention! Complete Comment Tutorial! This annoying message will go away once you do!

Hi! Please consider becoming a supporter of TappedOut for $3/mo. Thanks!


Important! Formatting tipsComment Tutorialmarkdown syntax

Please login to comment

Revision 16 See all

(10 months ago)

-1 Dragonspeaker Shaman main
+1 Invasion of Tarkir  Flip main
-1 Klauth, Unrivaled Ancient main
+1 Sarkhan, Soul Aflame main
-1 Scaled Nurturer main
+1 Zurgo and Ojutai main
Top Ranked
Date added 4 years
Last updated 10 months
Legality

This deck is Commander / EDH legal.

Rarity (main - side)

19 - 0 Mythic Rares

33 - 0 Rares

23 - 0 Uncommons

9 - 0 Commons

Cards 100
Avg. CMC 4.08
Tokens Copy Clone, Dragon 1/1 RG, Dragon 4/4 R, Dragon 5/5 R, Dragon 6/6 R, Faerie Dragon 1/1 U, Treasure
Folders Cool Commander Decks, Inspiration, Dragones, dragon commander, Budget EDH, EDH Decks, Decks, Cool decks, EDH Brain Food, Decks I Want
Votes
Ignored suggestions
Shared with
Views