
Colorless (2)
Gold (14)
- 1x Bane Alley Broker
- 1x Bruna, Light of Alabaster
- 1x Essence Vortex
- 1x Exava, Rakdos Blood Witch
- 1x Glissa, the Traitor
- 1x Jhoira of the Ghitu
- 1x Kaalia of the Vast
- 1x Lyzolda, the Blood Witch
- 1x Nin, the Pain Artist
- 1x Olivia Voldaren
- 1x Razia, Boros Archangel
- 1x Rubinia Soulsinger
- 1x Sage of the Inward Eye
- 1x Sivitri Scarzam
White (18)
- 1x Anafenza, Kin-Tree Spirit
- 1x Angel of Flight Alabaster
- 1x Angel of Glory's Rise
- 1x Angelic Destiny
- 1x Archangel of Strife
- 1x Divine Transformation
- 1x Emancipation Angel
- 1x Emeria Angel
- 1x I'm Rubber, You're Glue
- 1x Juniper Order Advocate
- 1x Kemba, Kha Regent
- 1x Kitsune Diviner
- 1x Kor Skyfisher
- 1x Miss Demeanor
- 1x Restoration Angel
- 1x Save Life
- 1x Seraph of Dawn
- 1x Shielded Passage
Blue (14)
Black (16)
- 1x Barony Vampire
- 1x Blood Tribute
- 1x Bloodflow Connoisseur
- 1x Chosen of Markov Flip
- 1x Deadly Allure
- 1x Drana, Kalastria Bloodchief
- 1x Ink-Eyes, Servant of Oni
- 1x Kalastria Highborn
- 1x Liliana of the Veil
- 1x Markov Patrician
- 1x Persecute Artist
- 1x Screeching Bat Flip
- 1x Soul Collector
- 1x Taste of Blood
- 1x Tavern Swindler
- 1x Xathrid Gorgon
Red (15)
- 1x Alesha, Who Smiles at Death
- 1x Bloodthorn Taunter
- 1x Crossway Vampire
- 1x Earthbind
- 1x Fire Elemental
- 1x Ire Shaman
- 1x Koth's Courier
- 1x Kruin Outlaw Flip
- 1x Markov Blademaster
- 1x Monastery Swiftspear
- 1x Red-Hot Hottie
- 1x Reversal of Fortune
- 1x Skirsdag Cultist
- 1x Staggershock
- 1x Stormcaller of Keranos
Green (21)
- 1x Disciple of the Old Ways
- 1x Dryad Sophisticate
- 1x Elvish Piper
- 1x Elvish Ranger
- 1x Eureka
- 1x Gatherer of Graces
- 1x Ghazban Ogress
- 1x Hunter's Prowess
- 1x Ivy Dancer
- 1x Jade Mage
- 1x Mirri, Cat Warrior
- 1x Nissa Revane
- 1x Nissa, Worldwaker
- 1x Nurturer Initiate
- 1x Serene Remembrance
- 1x Shape the Sands
- 1x Somberwald Dryad
- 1x Somberwald Sage
- 1x Sylvan Paradise
- 1x Tanglewalker
- 1x Triumph of the Hordes
Currently in Progress
Rules and Guidelines to Follow and Remember.
- Having a dropbox account is tech.
- Right click + inspect element is tech.
- Don't change the font size anywhere. If your font is too hard to read or causes too much obstruction at T/O's default font size, don't use it.
- All text must be completely legible, whether on profiles or on your username. Weird symbols or strange fonts that obstruct reading are not appreciated.
- Do not use animation on the usernames or the profiles. Animations can cause serious lag and loading troubles for many users. A single animated username can consume a computer's processing power by 50-70%.
- Try to use smaller sizes, or compress them. As like with the animations, large file sizes can cause laggy computers.
- Do not use or do anything that can mess with the site in some way. This includes, but is not limited to: changing the size of the username, removing some main functions with the site, making things harder to see, or general griefing.
- When altering your profile, make sure to choose a theme that is relatively dark or grey. The rest of the T/O site is dark and grey in general, so keeping to this guideline helps to prevent people from having to break out the sunglasses when viewing your profile.
- Make sure to always have a code that disables all coding for people who has access to the internet through some technology that has really low processing power and available memory (ie: phones, and potentially tablets).
- Learning this stuff isn't hard. I know absolutely jack about coding. I do know however how to test, alter, observe and just all around troubleshooting. I'll alter a value, see what it changes, and take notes. Eventually you'll see common patterns occur and things will quickly start to click in together. This is how I got to where I am now.
The following sites are tech, listed from newb friendly to I CAN'T SPEAK COMPUTEREESE!!!:
- HTML colour codes tech
- The opposite of the above tech
- Font site tech
- Another font site tech
- Webfont generator AND a font site tech
- Text gradient generator tech
- Little more advanced html font working tech
- Now we are getting more advanced tech
- Holy shiz lots of css visual stuff tech
- O.O ... ACK! tech
- The most important of them all tech
Username Customization Tutorial! FOR DUMMIES.
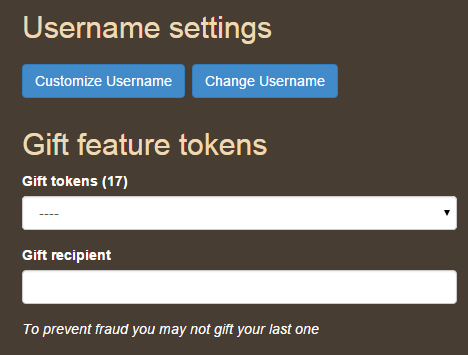
When you become upgraded, you get access to an option called "customize username". You can get there by either selecting said option on your user panel

Or clicking the button in your settings.
Once clicked, you'll be brought to a place that looks like this:
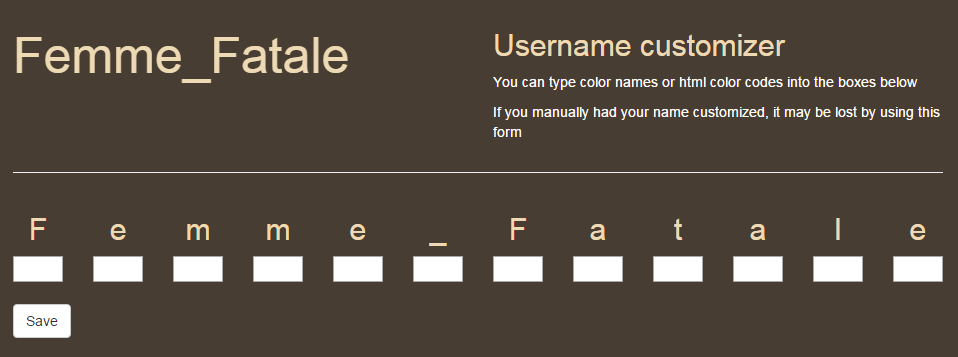
At the bottom, you'll notice a bunch of boxes. Each boxes corresponds to each character in your username. Further, when you put a code into a box, the system applies that code into each other box that comes after it. So if I type in the word gold in the middle of my name I get this ...
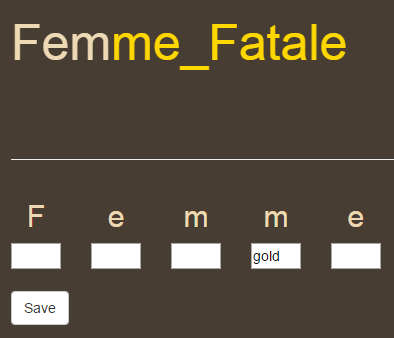
This is your testing grounds basically, where you can see how to utilize each aspect of the code. You can fiddle around with them all and test to see what everything does, what works and what doesn't. It's how I learned everything.
Now there is a lot more to it than just one word colour names. The entire code goes like this (obviously without the colour):
#FF0000; text-shadow: #0000FF 10px 0px 7px, #00FF00 -10px 0px 10px, #AA44FF 0px 5px 3px; font-family: Times New Roman; font-style: italic; border-top: 1px solid #FF44FF; border-bottom: 1px solid #FF44FF; border-radius:100%;
Notice how I've sectioned it off into 5 different sections. This is important as each colour represents a different section. Feel free to take this code and just play with it in the boxes.
Before we go any further, I want to mention that when you upgrade your username, it'll take a while for the changes to propagate throughout the site. If you haven't seen any changes occur within 24 hours, contact Epochalyptik or yeaGO for help. Finally, always make sure to keep a copy of your code in a notepad. Because trying to remember the exact code you used is near impossible for many of us, and it is a pain to write it out each time you want to do minor alterations.
First, let us look at the important aspects of each section. They all basically follow one syntax: "code-name: information;" The code-name must not have any spaces, and the spaces are generally replaced with hyphens. Code-name just basically defines what is going to be applied to your text, and you can choose to not to implement by removing that entire section. Code-name is always followed by a colon. Next is the information. The information is the part you can alter to change your desired effect. Here you can have spaces, as I've designated above so that it is easier to see. Each piece information is specific to the code-name, so different code-names require different information. Finally, the information must always be closed off by a semi-colon. From there, you can start a new section by naming a new code-name. Please note that you only need one code-name in any given box.
Section red is the colour of your text section. Now, you may be wondering, "what are all those numbers and symbols?" Well, that is called hexadecimal. Hexadecimal in terms of colour is basically a method in which to categorize any and all colours under a certain scheme. For us, we will be using the RGB scheme. You don't have to learn anything about how hexadecimal works, just know that any instance of hexadecimal can be replaced with symbol colour words like blue or pink or gold.
Important thing to note, is that you MUST have a colour as the very first thing you put in. It can't be anything else. Otherwise the entire code will not work. Everything else that comes after can be put in any order, but a rule of thumb is "colour comes first". If you wish to go into more advanced username tech, then I'll explain why there.
Okay, now is to figure out how to get a hexadecimal code. For anyone who deals with images a lot, specifically in photoshop, this is no big deal, you know how to get these. However, for everyone else, the easiest method of getting a hexadecimal code is going to this url.
Section green was the first fancy tech the folks on T/O figured out oh so long ago. Back when the community was a lot more ... better (is the only word I can think of) than it is now. Anyways. Section green is called the text shadow section. It's how everyone get's these fancy shades and glows. It is where a duplicate of your name is placed down in the direction, colour and blur of your choice around your initial name. This is arguably the most confusing of the 5 that beginners will encounter and want to utilize (ignoring the complicated stuff) so listen closely.
We know what the hexadecimal codes are, so I'll skip that part. The complicated thing about text-shadows is the numerous #px syntaxes that they use. And I still have troubles remembering what each one does, so don't fret, that's what this tutorial is for. px stands for pixels, and it is the default method for measurement on your computer screen since it is displayed in, well, pixels. Anyways. The 3 px syntaxes stand for the different modifications one can apply to their text. The first one is the x-coordinate of the shadow, the second one is the y-coordinate of the shadow, and the third one is the blur.
The x-coordinate goes left and right. Positive numbers make the shadow go right, negative numbers make the shadow go left. The y-coordinate goes up and down, but in this case, reverse order (if you wish to know why, I'll put a little snippet in the advanced section). Positive numbers make the shadow go down, and negative numbers make it go up. The blur can only be positive numbers (0 is a positive number). Defining the blur you can create three different possible visuals. A blur of 0 will make it look like you have two usernames overlapping each other. A medium blur will make it look like a shadow. A large blur will make your name look like it has a glow.
I want to touch on another aspect of shadow. This other aspect is the ability to generate more than one shadow. This is where you start to get fancy. For each instance of the shadow, you need all 4 parts: the colour, the 2 directions and the blur. Each instance is separate by a comma, but please be sure to remember that the last instance of shadow is closed off by a semi-colon right after the last x in px in the blur part.
Now for the blue part, the third section. This is the font section. The important thing to remember here is that most people will not see any font that you use. Phones and tablets in particular are notorious for this. Your best bet is to use a font that came with your computer or with a popular program like Microsoft Office. For most of you, the following will apply. For those of you that this doesn't, you are most likely well versed in fonts and can figure out which ones will work for yourselves.
First, you need to go into your fonts folder. To do this, just type in fonts in the "search programs and files" search bar in your start menu. Or you could go into your control panel and find the fonts folder there. For Windows 7 folks, it is under the "Appearance and Personalization" section. Once in the fonts folder, you'll see a bunch of font files. Open any one of them up and you should see something that looks like this:
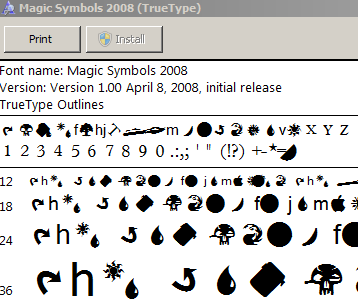
This file shows you whether or not the font legible enough at T/O's default 14 px font size, and it shows you the font's name. The name is shown at the top. For this font, it is "Magic Symbols 2008". You input that into where the Times New Roman font name is in the above code and it turns into this: font-family: Magic Symbols 2008;
Please be aware that some fonts are not compatible with all browsers, so you have to test them out. Sometimes it could just be you getting the font name wrong, so make sure you are putting it in correctly before you make judgments.
The gold code is optional. And really, there aren't any other alterations to this. It is either italic text or regular text. Nothing special here.
The final section, the pink section, is the newest of them all. This is the border section. This is what you use to get all those fancy curves everyone else has. Understanding it is actually quite easy. First, I want to mention about the section name. We see two, border-top, and border-bottom. We also have border-left and border-right. Now there are a lot more, but the 4 main directions are what I'll be mentioning here. Simply, they apply a border to the location you specify. So you could have a border only at the top of your username for each letter if you so choose.
We see the px thing again, this time it is the size of the curve. You kinda want this to be low. Like, less than 5. Next is an identifier. Here it says solid. This is basically the type of border. There are MANY different types of borders, and I'll go into detail in them in the advanced section. For now, all you need to know is solid, dotted and dashed. Please keep in mind that not all browsers will support the different types of border, and will default to solid (some won't even show them at all). Yay colour.
The final part is actually a different section, but it requires the border information that we just covered. This is really easy. This determines whether or not your border is square, or oval. The range is actually 0%-50%, anything higher than 50 just gives the value of 50. The same applies for 0 and if you were to go into the negatives.
And that concludes the FOR DUMMIES version of the username tutorial! Thank you, and have a nice day.
Advanced Username Customization Tutorial
So now you think you've got what it takes to take things to the next level. Welcome to the advanced section.
The very first thing you must know about the advanced section is the TRUE nature of the input boxes on your profile screen.
Yeah, those. Basically, those boxes actually input whatever you have right into a predefined code. The code is as follows:
<span style="color: [CODE YOU PUT IN THE BOX] ">USERNAME LETTER THE CODE APPLIES TO</span>
So the entire code for my username would look like this:
<span style="color: #FF44FF; text-shadow: #00E6FF 5px 0px 10px, #00E6FF -5px 0px 10px, #00E6FF 0px 0px 10px; border-top: 1px dotted #FF44FF; border-bottom: 1px dotted #00E6FF; border-radius:100%; font-family: Vivaldi;">F</span>
<span style="color: #AA82C7; text-shadow: #55D9AA 5px 0px 10px, #55D9AA -5px 0px 10px, #55D9AA 0px 0px 10px; border-top: 1px dotted #55D9AA; border-bottom: 1px dotted #AA82C7; border-radius:100%; font-family: Vivaldi; ">e</span>
<span style="color: #55C090; text-shadow: #AACC55 5px 0px 10px, #AACC55 -5px 0px 10px, #AACC55 0px 0px 10px; border-top: 1px dotted #55C090; border-bottom: 1px dotted #AACC55; border-radius:100%; font-family: Vivaldi; ">m</span>
<span style="color: #00FF59; text-shadow: #FFBF00 5px 0px 10px, #FFBF00 -5px 0px 10px, #FFBF00 0px 0px 10px; border-top: 1px dotted #FFBF00; border-bottom: 1px dotted #00FF59; border-radius:100%; font-family: Vivaldi; ">m</span>
<span style="color: #00EEC7; text-shadow: #FF8180 5px 0px 10px, #FF44FF 10px 0px 10px, #FF44FF 10px 0px 10px, #FF44FF 10px 0px 10px, #FF44FF 10px 0px 10px, #FF8180 -5px 0px 10px, #FF8180 0px 0px 10px; border-top: 1px dotted #00EEC7; border-bottom: 1px dotted #FF44FF; border-radius:100%; font-family: Vivaldi; ">e</span>
<span style="color: #00E6FF; text-shadow: #FF44FF 5px 0px 10px, #FF44FF -5px 0px 10px, #FF44FF 0px 0px 10px; border-top: 1px dotted #FF44FF; border-bottom: 1px dotted #00E6FF; border-radius:100%; font-family: Vivaldi; ">_</span>
<span style="color: #FF44FF; text-shadow: #00E6FF 5px 0px 10px, #00E6FF -2px 0px 10px, #00E6FF 0px 0px 10px; border-top: 1px dotted #00E6FF; border-bottom: 1px dotted #FF44FF; border-radius:100%; font-family: Vivaldi; ">F</span>
<span style="color: #AA82C7; text-shadow: #55D9AA 5px 0px 10px, #55D9AA -5px 0px 10px, #55D9AA 0px 0px 10px; border-top: 1px dotted #AA82C7; border-bottom: 1px dotted #55D9AA; border-radius:100%; font-family: Vivaldi; ">a</span>
<span style="color: #55C090; text-shadow: #AACC55 5px 0px 10px, #AACC55 -5px 0px 10px, #AACC55 0px 0px 10px; border-top: 1px dotted #AACC55; border-bottom: 1px dotted #55C090; border-radius:100%; font-family: Vivaldi; ">t</span>
<span style="color: #00FF59; text-shadow: #FFBF00 5px 0px 10px, #FFBF00 -5px 0px 10px, #FFBF00 0px 0px 10px; border-top: 1px dotted #00FF59; border-bottom: 1px dotted #FFBF00; border-radius:100%; font-family: Vivaldi; ">a</span>
<span style="color: #00EEC7; text-shadow: #FF8180 5px 0px 10px, #FF8180 -5px 0px 10px, #FF8180 0px 0px 10px; border-top: 1px dotted #FF8180; border-bottom: 1px dotted #00EEC7; border-radius:100%; font-family: Vivaldi; ">l</span>
<span style="color: #00E6FF; text-shadow: #FF44FF 5px 0px 10px, #FF44FF -5px 0px 10px, #FF44FF 0px 0px 10px; border-top: 1px dotted #00E6FF; border-bottom: 1px dotted #FF44FF; border-radius:100%; font-family: Vivaldi; ">e</span>
Resulting in this:
Femme_Fatale
Now for those of you adept in coding, this automatically means you can do a LOT. You can input symbols, images, css files and so much more directly into the box to make things work. Basically: you can't change what comes before, or after, [CODE YOU PUT IN THE BOX]. Which means you have to get creative with your coding, but since you know what comes before and after, you can input whatever you want as long as the predefined parts close correctly.
Now while I do say this, I must forewarn not to input foreign objects like symbols and images into your name, because otherwise it'll be very hard for some users to write out your name. And remember the biggest rule about customization: Legibility is key. The second rule is that you must not break anything. The third rule is that it must not interfere with a user's everyday use of the site. Because of these three rules, one must not blindly put things in without testing them out first, and one must not use heavy coding that lags other people's computers out, special mentions to those with animated usernames and profiles.
So this is where you get to use your dropbox account that I had you make. Yay. Anyways. Open up a text document, type something that looks like this into it.

Then save it into your dropbox folder as a .css file. You do this by changing the .txt to .css like so:
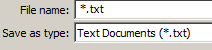
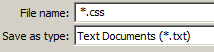
And then input whatever you want for the asterisk.
Next, you want to grab yourself a font. There are three sites that I recommend for this.
- Urban Fonts.
- Da Font, you'll find a larger selection here.
- Font Squirrel. The easiest of the three to use because it is a webfont generator AND a font site.
We are going to start this out by using Font Squirrel.
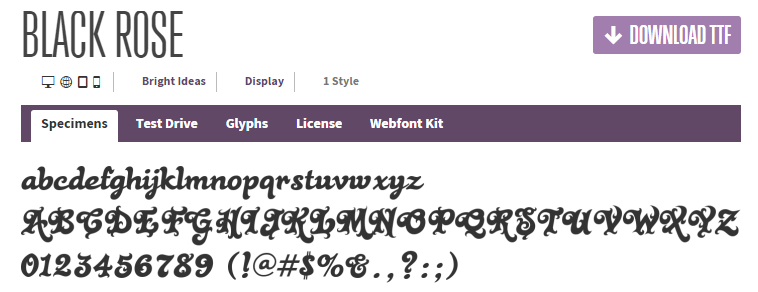
Font Squirrel is really nice in that if the font's licensing supports it, they will GIVE you the pre-made css file. I highly recommend for the less code savvy individuals to use these guys exclusively, because it is so much easier. So, find yourself a font, we'll be choosing Anagram for this.
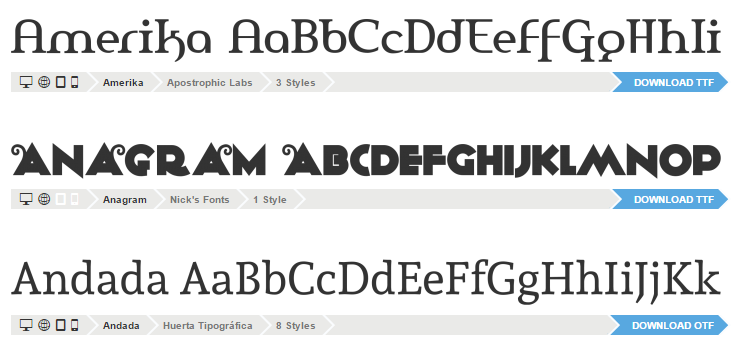
Now, there is a little grey bar full of information right underneath the font name.

The first thing you'll notice is a little batch of symbols. The second thing you'll notice is that some of them are grayed out, unlike the fonts surrounding it which have them full black. Now this means that this font will not work on the media that the symbols represent. The icon of a monitor represents your PC. The icon of a webbed ball represents the internet. The icon of a square represents the tablet, and finally, there's the very obvious icon of the modern day phone. Since the tablet and iPhone are grayed out, that means that this font does not have the associated files with it to work on those medias. This is something to keep in mind when choosing a font.
Right next to that we have the font name. Then the name of the user who created/uploaded the font. And finally, the number of styles that font file has. We'll get to the styles section in a moment.
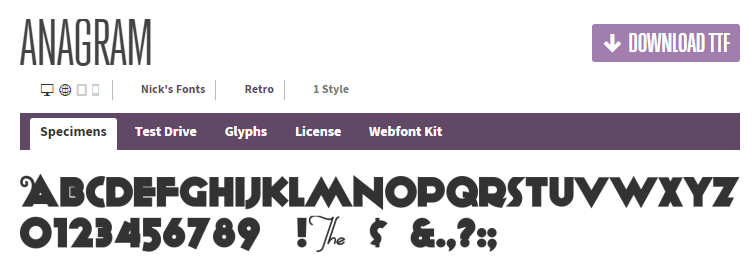
Clicking on the font will bring us to a preview page that looks like this.
The first thing we want to do is find out if this font will actually look nice and be legible at T/O's default 14px font size. So, click on test drive.
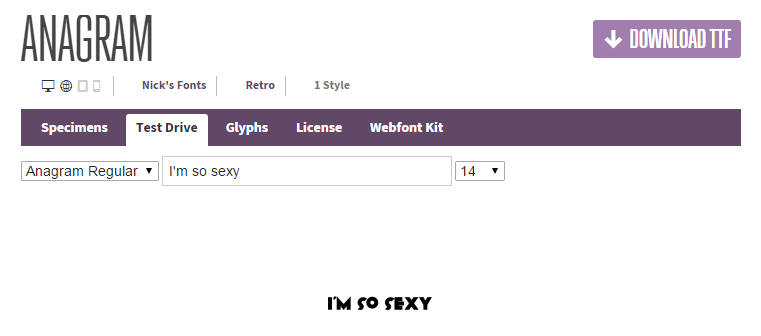
From here, you can test out all the font options. Where it says "Anagram Regular" is the option to select the multiple different styless of that font. More professional or experienced font creators will create different font aspects of their font to suit multiple situations. However, this one doesn't, and for the most part, you never need to worry about this. This is an aspect appreciated mainly by designers.
Right next to it, is the input text box, this is where you will type in your name to give it a test run. Right next to that at the end is the drop down menu to select size. We've selected 14.
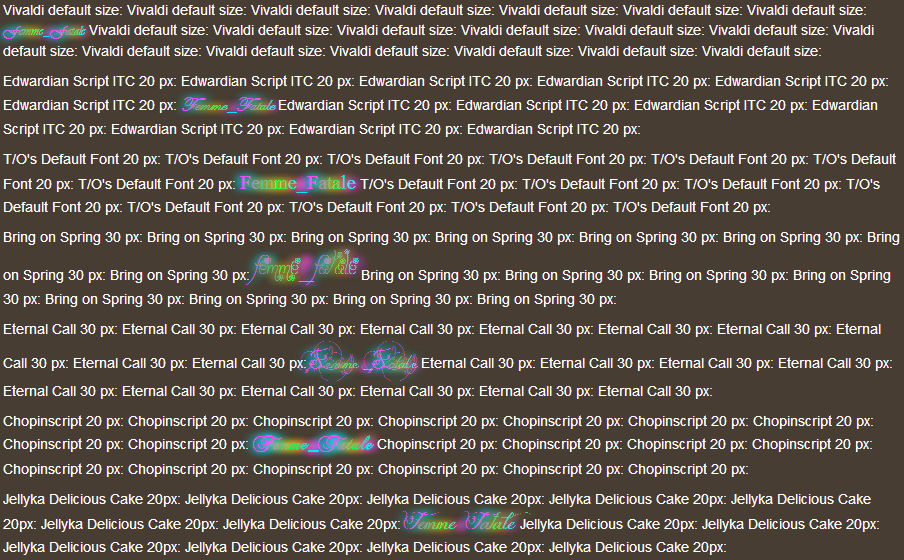
So as you can see, this font is an ideal font to use on T/O thanks to it being clear and legible at 14 px font. But what do non-ideal fonts look like? I'll be posting numerous examples. To give you a demonstration.
Duh, glyphs aren't actually letters.
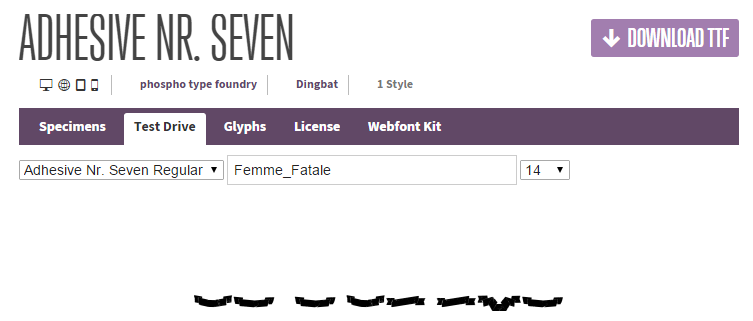
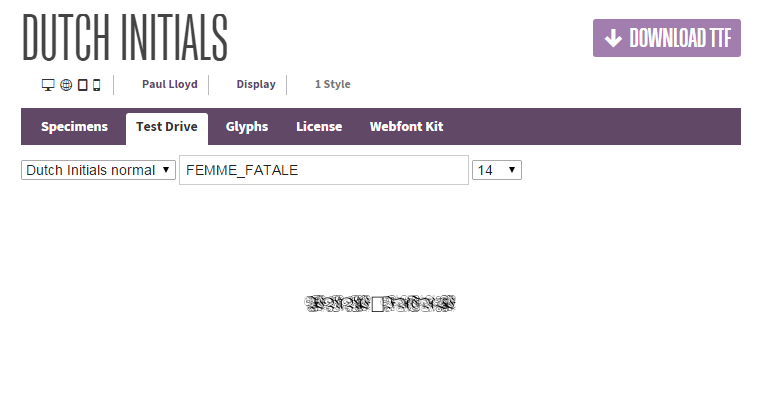
This one doesn't actually have the available glyph for an underscore. Thusly, trying to use this font as the font for your username when you have an underscore in your username means that no one will ever be able to link you properly. They won't know that you have an underscore in your name. Therefore it is important to remember to pick fonts that have all the available glyphs for your username.
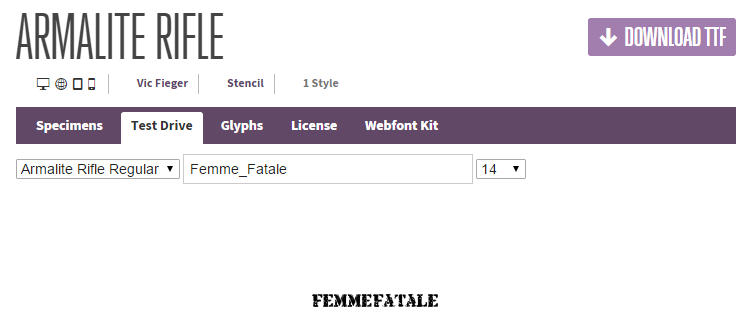
The constant changing symbols and sizes make this for an interesting large font, but not as a small font. Constantly trying to read this will be a pain, and as you can see, some letters are really hard to see. Special mention to the t. Therefore, this fails the legibility test, some letters can not be read.
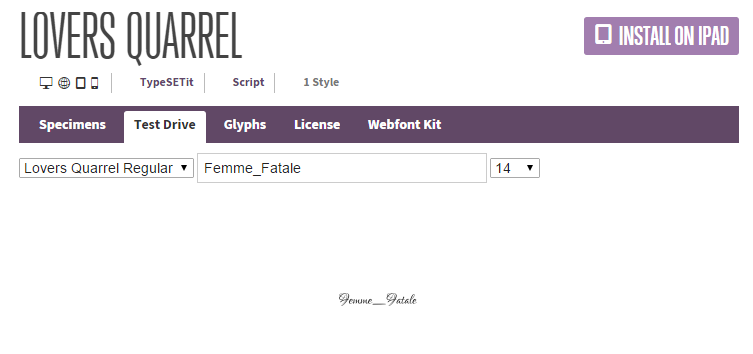
Cute and all, but too small to read. Remember, legibility is key.
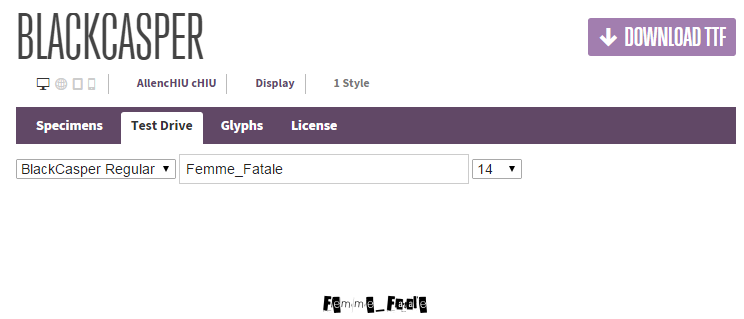
WOAH!! What in the-WHAT IS THIS!? This my friends, is a very good example of a TOO fancy of a font. It is so fancy, you can't even read it. Not too mention that it isn't very well made either, if you notice, I've had to capitalize each letter of my username so that it'll register and not appear as a box. If you try and use this font, we will give you hell for it.
Okay, so moving on. Let's actually use a font. Now that we understand that Anagram won't work on all media, let's choose one that will:
For this part, you'll want to click on the webfont kit tab to be brought to this page:
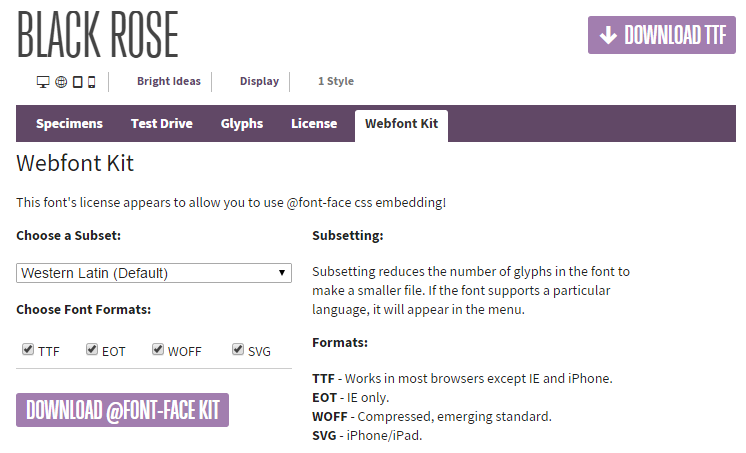
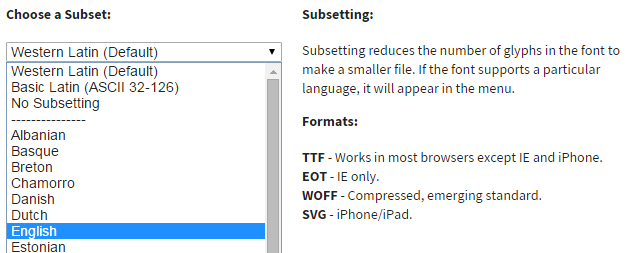
Next, you'll want to choose a subset, choose English.
And finally, click the download @font-face kit button!
Whew, all that work and we haven't even begun to code! And we still won't code because we need to work out how to make a font from another site work.
Font Squirrel is nice and all, but they have very stringent criteria on what goes in the free section. Therefore, let's grab ourselves a font from - Da Font. I've already gone ahead and chosen a font.
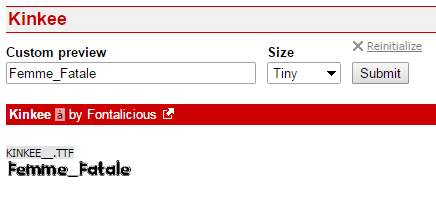
Now, important thing about Da Font is that the "tiny" option is the closest to 14 you are going to get. So make sure it is legible at that size.
Download the font, open it up, and you'll notice that there is a read me file and a font file. You'll want to extract both, rename the read me file to contain the font name in it, stash the read me file into a folder called font licensing and stick that into your dropbox. This is important as using these fonts online can technically be called distributing them, and I don't want to have people come up to me crying about how they got sued for using a font.
Now place the font file into the font folder I mentioned earlier. This will effectively install it to your pc. Now, extract the two files from the zip file again. This time, keep a reserve copy of the read me for yourself just in case something happens to the dropbox and head on over to Font Squirrel's Webfont Generator.
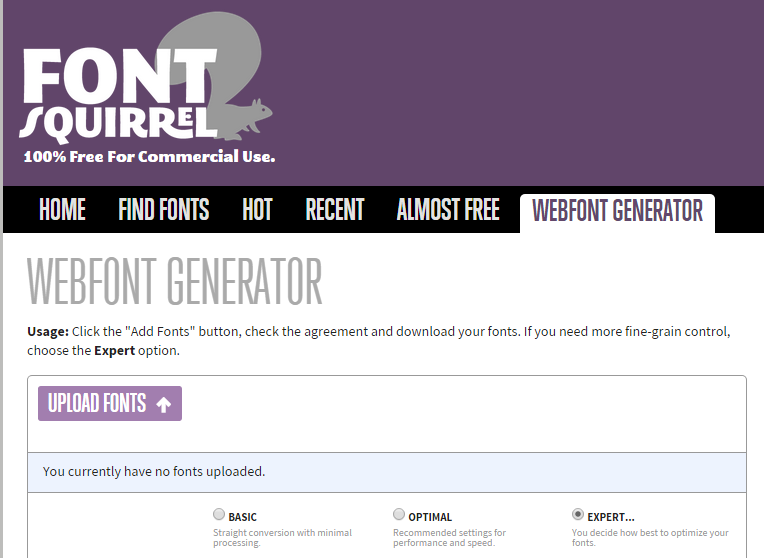
Once there, click on "expert" and you'll be brought to this jargglemess.
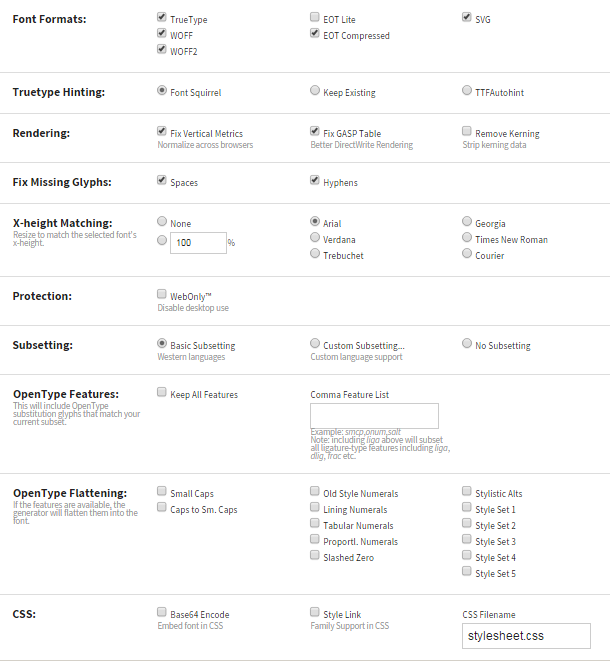
Now don't fret, there are only a few things that you need to know. In Font Formats at the top, click on SVG. For X-Height Matching, click on Arial (or whatever T/O's default font type is at the time of you reading this tutorial is). And on the bottom, rename stylesheet.css to whatever you what.
Ignore this next section, I started writing out the profile tutorial in the middle of the coding sections of the username tutorial.
Next what you want to do is input this code into your document and save as.
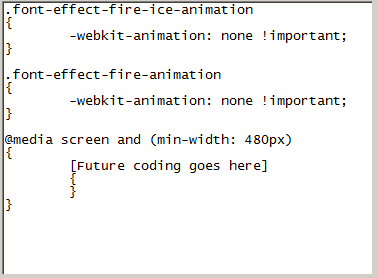
Any alterations you'll be making will be placed in the "future coding goes here" section.
So what does all that code do? Well, the first two remove the two most prominent font animations that are seen around the site. I'll be adding a new code for each and every font animation I see, and if there are any that I've not found, let me know and I'll add them. The last code, the media-screen code, basically prevents the coding from being visible on phones or tablets. If you still see it on those medias, let me know and make sure to tell me the resolution of the media you are using.
Why use these codes? Remember to the rules of functioning I mentioned earlier. These codes are in place to prevent long load times from interfering. Profile and font animations cause people's computers to chug like crazy, and phones lag incredibly bad when you use any css alteration. Therefore, they must go.
In fact, these codes are so prominent, that you should stick them wherever you make a deck, cube, thread or article.
Suggestions
Updates Add
Comments
Attention! Complete Comment Tutorial! This annoying message will go away once you do!
Important! Formatting tips — Comment Tutorial — markdown syntax
Please login to comment
| Date added | 9 years |
| Last updated | 3 years |
| Legality | This deck is not Unformat legal. |
| Rarity (main - side) | 10 - 0 Mythic Rares 29 - 0 Rares 36 - 0 Uncommons 25 - 0 Commons |
| Cards | 100 |
| Avg. CMC | 3.33 |
| Tokens | Bird 1/1 W, Cat 2/2 W, Morph 2/2 C, Saproling 1/1 G, Thopter 1/1 U |
| Folders | Utilities, Decks I like, Username Customization, Username Tutorial, Love the Deck, Templates, .Resources, tutorials, Favorites, Tutorials & CSS |
| Votes | |
| Ignored suggestions | |
| Shared with | |
| Views |