"The Waking Wood is a wretched place where even heroes shy. Where fools are drawn to foolish ends, for the dead there... never die."
(Hi everyone!! I'm trying to get back into deck building again with a brand new entry to my old Ultra-Budget series! If you'd like to help me get this new build off the ground, head over to Ultra-Budget: Dunwich Horror (And Friends!), check it out, and shoot me a comment with your suggestions!)
(If you're here to check out how the 1 shot kill combo works, skip to the Key Combos section below)
First and foremost, this deck is very budget friendly. If you run Jungle Hollow instead of Woodland Cemetery and Doom Blade or Go for the Throat instead of Abrupt Decay, you can get the whole deck, including the sideboard for $45 US. On the flip side, if you want to go less budget friendly, Overgrown Tomb will add more swamps and forests to your mana pool to make Jarad's resurrect ability more consistent.
This deck has gone from Simic to Sultai and now finally it's settled on Golgari, where it is by far the most powerful it's ever been.
A strong self-mill engine is in place with multiple wincons that allow for various angles of attack against a variety of decks. Life from the Loam and Dakmor Salvage are here to make sure there's always gas in the tank even when lands get milled. And Lotleth Troll is helping to add early pressure (as well as an excellent discard outlet) where the deck used to struggle in the early game. The milled-fueled power of the deck has also been combined with a Dredge-based suite of black discard to make sure your opponent's hand is always as dry and nonthreatening as possible.
The result is a deck that doesn't care too much about how slow it is, because it's going to make you play just as slowly. Right up to the point that it steamrolls over you.
For more detailed information, check out the deck breakdown below!
Deck Breakdown
So, the most important thing to remember is that stuffing creatures into your graveyard isn't a bad thing in this deck. You want your creatures to die as fast as possible. Once your graveyard is stocked up, your priority becomes protecting your beefed up beaters and swinging for the kill. So everything in this deck is here to build toward that end. Just be careful not to mill yourself out, because there is a heavy amount of Dredge in the deck after its overhaul.
I will say, the deck isn't super easy to play. If you play it too traditionally, you won't have a very full graveyard and so you won't generate much of a threat and you'll be very slow. But you can just as easily spend too much time Dredging and wind up at a disadvantage as well. I advise you to practice playing the deck as much as possible to learn when to Dredge and when to draw. You don't ever want to get into a position where: 1, your hand is full and your graveyard is empty, or 2, your graveyard is stuffed but your hand is empty. You need to maintain a balance. And that can only be learned through practice.
Also, side note, this deck is excellent in multiplayer. Bonehoard and Nighthowler feed off every graveyard. And Jarad, Golgari Lich Lord's activated ability hits every opponent at once.
Key Combos
(For each instance of Bonehoard in this section, you can also use Nighthowler's bestow ability to the same effect)(Dakmor Salvage + Raven's Crime
) - This is an efficient way to keep your opponent's hand clear of threats while simultaneously milling your deck with Dredge.
(Golgari Grave-Troll + Lotleth Troll
) - This is an incredible way to mill your deck into your graveyard very quickly, and it has the added benefit of generating a really big creature on the battlefield.
(Bonehoard + Splinterfright
) or (Bonehoard + Lotleth Troll
) - Equipping Bonehoard to a creature with Trample ends games very quickly.
(Bonehoard + Stinkweed Imp
) - Just like Trample, Bonehoard on a creature with flying can be devastating as well.The Dread Nuke
(Pictured here!)
So this is the 1 shot kill combo. Pull it off and your opponent (or opponents) will lose their minds. The best part is, this combo can kill every opponent in a multiplayer game at once - in fact, the more opponents in your multiplayer game, the easier this is to pull off! Here's how it works:
- First, you absolutely have to make sure you can get a Bonehoard onto the field. Nighthowler works as well, though Bonehoard is superior (for the reason mentioned in the note below). Making this kill in a single shot will be almost impossible without it.
- Get Jarad, Golgari Lich Lord onto the field. Doesn't need to be right away, but he needs to be out and able to cast his ability when it's time.
- Get another yard fed fatty on the field - Golgari Grave-Troll, Splinterfright, and Nighthowler all work.
- Dredge and mill your brains out. Simultaneously try to use your opponent discard suite to fill their graveyard too. The faster the better.
- Once all the creatures in all the graveyards give your fatty + Bonehoard a power total that's greater than or equal to your highest opponent's life total, activate Jarad, Golgari Lich Lord's ability, sacrifice the creature, and defeat every one of your opponents simultaneously. Then sit back, feast on their rage, and drink deep of their tears.
Note: if you can't kill your opponent in a single shot, it is possible to sacrifice your biggest creature + Bonehoard, then equip Bonehoard to another creature and sacrifice that one, and so on until they're dead. It's risky, and it might take more than one turn, but it works.
Finally, keep in mind that this deck isn't built solely to win with this combo. It's built with numerous flexible win conditions. You can swing with massive tramplers or flyers. You can go overwhelmingly wide with tokens. You can play a strong midrange style game, strategically breaking your opponent down while maintaining control through discard. And sometimes you'll get to blow off this 1 shot killer and everyone will rage. Each wincon is strong and easy to adjust your play toward, so just don't get tunnel vision and you'll see great results. Because most of the time, it's a combination of these wincons that'll score you the win - a 10/10 Trampler, a 3/4 spitting out 10 2/2 wolves, and a flying deathtoucher all attacking at the same time is hard to contend with, especially when you've got your finger on the button for Jarad's nuke (and don't forget, Jarad can still attack on the turn he nukes - in fact, he's probably your biggest creature).
Creatures
Stinkweed Imp - With deathtouch and flying, this guy gives the deck excellent defense against early aggro and late game flyer strategies. He's also a prime target for Bonehoard. And his Dredge ability is pretty substantial, not only making him difficult for an opponent to get rid of, but fueling your big beaters in the process.
Lotleth Troll - This guy helps the deck in a number of ways. He's a decent body that can get stronger while simultaneously pumping up the graveyard. He's another trample option for Bonehoard. His regenerate ability makes it very difficult to get rid of him. And he comes with a built in discard outlet so we can just put creatures straight into the graveyard from our hand (to be dredged back out later!). Also, it should be noted that he's capable of getting very big on the turn he comes down. Don't be afraid to use him for a little aggro work while you stuff your graveyard.
Satyr Wayfinder - Basically just Mulch with a body. He lets you mill your library and grab some land for early ramp. Or, since he's super weak, he makes excellent graveyard fodder. Either discard him with Lotleth Troll or just be perfectly content when he gets milled away. No matter what, he did his job.
Nighthowler - This one should be pretty obvious. He's relatively cheap and gets really big really fast in this deck. He doesn't trample like Splinterfright, but it's hard to complain about such a threatening body for the cost. If you cast him for his Bestow cost, just like Bonehoard, you can make another creature game-winningly powerful very quickly.
Kessig Cagebreakers - This card is super slow, but is totally worth the wait. If you've been doing your due diligence and getting that graveyard good and fat, the first time this guy attacks, it could very well be game over. It is not uncommon for him to be spitting out 10 2/2 wolves on his first attack. And those wolves stick around, so a few attacks from him and your opponent's survival is pretty unlikely.
Splinterfright - Another incredible deal for the mana. This guy is cheap to summon, gets big just as fast as Boneyard Wurm, tramples, and if that wasn't enough, he helps stuff your graveyard on his own! He is the perfect card in this deck and will be the name your opponent's curse after they get stomped all over by him. Get him out early for milling or save him to safely bring down later when he's a big old fatty. Either way, he's a bomb. I highly recommend keeping your control/removal available for protecting him, because he's your primary wincon.
Golgari Grave-Troll - Recently unbanned for Modern, even if this guy never sees combat, his Dredge ability is massive. You could cycle him in and out of the graveyard with Lotleth Troll and pump up your board very quickly. But if he does make it out to fight, he's a beast just like the rest of our big beaters, with the added benefit of being VERY hard to kill.
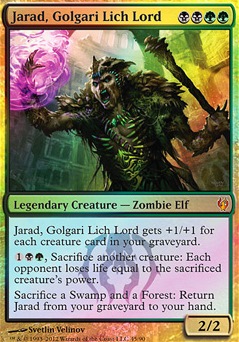
Jarad, Golgari Lich Lord - Even as a 1-of, he's an additional win condition in this deck. There's a very high likelihood that he'll end up in the graveyard, and if he does, you can pull him back out relatively guilt-free thanks to Life from the Loam and Dakmor Salvage. When he hits the field, of course he'll be super strong given all the deck's milling and discard outlets. And if combo'd together with, say, Splinterfright + Bonehoard, his activated ability can potentially end a game on the spot.
Bonehoard - I'm including this under creatures since it can come in and attack on its own. If Splinterfright makes your opponent's rage, this guy will make them flip the table. Equipping this to any of your creatures means your opponent is likely facing the business end of an Eldrazi killer. On Splinterfright with his trample, it's especially deadly. But the mere fact that you can equip to any creature on the field and make them a devastating monster if you have to is a testament to its power. The real kicker is that unlike your other creatures, Bonehoard includes your opponent's graveyard as well. That means as it kills, it gets stronger. And in multiplayer, it's downright overpowered. You'll smile every time you draw this bad boy. (Side note: don't forget you can attack with this on one creature, then equip it to another to block)
Spells
Night's Whisper - This spell has dual benefits in this deck. First, drawing two cards for an easily splashable 2 mana and some life (to be healed back with Gnaw to the Bone later) is pretty nice. If you need some card advantage, you're set. But since this deck is Dredge heavy, this card gives you some new options. You can draw two cards, Dredge two cards, or draw one and Dredge one - whichever is most beneficial at the time. At worst, it gives card advantage. At best, it's like stomping on the Dredge engine's gas pedal with both feet.
Life from the Loam - This spell makes sure you've always got fuel in the tank. By providing you with a ton of mana and filling your graveyard simultaneously, you really can't go wrong with this one.
Raven's Crime - Thanks to this card's Retrace ability and Dakmor Salvage's Dredge, there's a very high likelihood that you'll be able to cast a lot of these each game. Keep your opponent's hand free of threats while you ramp and it'll be game over in no time.
Gnaw to the Bone - Lifegain is usually garbage, but the amount of healing you can get from this spell in this deck (and cast it twice with Flashback) is bonkers. Talk about stalling. If you need a few extra turns to bring the pain, this spell will get you there. And in some cases, if your graveyard is full enough, your opponent might just scoop on the spot when you blow this twice in the same turn and heal for 40.
Sideboard
Abrupt Decay - Clear the field of threats, protect your creatures, or stuff your own graveyard. All around great utility card. And it can't be countered to boot. One of the biggest benefits to running B/G is this card. It can't bring down big fatties, but your forced discard can help make sure they never see the field anyway. (As an alternative, Go for the Throat or Doom Blade work as well, though they lack in utility comparatively.)
Naturalize - Don't let your Splinterfright get Pacified! Or any other enchantment/artifact shenanigans.
Vines of Vastwood - If you run up against a deck heavy in removal and you can't pick them off with your forced discard, this is a good option for protecting your big beaters while simultaneously making them even beefier if you need to.
Bile Blight - Good game, tokens. Also useful against general weenie strategies or any deck that isn't solely running fatties. But mostly tokens, lets be honest. Those things are the worst.
And that's it. Hope you like it!
For less competitive, more casual fun shenanigans check out my ultra-budget decks: Ultra-budget: Wrath of the Witch-King and Ultra-budget: Midnight Onslaught and +1 and comment there as well!
