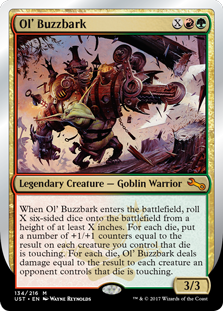
Creature (30)
- 1x Avenger of Zendikar
- 1x Beetleback Chief
- 1x Champion of Lambholt
- 1x Devoted Druid
- 1x Earl of Squirrel
- 1x Embermaw Hellion
- 1x Eternal Witness
- 1x Fyndhorn Elves
- 1x Gyre Sage
- 1x Joyride Rigger
- 1x Krenko, Mob Boss
- 1x Legion Warboss
- 1x Llanowar Elves
- 1x Mindless Automaton
- 1x Mycoloth
- 1x Oni of Wild Places
- 1x Rishkar, Peema Renegade
- 1x Roaring Primadox
- 1x Rosheen Meanderer
- 1x Siege-Gang Commander
- 1x Stampeding Serow
- 1x Stampeding Wildebeests
- 1x Steamflogger Boss
- 1x Steamflogger of the Month
- 1x Steamflogger Service Rep
- 1x Steamflogger Temp
- 1x Temur Sabertooth
- 1x Three-Headed Goblin
- 1x Willing Test Subject
- 1x Wrench-Rigger
Planeswalker (2)
Land (37)
- 1x Cinder Glade
- 1x Command Tower
- 12x Forest
- 1x Game Trail
- 1x Gruul Turf
- 1x Karplusan Forest
- 1x Kessig Wolf Run
- 1x Kher Keep
- 1x Mosswort Bridge
- 10x Mountain
- 1x Rootbound Crag
- 1x Skarrg, the Rage Pits
- 1x Spire Garden
- 1x Stomping Ground
- 1x Temple of Abandon
- 1x Temple of the False God
- 1x Wooded Foothills
Enchantment (10)
- 1x As Luck Would Have It
- 1x Awakening Zone
- 1x Chittering Doom
- 1x Cramped Bunker
- 1x Furnace of Rath
- 1x Gratuitous Violence
- 1x Mirror March
- 1x Outpost Siege
- 1x Stolen Strategy
- 1x Zendikar Resurgent
Instant (2)
Commander (1)
Sorcery (10)
- 1x Cultivate
- 1x Harmonize
- 1x Harvest Season
- 1x Kodama's Reach
- 1x Mana Geyser
- 1x Rampant Growth
- 1x Rishkar's Expertise
- 1x Selfie Preservation
- 1x Shamanic Revelation
- 1x The Countdown Is at One
Artifact (8)
Sideboard
Contraptions (16)
Suggestions
Updates Add
Comments
Attention! Complete Comment Tutorial! This annoying message will go away once you do!
Important! Formatting tips — Comment Tutorial — markdown syntax
Please login to comment
| Date added | 5 years |
| Last updated | 5 years |
| Legality | This deck is not Commander / EDH legal. |
| Rarity (main - side) | 6 - 4 Mythic Rares 39 - 7 Rares 21 - 5 Uncommons 12 - 0 Commons |
| Cards | 100 |
| Avg. CMC | 3.65 |
| Tokens | Construct X/X C, Copy Clone, 4/4 O Token Creature Dragon, Eldrazi Spawn 0/1 C, Faerie Spy 1/1 U, Gnome 1/1 C, Goblin 1/1 R, Kobolds of Kher Keep 0/1 R, Plant 0/1 G, Rogue 2/2 B, Saproling 1/1 G, Satyr 2/2 GR, Squirrel 1/1 G |
| Folders | Test |
| Votes | |
| Ignored suggestions | |
| Shared with | |
| Views |

