Maybeboard


Welcome to T&T Bloom Scepter

T&T Bloom Scepter is a Mid Range combo control deck designed with exactly one purpose in mind: beating every other deck in the format with the greatest degree of consistency possible. For those looking to win consistently in competitive circles and play the absolute best deck in the format, look no further, you've found it.

How do you Meta?

The cEDH meta, though always evolving as new sets and cards are released, has slowed to a crawl in terms of innovation. Much of the potential meta space has been explored and many of the format's fundamental concepts are well known by now and rather entrenched. However, there are some aspects that the competitive community is still slow to pick up on and many of the decks in the meta space rely on a flawed understanding of some key factors to remain competitive. T&T Bloom Scepter is a deck looking to exploit this complacency within the meta and leverage efficiency to a maximum potential as a means to generate wins on a consistent basis against what many believe to be high quality decks that are difficult to best. The first thing that must be understood by a T&T Bloom Scepter pilot is what fundamental aspects the meta at large is failing to recognize as important, then learn how to exploit these failures to an advantage for as long as the community takes to adjust to the new reality.

The first topic we will broach is the concept of a single point of failure as this is the concept that the entire cEDH community has been slow to recognize the importance of in competitive play and a primary weapon T&T Bloom Scepter will look to utilize against opponents. Taking a step back to look at the big picture, it's important to realize how the competitive community reached a point where this concept is a relevant angle from which to attack opposing players and decks. In the arms race to make each deck as fast as possible in execution of a combo win line many decks have eschewed robust, resilient deck building principles.

The slower decks in the meta often struggle to compete with the speed and consistency with which the faster decks can employ a combo win line and these combos tend to be compact enough, in terms of card slots and mana investment, to initiate with relatively consistent ease. What many of these slower decks are overlooking as they try and fail to compete is that many of these fast combo decks have built an inherent weakness into their deck in an attempt to make the execution of a particular combo line as fast as possible, often devoting a dozen or more individual card slots to support the execution of one particular combo line. This dramatically limits the amount of space available to many fast decks for other important elements a deck should have, such as alternative ways to win in the event one is unavailable or pieces to prevent other decks from gaining advantages and potentially winning the game.

Consider for a moment a typical Laboratory Maniac style combo win line. In the event this win condition is exiled and removed as an option in the course of game play early in a match the rest of the many pieces the deck was running to support the line as well as the combo pieces used to initiate the line themselves have now become dead cards taking up deck space that serve no function to help the fast combo deck actually win the game. For many decks out there in the meta this is liable to be the ONLY way to win via a fast combo and the removal of the win condition piece essentially eliminates the deck from contention in the match altogether. A deck with a single point of failure, or even potentially several individual points of failure in a particular chain that requires each of these individual elements, is extremely vulnerable to being attacked from this angle and that is what T&T Bloom Scepter is looking to do in some configurations while avoiding falling prey to the same weakness.

Card slot efficiency is a concept that the cEDH community believes it understands very well. It's often a topic of discussion and consideration, but many in the community tend to think about this from a singular card perspective and ignore the bigger picture aspect that is equally important: total card slots devoted to a particular purpose. Yes, Flash is a spell for , this is very mana efficient and the function of the card is also efficient being able to generate a game winning line for that low mana cost investment.

But what about the total card slots devoted to enabling the line of play? Well, usually there are going to be the second major piece in Protean Hulk and about a dozen other pieces directly involved in a chain of subsequent actions that all must also be run to enable this line. And then the line needs a win condition, which is often the Laboratory Maniac discussed earlier. And then the line needs additional slots devoted to tutoring up these pieces that might not other wise need to be run such as Eladamri's Call. In the end Flash, while being efficient in and of itself, requires an extremely inefficient card slot set up to be a viable plan of action to win a game. This is going to limit the resources available to a deck employing a Flash based strategy for other purposes and pushing that deck into a game plan where the Flash related resources are incapable of producing a game winning line before the deck is able to defend against the angle of attack is going to be an objective for T&T Bloom Scepter in certain configurations.

This is a concept rarely discussed in the cEDH community and many players tend not to give much thought to it at all, which means it's another angle T&T Bloom Scepter can use to aggressively attack opponents.

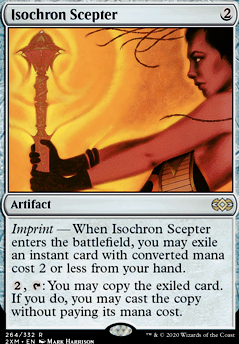
Consider for a moment the relative vulnerability of a Dramatic Reversal imprinting on an Isochron Scepter line compared to a similar line in casting Power Artifact on a Grim Monolith. The Dramatic Scpeter combo is neat and compact, very efficient, but this line of play is more vulnerable than enchanting a Monolith with Power Artifact. The Scepter combo requires additional cards in play aside from the 2 being used to function, and this line exiles Dramatic Reversal in the process. There are more angles to attack this line of play than there are with Power Monolith, and some of these angles of attack can prevent the line of play from ever being available again in the future. A pilot could destroy the mana rocks or creatures the Scepter needs to generate infinite mana. The Scepter and the spell it casts a copy of can be countered. If the Scepter is destroyed the Dramatic Reversal remains exiled. However, the Power Monolith combo can only be interacted with in the castings of these two pieces or destroying them and destroying either of them merely sends them to the graveyard rather than exile, which is much easier to retrieve lost pieces from.

Or consider a typical Food Chain winning line when compared to Demonic Consultation winning line. The Forbidden Tutor play comes with an inherent risk of exiling the win condition when employed as well as exiling pieces that could be used to help a deck recover if the line fails for some reason. It also includes vulnerability to more forms of interaction than a Food Chain line as there are generally slightly more ways to deal with creatures on the board in cEDH decks than enchantments and also slightly more commonly run pieces of counter magic that can hit instants or 1 cmc spells than a 3 cmc enchantment.

When piloting T&T Bloom Scepter it's always a benefit to attempt to force an opponent onto the game plan that has the greatest degree of vulnerability as a line of play. This increases risk in the risk/reward factor for opponents which can have significant pay offs over the course of time and is important when considering the angle from which to attack decks that actually do have more than one point of failure.

The burden of interaction is a concept that the cEDH community is becoming more accustomed to. It's important to remember that in a multiplayer format no one individual will be able to have the ability to interact with every other individual most of the time. T&T Bloom Scepter is a deck that will look to utilize it's opponent's abilities to interact with each other to a profitable advantage by opening up opportunities for players who don't want another player to do a particular thing to have a chance to prevent it from happening. It will be vital to prioritize allowing the slower opposing decks to have opportunities to interact with the faster opposing decks since T&T Bloom Scepter can assemble advantages over time very easily as well as explosively very easily. The degree of flexibility the deck construction of T&T Bloom Scepter affords allows it to more profitably "pick it's spot" than other decks in the format. It's design is such that it is extremely resilient and terrific at acquiring more total resources than opposing decks will be able to collect in the same time frame.

Placing the burden of interaction on other players intelligently and selectively allows T&T Bloom Scepter to employ the resources of those decks as well as it's own against the competition making proper threat assessment critical at all junctures in time. Properly done this can leverage the resources of each opponent against each other opponent until the attrition adds up and the card advantage generated from active and passive sources allows T&T Bloom Scepter to fight through multiple opponents' potential remaining permission elements for a game winning line of it's own.

Overview Conclusions

Understanding these aforementioned concepts, the game plan to attack opponents in match becomes clear for T&T Bloom Scepter. The deck wants to quickly disable fast decks with single points of failure by exiling the critical pieces (when in the Inception configuration), employ the most efficient lines of play possible to it, force opponents onto as inefficient lines of play as possible, and stay patient while employing the resources of opponents against one another and utilizing conservative low risk angles of attack to allow attrition to take a toll before making a big move. Effectively employing these tactics and attacking decks from angles the meta is not used to handling is the route to success in a meta that has become complacent with the status quo.

Before getting more in depth about how to approach playing a game with T&T Bloom Scepter it's necessary to understand what the engines the deck employs can do and the limits of each. Each engine is designed to be as compact and efficient as possible in terms of card slots and mana investments and each is intended to perform the same function. This gives the deck several means of accomplishing the same goal and adds layers of redundancy that will make it much more difficult for opposing decks to do to T&T Bloom Scepter what T&T Bloom Scepter is trying to do to them: eliminate the ability for a deck's combos to function at all and turn cards devoted to them into dead card slots. All the engines T&T Bloom Scepter utilizes are intended to draw the whole deck and generate infinite mana. It's not all that important to fight too heavily to protect any one of these engines as the deck will be happy to use one or two of them as bait for opposing interaction to be able to force through a different engine and hold it's own interaction for preventing opponent's from being able to effectively combo off. Be wary of putting too many of the pieces into the graveyard however, as this invites opponents to spend graveyard hate to exile multiple pieces you might want back later.

These two engines are very simple and well understood. Each is a two card combo that enables the generation of infinite mana, although Dramatic Scepter will require enough mana rocks/dorks in play to be able to function. With either engine in play and Thrasios in play a pilot is able to draw the whole deck. The greatest threat to these engines is typically going to be Abrupt Decay as the only real answer to it this deck runs is Narset's Reversal. Grim Monolith is the lowest risk to play and can generate value without being part of an infinite combo. It also enables the Dramatic Scepter engine on it's own as it is a single mana rock that can generate net positive mana per loop iteration. There is very little downside to casting this at the earliest opportunity and most of the risk comes in the attempt to enchant it with Power Artifact. Isochron Scepter is slightly more risk to play as it could potentially be destroyed or bounced after imprinting Dramatic Reversal. T&T Bloom Scepter can feel free to cast Isochron Scepter for value earlier on in the game and imprint a different target, such as a counterspell (Swan Song HIGHLY not recommended) or Brainstorm. This can often be a good way to bait opposing targeted removal.
The Mystic Bloom combo engine is a new concept that offers some play pattern advantages to a deck that are worth taking advantage of in competitive metas. The combo revolves around Summer Bloom, Mystic Sanctuary, Squandered Resources, a means of playing lands from the graveyard (Crucible of Worlds or Ramunap Excavator), and a land that can sacrifice itself to draw a card (Silent Clearing, Nurturing Peatland, or Waterlogged Grove) as the elements that assemble a game winning engine and line of play.

The engine functions in a simple enough manner. With 3 Islands, Squandered Resources, and Ramunap Excavator in play, Mystic Sanctuary and Waterlogged Grove available to be played in hand or already on the board, and an available the engine is ready to be turned on. Use the to cast Summer Bloom to net three additional land drops. Play Mystic Sanctuary, using it's triggered ability to put Summer Bloom back on top of the library. Play Waterlogged Grove. Play any other land that can produce green mana (including those already in play by first sacrificing it to Squandered Resources for mana). Tap the Mystic Sanctuary for , sacrifice it for , tap the other land for , sacrifice it for any color of mana it can produce. Use to sacrifice Waterlogged Grove for it's ability to draw a card and draw Summer Bloom from the top of the deck. There is now remaining to cast Summer Bloom as well as one left over mana of any color that the third land could produce. Repeat this loop for infinite mana.

This loop can also generate infinite draw. Every third iteration of the loop can be used to play Waterlogged Grove, use the from the Sanctuary to draw Bloom off the top, then replay Waterlogged Grove and use the second from sacrificing Sanctuary to draw the next card of the library.

Alternatively, the loop can also be used to restock the library with relevant instants and sorceries. Every third iteration of the loop can be used to play Mystic Sanctuary to put any instant or sorcery on top of the deck, then tap the Sanctuary for mana and sacrifice it for mana before playing it again from the graveyard to put Summer Bloom back on top of the library. The third additional land play can then be used to play Waterlogged Grove, sacrificing it to draw Bloom off the top.

This engine is a one size fits all infinite looping mechanism that can bypass many forms of meta hate such as Cursed Totem, Torpor Orb, Null Rod, Grafdigger's Cage and many other common effects. The only forms of meta hate that prevent this engine from functioning are graveyard hate pieces like Rest in Peace, draw hate pieces like Notion Thief, or spell cast hate pieces like Rule of Law or Thorn of Amethyst. This versatility and reliability make the Mystic Bloom engine a powerful game winning play line, but the inclusion of the engine also offers advantages in other ways due to the play patterns it allows in early game situations. Playing fetches from the graveyard to consistently make land drops and thin the deck is a major value advantage, wheeling into Summer Bloom drops can massively ramp ahead of opponent's board states, and Squandered Resources is a very low risk play with excellent upside and value reward even when not actively engaged as part of the combo engine. The pieces that allow these play patterns, and the other elements being lands (one of which is very easy to tutor for with other fetch lands) makes these play patterns extremely consistent in terms of providing significant advantages in the course of game play that allow T&T Bloom Scepter to position for wins against the meta at large, and particularly against the meta's standard staples.

Angel's Grace paired with Ad Nauseam should need very little explanation in and of itself as this combo is a staple of the format. If both resolve the whole deck can be drawn at the cost of life equal to the combined mana cost of cards remaining in the library. This comes with a fairly high degree of risk as opponents tend to universally understand the implications of a resolved ANAG combo. Generally, if they can interact here they will do so. If the combo resolves then it's highly unlikely opponents have any sort of remaining countermagic they will be able to cast and the greatest threat will come from opponents who still have untapped mana and instant speed targeted removal.

With the whole deck in hand after completion of this combo any of the above engines will be able to generate infinite mana and which can be played depends only on the mana that will be available. Abrupt Decay is again the biggest threat to the engine pieces that resolve as most other removal targeting an engine piece can be dealt with by the answers drawn off the ANAG combo. If Silence is being run it is a wise idea to cast it prior to attempting the ANAG combo in order to protect it and the subsequent plays.

Mystic Top is a new engine with the release of M20. Usually this slot would be held by Paradox Engine, but since that card has been banned in commander Mystic Forge will be the replacement. Paired with Helm of Awakening and Sensei's Divining Top this engine allows for the drawing of the whole deck. With all 3 in play activate Top to draw a card returning it to the top of the library, then play it for free from the top of the library with Mystic Forge's effect. Repeat to draw the whole library. With the whole deck in hand 3 pieces can be added to this combo to generate infinite mana: Elixir of Immortality, Dark Ritual, and Lotus Petal. Play the Petal and Elixir for free. Tap and sac the Petal for , then use the mana to cast Ritual. Spend to activate Elixir and return the graveyard to your library and gain 5 life. Repeat the draw process with Top to draw the cards again. Play the Elixir and Petal for free again and use the remaining to cast Ritual. Sac the Petal for any color of mana. Use to again activate Elixir, and then use the Top to draw them again. From this point on the loop will generate to cast Dark Ritual off the previous Dark Ritual infinitely and infinite mana of any color as well as infinite life gain.

Playing Sensei's Divining Top comes with the lowest mana investment and least risk. The Top is also fairly good at being able to protect itself while offering excellent utility. Playing Helm of Awakening outside the combo comes with more risk as this will decrease not only the cost of your spells but your opponent's spells as well. Very rarely will opponents want to interact with these 2 pieces as one protects itself and the other is helping them. Playing Mystic Forge comes with the most risk and greatest mana investment. Opponents are very likely to respond with interaction upon casting or resolving the Forge with the other 2 pieces in play, but the Forge is immune to Abrupt Decay where the other pieces are not.

In total, T&T Bloom Scepter is devoting 4 card slots to 2 combos, and a further configuration dependent small number of slots to a 3rd and/or 4th combo. This is a significant advantage over most every other deck in the format as none will be able to match this card slot efficiency or resiliency. All other remaining cards can be devoted to interaction, mana sources, card advantage sources, tutors, and meta specific hate packages. After using any of these engines to generate infinite mana and infinite on demand card draw T&T Bloom Scepter can proceed to the looping of a win phase using the interaction spells themselves to generate a win.

The next thing to understand before delving into how to approach playing a game with T&T Bloom Scepter is the ways in which the deck combo wins making use of the concept of infinitely looping spell casts in order to save deck space, remain as consistent as possible about it's opening turn plays and development, as well as maintain a maximum degree of efficiency in terms of card slots and mana resources used. There are at least a pair of loop enabling engines that the deck will make use of in it's default and alternative configuration set ups and an additional option that can be included in Memory's Journey should a pilot feel another layer of redundancy is required for the meta game they will be facing in a match.

Elixir of Immortality, as discussed briefly earlier, is the primary loop enabling piece and requires only 1 card. It has several advantages over other loop generation options as it is an artifact that can be returned from exile rather easily in this deck's primary set up, requires only 1 card and a total mana investment of to enable looping, and does not generate new hands of cards for opponents to use to potentially interact with plays. It also comes with a disadvantage by being run, however, as this is a card that is slightly less "live" than other options may be. Outside of generating infinite loops it's only real function is to protect the graveyard from graveyard hate pieces in game, a valuable effect, but not one that will be the most often needed from game to game.
T&T Bloom Scepter's secondary loop enabling option is the combination of Narset's Reversal and Timetwister. The disadvantage here is that this method requires a greater mana investment at to perform, 2 cards to perform, and it's pieces cannot be returned from exile in the deck's primary build iteration. On the advantageous side of things these are both spells that are significantly more "live" than other options may be from game to game outside of looping. In the event, for whatever reason, that Narset's Reversal is imprinted on Isochron Scepter (not usually recommended unless Memory's Journey+Noxious Revival is also in the deck and the value of Narset's on Scepter is much greater while the risk is significantly lessened) this loop will additionally require the use of Dramatic Reversal to function (as well as increase the cost of the loop to ). To perform the loop first cast Timetwister, then cast Narset's Reversal targeting Timetwister, and if need be then cast Dramatic Reversal while holding priority on Narset's Reversal's resolution. This will shuffle all cards used back into the deck to be used again, as well as hands and graveyards of opponent's back into their decks, and draw a new hand. Always make sure Thrasios is in play, is able to activate his ability, and that infinite mana of every color has already been generated if possible before attempting this line to allow the line to protect itself as Silence is not run in this deck's primary set up. Proceed to use Thrasios to draw the whole deck and return to a loop enabled game state using permission as needed to defend against any opponents who might have drawn interaction off of the Timetwister. Dovin's Veto (or similar effects like Counterflux) being drawn is typically the greatest threat to this line as Narset's Reversal cannot be used to deal with it. It is wise to exile these potential pieces, if possible, from opposing decks prior to starting this line.
While the previously mentioned Bloom Combo loops can generate infinite mana, infinite card draw, or infinite looped restocking of instant and sorcery spells, an additional piece can be added to allow infinite looped restocking of any card in the graveyard without limitation and enable all of T&T Bloom Scepter's game winning loops.

With Noxious Revival these loops can be used to return every card in the graveyard to the library. First generate infinite mana, next generate infinite land drops by only using two land drops per Bloom Combo loop iteration to play Mystic Sanctuary and Waterlogged Grove to reset, redraw, and replay Summer Bloom. Then cast Noxious Revival on any target in the graveyard to put it on top of the library, play Mystic Sanctuary to put Noxious Revival on top, play Waterlogged Grove, then sacrifice Mystic Sanctuary for mana and Waterlogged Grove to draw the Noxious Revival. Repeat this portion of the loop until all cards are returned from the graveyard to the library or as needed to loop the win condition of choice.

The last option that may occasionally be available is Memory's Journey paired with Noxious Revival should it be included for some reason in the deck's set up. On the pro side of things this looping method is slightly more "live" than Elixir as the pieces can double as interaction for opposing graveyards in addition to recursion of your own pieces in the graveyard in non looping game situations, does not grant opponents additional card resources in hand, and requires a low mana investment of (and 2 life), or at instant speed. The cons are that the method requires 2 card slots, can only loop 2 spells at a time as opposed to an entire graveyard, and these cards can not be easily returned from exile in the deck's primary set up. Using Narset's Reversal with Memory's Journey is also possible but requires Narset's Reversal to be imprinted on Isochron Scepter with Dramatic Reversal in hand, and increases the mana investment required to use the loop to . To perform this loop simply cast any 2 spells that need to be looped, then cast Memory's Journey. If using Narset's Reversal tap Isochron Scepter to cast it here targeting the Journey to return it to hand and copy it on resolution, hold priority and cast Dramatic Reversal to untap the Scepter; upon resolution use the copy of Journey to target Dramatic Reversal that is now in the graveyard and the 2 spells cast earlier to return them to an empty library and proceed to use an infinite draw method to return to a loop enabled game state. If using Noxious Revival, target the 2 spells cast earlier with the Journey to return them to the library, then cast Noxious Revival to return the Journey to the top of the library. Proceed to use an infinite draw method to bring these cards to hand and repeat the loop using the third target slot from Journey to also return Noxious Revival to the deck. Draw the cards again to return to a loop enabled game state and perform the loop as needed after proving it can be short cut to a deterministic end result.

Using these loops the following methods are able to win the game.

Ashiok, Dream Render is the go to method of generating a looped win. In addition to providing a high quality measure to impede opponents from searching libraries while providing graveyard hate, Ashiok will exile all opposing libraries when looped. To perform a looped Ashiok win first cast Ashiok, then use her minus ability to exile all opposing graveyards and the top 4 cards of one opponent's library. Abrupt Decay can then be used to destroy her and put her in the graveyard to be looped. Chain of Vapor can also be used to return her to hand and replay her for additional activations. Use a looping method to return Ashiok and/or the other cards used to the library and then use an infinite draw method to return these cards to hand. Replay Ashiok for additional activations and perform the loop as needed after proving it can be short cut. Opponents who then draw on an empty library will lose the game and result in a win for T&T Bloom Scepter.
One of the most ideal methods of winning a game in the Inception Configuration relies on exiling opposing libraries with Extract and Praetor's Grasp. These cards pull double duty, being both a primary angle of attack against decks with a single point of failure early on in a match and game winning finishers. Performing a loop is simple with these options, just target an opponent with one of these spells and exile a card (it won't often matter, but starting with free countersepells such as Pact of Negation and uncounterable cards such as Dovin's Veto or Abrupt Decay is correct prioritization). Use a loop + draw method to return Extract and/or Grasp to hand and repeat the process as needed after proving it can be short cut. Again, opponents drawing on empty libraries results in a win.
T&T Bloom Scepter's second option set revolves around looping Assassin's Trophy and/or Swan Song (Beast Within, Pongify, Winds of Rebuke, Oko, Thief of Crowns, etc). At it's core only Assassin's Trophy is really needed to set up for an assured win, but in all cases this line is a greater risk than the aforementioned game winning lines even if that risk is fairly negligible. Should the deck be running either Generous Gift or Beast Within, both can perform the same function at greater cmc but less card slot investment. To perform this winning line start by casting and looping targeted discard spells to shred opposing hands of any non land cards. Then proceed to cast and loop Assassin's Trophy on all opposing permanents until each opponent has a completely empty board state as well (GG and BW can be substituted here, followed by Swords to Plowshares, Cyclonic Rift, Chain of Vapor or Winds of Abandon looping to remove any opposing tokens). From this point cast all the creatures in the deck and then loop Swan Song on any spell T&T Bloom Scepter can cast that is able to be countered by Swan Song to generate infinite bird tokens (GG and BW can be looped targeting Tymna to the same effect). For style points feel free to cast any opposing creatures acquired via Praetor's Grasp (should it be included as part of the deck configuration). Pass the turn to opponents with no board and wait a turn cycle to attack for the win. Typically the biggest threat to this line is something like Massacre, but the process can be repeated each subsequent turn as needed until opponents are all dead.
Windfall can be used on a loop (or after looping the above mentioned lines to exile opposing libraries for an immediate draw on empty libraries) to force opponents to draw and discard their whole deck, but comes with the inherent risk of putting new cards into opponent's hands. As discussed earlier it is relatively easy to protect against this impacting the win line, but risk is still risk and this win line should be the last one attempted if possible. The Windfall line also runs into problems against decks running cards like Kozilek, Butcher of Truth as they can use the discard effect to reshuffle their graveyard into their library. Typically these are pieces T&T Bloom Scepter will be looking to attack and exile from opposing decks in earlier portions of a match, but things may not always work out in such a way as to be possible every game. Deathrite Shaman can be used to exile pieces like this at times, should the creature not be summoning sick. Casting Angel's Grace before starting this win line can help make it's employment much simpler, but in the event cards need to be returned to the deck there are plenty of ways to do so including simply casting spells or saccing fetch lands and performing a loop to restore them to the library without returning to a loop enabled game state by drawing them from the library. After Angel's Grace or stacking the library simply cast Windfall and let it resolve before using a loop + draw method to return the library to hand and repeat as needed after proving it can be short cut.
Deathrite Shaman can technically be a win condition, but is the least reliable method available to the deck. This win line is only possible with Dramatic Reversal looping or imprinted on Isochron Scepter, requires a from a mana rock or mana dork, and a large number of spells to target in graveyards. If there are not enough spells able to be utilized for this purpose in opposing graveyards then T&T Bloom Scepter must start using it's own spells for this purpose which is certainly a risk. Typically this won't matter if the point in a match has been reached where a pilot is resorting to this win line, but it is a consideration.

With a basic understanding of how the engines and loops function actual game play can now be considered.

General Game Plan Overview

The general game plan with T&T Bloom Scepter is pretty simple in essence: attack the opposition where they are most vulnerable and win the battle of attrition. In actual execution it's a lot more complicated and a successful match win is going to be predicated on a pilot's specific knowledge of the match ups and operational patterns of opposing decks, as well as the ability to correctly interpret the evolving threat levels and capabilities of opponents in a match. It has a simple plan, but requires a cerebral approach to employ it effectively. Often times the best line of play may be one that would seem counter intuitive at first glance. Sly political machinations, while not a common concept in many cEDH games or the community at large, can be a huge boon to a T&T Bloom Scepter pilot and this adds an element of intrigue to games that might not otherwise be present. At a fundamental level the deck is looking to do something that goes completely against the grain of typical cEDH game play patterns: be the last player to attempt to combo off for the win. The reason for this is easy to understand after seeing the deck work in practice a few times as more often than not the first person (or persons) to attempt to combo off will have those attempts stuffed, but the last person to attempt to combo off is the person who finally succeeded and wound up winning the match. This is how T&T Bloom Scepter will attempt to exploit the weaknesses present in the cEDH meta at large.

A successful piloting of T&T Bloom Scepter starts before the first player has even drawn the first card of the first turn of the game. When sitting down to play in a pod a pilot must begin by assessing the relative threat level of each deck opposing it, the potential speed with which those threats might be deployed, and the position of each deck in regards to turn order as these factors will help determine what opponent is the most important to target in the opening phases of the game. A fast deck going first in turn order with a single point of failure and inefficient card slot usage is the most threatening potential opponent who is also most vulnerable. A slow deck going last in turn order with multiple points of failure and efficient card slot usage is a less threatening potential opponent who is also less vulnerable. The most threatening, most vulnerable opposing deck is the first deck T&T Bloom Scepter will be looking to attack. If multiple decks are equally threatening then the most vulnerable deck takes priority in terms of which to target with turn order next dictating priority. There will be more time and opportunities to deal with the less threatening opponents as the game progresses. Identify the correct target before shuffling up and drawing a hand.
Targeting a deck with a single point of failure in the opening phases of the game and compromising that point of failure is generally going to be the line T&T Bloom Scepter pilots will take to start a match. On this angle the deck's discard disruption package will be the tools to employ, ideally using Extract and/or Praetor's Grasp on turn 1 or 2 to exile and compromise the point of failure in a vulnerable deck. While many other decks will be using these turns to tutor up various combo initiation pieces to engage their combo line as soon as possible, T&T Bloom Scepter will often be tutoring up an Extract to attack that combo line's pieces that remain in an opposing deck. In the event more permanent solutions aren't available in the opening turns then Inquisition of Kozilek, Duress, and Thoughtseize are a means of removing critical pieces from opposing hands to delay, at the very least, opposing game plan development.

Even in the event the target defends their deck and critical single point of failure combo piece with interaction this is a win for T&T Bloom Scepter as the burden of interaction has now been shifted to the slower opposing decks to use the opportunity of a now usually unprotected combo line attempt by the targeted fast combo deck to interact with and prevent the fast opposing deck from being able to combo off. This will waste a significant number of resources the fast combo deck may not be able to recoup quickly and buy time for the table to develop, or potentially even succeed in exiling the fast combo deck's critical piece and essentially eliminate the deck from being able to compete outright if forced onto the plan of "creature beats" as the sole remaining way to win.

There is some element of risk associated with this game plan as it is a single target play. Other opposing fast combo decks may have time to employ their own combo before the turn cycle returns and on occasion perhaps the only person who could have stopped it was the opponent targeted by Extract who chose to defend against the attack. Mathematically this type of scenario is unlikely, but it will happen in a certain small number of games per 100 played. Fortunately the angle of attack employed (with Extract and targeted discard spells at least) is extremely mana efficient and T&T Bloom Scepter will most often have left over mana resources, disruptive interaction resources in hand, and a chance to interact itself in such a situation.

This plan rather boils down to a single card: Ashiok, Dream Render. T&T Bloom Scepter wants to get her into play and start exiling opposing libraries and graveyards while also preventing opponents from utilizing tutors and fetch lands. Against some decks this angle of attack can be more effective than the primary angle of attack, usually decks that want to make use of the graveyard as either a stockpile of resources or reanimation zone. Any deck that wants to be reliably pulling resources out of it's library, however, is also seriously impeded by Ashiok and this is often bad news for fast combo decks and slower control decks alike. It's not important to try to rush her out, rather, look for an opportunity to get her into play when an important piece hits an opposing graveyard or when an opponent is expected to be looking to tutor for a reload or second attempt at a win.

Protecting Ashiok isn't a requirement, but T&T Bloom Scepter will want her to both resolve and stay alive to continue to employ the general game plan of attacking opponent's weaknesses in deck construction techniques that rely on excess tutor packages and low numbers of critical points of failure for low numbers of combo win conditions. It's often a good moment to drop an Ashiok after opponents have spent a turn cycle in attempts to employ combo lines that failed or were stuffed, interaction was spent, and remaining mana resources are also strained. There will often be numerous things in multiple graveyards T&T Bloom Scepter wants to exile in this type of situation to knock opposing decks out of the game. Ashiok is one of the few types of openly aggressive plays the deck will make and this will draw attention, ire, and opposing interaction resources, but will enhance the other lines of attack being utilized against those opponents.

Against certain decks employing Food Chain this plan can have an increased level of risk as it could potentially exile creatures they would rather prefer to be in exile any ways. It's rarely wise to target these decks with an Ashiok activation unless the Food Chain has already been dealt with and exiled itself. Typically the greatest risk in playing her is going to come from the mana investment versus any piece of interaction used to eliminate the threat she poses, particularly Abrupt Decay, as these pieces require less mana spent to deal with her than it cost to cast her and also places the burden of interaction back on T&T Bloom Scepter to deal with opposing win line threats when these interaction pieces are spent on Ashiok. In the event a T&T Bloom Scepter pilot is relying on an opponent to interact with another opponent based on information known or other factors it can be best to wait for a more opportune moment to play her.

The third option to attack opposing decks is a more (generally) passive approach with a much broader scope but a single goal: generate resource advantages over opposing decks and force resource attrition to cause opponents to falter. An opponent with less mana available, less cards available in hand, less resources to use in the graveyard, and less pieces in play on the board is an opponent who is much less of a threat to win a game or oppose a game winning line. Attacking opposing resources in an active or passive fashion will open up an opportunity for T&T Bloom Scepter to employ it's resource advantages relatively uncontested. In it's default configuration this will tend to be the primary angle of attack for T&T Bloom Scepter.

Some of the ways to enact this line exist in the command zone and will be able to be accessed with regularity on demand. Tymna the Weaver is an aggressive approach that will generate accumulation of additional resources in hand when the deck's creatures damage opponents. Thrasios, Triton Hero is a passive approach that takes advantage of unspent mana on opposing end steps when mana is held up to interact but no interaction was required to generate accumulation of resources both in hand and on board. Typically if a pilot is not in desperate need to reload resources in hand or find interaction it is better to ramp off Thrasios activations than acquire a cantrip or similarly less game impacting card. T&T Bloom Scepter wants to win the long game every time, but will be happy to win in shorter time spans if this does not require deviation from the main game plan of allowing attrition to do much of the heavy lifting for the deck.
Other passive means of using card advantage to attack opponents using the idea of attrition are included in the deck outside the command zone. Runic Armasaur will add extra resources in hand when opponents activate fetch lands, activate abilities of creatures like Thrasios or Urza, Lord High Artificer's last Mind's Desire ability, and utility lands such as Academy Ruins or Bazaar of Baghdad. Forcing opponents to choose between giving T&T Bloom Scepter more resources or not using their own are both outcomes that benefit T&T Bloom Scepter. Mystic Remora performs a similar and even more effective function. Dark Confidant and Sylvan Library won't impact opposing players as much but still help in the battle of attrition at an efficient investment price. Sensei's Divining Top gives access to the top of library to assist in this battle and can help set up a potential combo for later with a low mana and risk investment. Rhystic Study and Smothering Tithe can be included in the configuration to assist in these efforts. Which of these pieces is included in the deck configuration can often be a meta call made by the pilot based on what they expect to encounter using the modular flex slots intended for this purpose.
Casting an Ad Nauseam "for value" (as opposed to as part of the ANAG combo) on an opposing endstep is a more aggressive and active method of fighting this battle that comes with relatively low risk as it's not a piece the deck is dependent on resolving to achieve value within the parameters of it's overall gameplay, baiting an oppoenent's interaction can be effective in many situations. Necropotence is an option that is not included in the primary list but can be slotted in for certain metas that is another aggressive, active method of fighting the battle of attrition. All of these pieces will help the deck acquire extra resources, but T&T Bloom Scepter doesn't just want to acquire them; it wants to use as few of them as required to disrupt opponents and begin the process of stockpiling advantages to use explosively later on.
Another layer in this angle of attack is the targeted discard spells which work as a simultaneously active and passive approach to fight the battle of attrition. Actively, casting one targeting an opponent will remove a card from their hand either on resolution or when they interact with the spell to protect their hand making their subsequent actions more vulnerable. Passively, opponents who reveal a hand reveal information to the whole table allowing a T&T Bloom Scepter pilot the opportunity to shift the burden of interaction and encourage or force other opponents to answer problem pieces that might be found in that revealed hand.

It is sometimes the correct choice to make an opponent discard a permission or defensive piece rather than a combo piece to attempt to force the burden of interaction onto the remaining opponents to deal with the combo (this is more effectively done when T&T Bloom Scepter has an answer itself but would rather save it and the two opponents not targeted will have priority due to turn order after the targeted player but before T&T Bloom Scepter), essentially turning the targeted discard spell into a potential 3 for 1 that removes an interaction piece and a combo piece from one opponent as well as an interaction piece from another opponent.

It is sometimes the correct choice to do the opposite and force discard the combo piece but leave an opponent with the interaction they were unable to cast to defend against the discard spell (most effective when the target will act immediately before T&T Bloom Scepter except on T&T Bloom Scepter's own turns where they will be last in priority order). This shifts the burden of interaction to the opponent targeted to deal with any known or unknown threats another opponent might attempt to deploy as well as signals the rest of the table that interaction is available to disrupt them and potentially buy more time for T&T Bloom Scepter to allow attrition to work in it's favor.

Sometimes the correct choice is to play politics upon the reveal of an opposing hand, ask the table about what to remove, judge the responses and acquire information about the other opposing players' hands passively. In fact, this choice is usually correct and can be utilized, typically, regardless of other choices that might be made as the information that can be subtly acquired can have major implications for the state of the game and what lines T&T Bloom Scepter will want to pursue moving forward.

These options are complicated in nature and one of the most fundamentally misunderstood aspects of competitive edh as the vast majority of players will incorrectly play around turn priority actions and spend resources they might not otherwise have needed to spend. In order to understand how to allow turn priority to generate advantages it's important to start with the basic elements.

Whenever a spell is cast or ability activated, each player has a chance to respond based on turn order. Each player (providing there are no limiting hate pieces in play) will receive priority to act and can choose to do something, or nothing. The burden of interaction is always on the player who is last to respond to a particular spell cast or ability activation. This means that if everyone else passes priority on a particular thing, this last player is the person who must respond to it if it's something that requires an immediate response (such as a game winning line of play resolving). A clever pilot can abuse this fact to an advantage any time they are not last in turn order priority to respond to a given threat. Any time the last remaining player in turn order priority (or any number of players behind the pilot in priority) has an ability in play that they are able to activate that interacts by placing a new trigger on the stack (such as fetch lands, a non summoning sick Deathrite Shaman, or available mana/unappted Sensei's Divining Top) it is always safe to pass priority to such an opponent in competitive settings in order to force them to use resources to interact with the stack. Even if this opponent doesn't have a way to stop the impending "threat" and the T&T Bloom Scepter pilot does, as in order for this last opponent to give themselves the best possible chance to win they will be required to expend these resources to check to see if one of the other players was "bluffing" about not having interaction or interact with the threat themselves.

Ultimately, correctly playing in a fundamentally sound fashion around stack triggers can generate huge advantages in terms of the resources players have available to enact their game plan and T&T Bloom Scepter pilots will always want to spend their resources as wisely as possible by first allowing opponents to expend their resources instead.

The last set of options to consider are ones that can work both defensively and offensively: Timetwister and Windfall. Used aggressively, these are cards that can generate a net gain in available resources for a T&T Bloom Scepter pilot. These pieces can only be used effectively in an aggressive fashion, however, when opposing players have a large number of cards in hand while T&T Bloom Scepter has few. Mostly in these situations T&T Bloom Scepter will have dumped a number of resources in hand onto the board and will need to reload quickly while opposing players haven't yet had a chance to match the resource deployment or leave enough mana open to prevent the spell from resolving. This can be an inherently risky proposition as it is a symmetrical effect that puts an often large number of resources in each opponent's hand, is extremely vulnerable to Notion Thief style effects, and typically can't be defended easily as a line of play. Prior to turn 3 there is generally significantly less risk (if any at times). This option should be utilized with extreme care and proper game state evaluation is critical. On occasion an opponent will have a bad hand, or be in a "behind" position and want the spell to resolve to potentially solve that problem. It can be wise to look for such a situation and utilize this player to assist in resolving this type of play.

It is relatively common to pursue tertiary angles of attack more so than any others after the opening 2 turns of the match. In part because the options are more numerous, but also in part because many of these options often aren't interpreted as "threatening" by opponents which can mean they will save and then spend their interaction resources elsewhere which enhances the effectiveness of this angle of attack.

It is important at this juncture to take note of the fact that none of the angles of attack discussed to this point include attempting to find or play a combo win line. It should be reiterated: T&T Bloom Scepter is not looking to aggressively pursue attempting a combo win line until the pilot is satisfied that enough resources have been acquired in comparison to the resources available to opponents that a combo win line has a very high likelihood of being successful either because it can be well defended or opponents are incapable of disrupting it. Remember, T&T Bloom Scepter is looking to be the last player to attempt to go off as it is the last player to make the attempt who succeeds in every game by definition. The deck is happy to use tutors for other purposes and play a defensive minded game while using card advantage resources to draw into combo elements naturally, and even then it is willing to deploy those combo pieces purely to bait opposing resources at times. Knowing each opponent who can has already cast an Abrupt Decay (or similarly difficult to prevent piece of interaction) and no longer has access to it gives T&T Bloom Scepter an advantage and is the type of window of opportunity being looked for to "pick that spot" for a win attempt.

This is pretty simple and should come as no surprise after seeing the deck list. T&T Bloom Scepter will usually be utilizing it's robust interaction suite as the primary means of defending against opposing combo and other lines of play used by opponents. Where other decks may be devoting 20 card slots to engaging and supporting a single combo line, T&T Bloom Scepter devotes a large number of card slots (including even more with certain flex slot configurations) to various ways to impact or disrupt opposing game plans, a little over half of which are instant speed direct answers. In addition to those, some of the attack line options work double duty on the defensive front, such as the wheel effects, targeted discard spells, Ashiok, and the targeted exile spells (the cliche of "the best defense is a good offense", and vice versa, certainly comes to mind). A handful of other effective utility and hate pieces round out the complement.

For most of these pieces the correct moments to utilize them should be pretty self explanatory.

The wheel effect spells on the other hand could likely do with a little explaining in how to use them to defend against opposing lines of play. For the most part, using a wheel effect as a defensive measure comes down to a particular set of circumstances that is common in cEDH games: when an opponent or opponents have tutored for or otherwise knowingly acquired a combo piece in hand. Wheeling away this threat is a very effective method of dealing with the problem and oftentimes is a play that other opponents will be willing to assist in allowing to resolve at the detriment of the opponent(s) who knowingly acquired pieces with an extreme threat value. The downsides can be that potentially one or multiple opposing players will acquire a net addition in available hand resources, and that the table will tend to acquire a net mana availability advantage against T&T Bloom Scepter (at the very least) given that these effects are sorcery speed and cost . The upside is that this is a play that can effectively waste the turn of set up an opponent used, waste the spells used on the set up, waste the mana used trying to prevent the wheel from resolving, and, critically, prevent that player from being able to achieve resolving a game winning play line. In almost every situation where this type of defense is possible to employ the upside dramatically outweighs the downsides.

In general, defensive priority should be afforded to opposing lines of play that directly contradict T&T Bloom Scepter's overall game plan. Minor obstacles such as a Cursed Totem or Back to Basics are an annoyance, like a mosquito. Moderate impediments like a Null Rod may eventually need to be removed, but aren't a serious, time pressing issue. Major concerns in the form of pieces similar to Mystic Remora or Notion Thief will seriously hamper the efforts of the general game plan of T&T Bloom Scepter, however, and are pieces to defend against. Catastrophic threats such as an opponent casting Doomsday before that player's Laboratory Maniac has been exiled or a Food Chain resolving are must answer issues and in the event other opponents can't answer T&T Bloom Scepter must make sure it is able to do so as these situations are akin to the house being on fire.

The secondary line of defense employed by T&T Bloom Scepter is passive in nature as opposed to active in nature the way the interaction pieces are used. The idea is best summed up in one word: Camouflage. While it's difficult to hide the deck's commanders (which are always considered quite threatening in cEDH), or the permanents the deck might have in play in game (players tend to know more mana rocks and dorks means more mana which means more threat potential), it is possible to disguise the threat T&T Bloom Scepter presents to the table. Much of this boils down to the passive pattern of play exhibited by the deck in a typical game. Opponents will all be more worried about an opposing Food Chain in play than the untapped Deathrite Shaman, tapped Mana Vault, and Sylvan Library in play for T&T Bloom Scepter; and rightly so as Food Chain presents a potentially game ending threat just by existing in play. A non summoning sick Zur the Enchanter seems a lot more fearsome than T&T Bloom Scepter's Linvala, Keeper of Silence. Hiding in plain sight can be key to encouraging opponents to spend resources on these types of threats and each other rather than on T&T Bloom Scepter's own pieces.

As a pattern of play in many games it can often appear that T&T Bloom Scepter "isn't doing much" as some series of turns progresses and the deck merely plays a handful of mana rocks/dorks, a cantrip or two, perhaps a targeted discard spell or sneaking in a passive card advantage source while leaving up mana to potentially interact at instant speed, sometimes doing so, sometimes not but clearly able (which might be puzzling to an opponent). Much of the time this is because the only plays T&T Bloom Scepter is looking to make will be to directly oppose a game winning line if forced, target a critical piece to be exiled and prevent all potential future game winning opportunities for a deck, or acquire more cards to continue these defensive measures while stockpiling the needed resources to win. The idea of disguising the deck's threat to the table is part of the process of manipulating the burden of interaction and forcing opponents to expend resources and lose the battle of attrition. This style of passive defensive play enhances the angles of attack being leveraged against opponents as, really, no one wants to Nature's Claim a Mox Diamond, Chain of Vapor a tapped Grim Monolith or Abrupt Decay a mere Runic Armasaur despite these pieces actually being essential to the game plan of T&T Bloom Scepter.

A good defense is just as important as a good offense for a deck that is looking to grind out advantages over time.

Often times the progression of play in a match will follow a somewhat standardized "script". Knowing that script and T&T Bloom Scepter's part in it will help a pilot achieve consistent results, posting more Ws in the win column per 100 games played.

During these turns T&T Bloom Scepter is looking to ramp with cheap mana sources and begin to build a board presence while simultaneously employing the primary angles of attack. Turn order is often very important here as it can determine how aggressively T&T Bloom Scepter can pursue engaging an opponent on which primary angle of attack, going first in pod offers the maximum amount of potential options while going last offers the least. If a choice must be made between prioritizing ramping and board build up or attacking a vulnerable opponent it is generally more important to build a presence on the board when going first and often more important to prioritize effectively engaging the vulnerable opponent on a primary angle of attack before they are able to defend against the line when going last. The effectiveness of a primary angle of attack relies on it's ability to be employed quickly. Dropping a turn 2 Tymna is a feels good moment, but often shouldn't be done at the expense of T&T Bloom Scepter's general game plan.
Starting from this point T&T Bloom Scepter should look to be permanently playing with "shields up", rarely tapping out for any reason and remaining able to interact if possible (or often bluffing interaction at the very least with posturing which can be equally effective). Continuing to build up a board state and ramp with cheap pieces is a boon, but care should be taken not to overextend and become vulnerable to an early sweeper effect. A pilot should begin looking for an opportunity to start employing the tertiary angle of attack options here in either a passive or active fashion, but prioritize defense if the mana resources available don't permit both sets of actions.
At this stage many times opposing players will have already made an attempt to force through a win and in all realistic likelihood that attempt or those attempts were stuffed by the table and T&T Bloom Scepter itself with more active defensive measures. Opponents may be looking to recover or reload, or potentially even attempt another winning line. These are options T&T Bloom Scepter will be looking to prevent if possible as the deck is usually starting to win the battle of attrition at this point and will want to continue down that path. Politicking options can become very effective at this stage and in the Late Game stage as they are very mana efficient means of enhancing the angles of attack revolving around attrition. If an opponent or multiple opponents are vulnerable to the line, Tymna becomes an extremely reliable way of enhancing this game plan as well. Ashiok will pretty regularly be a tool to deploy at this stage that is highly effective. It may be possible to try an aggressive game winning line here provided the risk of doing so is relatively low. Attempt to assemble a game winning engine in such a case but don't go overboard trying to defend this line if the potential cost is failure and an inability to continue with "shields up" after spending resources on a failed defense of the line.
Thrasios will become a much more viable method of attacking opponents along the front of attrition at this stage and more openly aggressive means of acquiring resources can often be employed as well. Good opportunities to attempt game winning lines will typically be presenting themselves starting at this stage for T&T Bloom Scepter and a pilot should take note of the circumstances to be ready when the moment presents itself. Troublesome pieces of opposing players' boards may need to be eliminated before game winning lines are possible, house cleaning may be in order to set up for the finish. Employing sweeping options against opponents here can be highly effective in this regard. In the event critical pieces of T&T Bloom Scepter's own engines are in exile this is the point to begin using Karn, the Great Creator in a more active fashion to recover those pieces (should he be included in the deck configuration).
Many games may be over before the match reaches this stage and some may not given the game plan of T&T Bloom Scepter is more of a long term one. Attrition should, at this point, have become a crucial tax on opposing resources with many opposing options potentially in exile. Assembling a game winning engine now becomes the primary, or perhaps even the only, remaining concern for T&T Bloom Scepter. Any remaining obstacles or impediments to the function of T&T Bloom Scepter's engines and loops should be removed and aggressive pursuit of a game winning line should be viable.

It's not always a requirement to follow the script. Improvisation can be successful, but is often attempted at a greater level of risk.

Not every match will see T&T Bloom Scepter playing against fast, fragile, aggressive combo based strategies. Sometimes a pod will consist of slower, perhaps less vulnerable types of strategies and decks. In such a situation T&T Bloom Scepter has the capability to switch gears and play the role of the fast combo based aggressor.

When sitting down to a match and noticing the pod is filled with slower style decks, perhaps featuring greater resiliency as well, assuming the mantle of the aggressor in the pod is fundamentally the correct choice. Just because T&T Bloom Scepter has a primary game plan based on playing a slower controlled style game doesn't mean this is a deck that is incapable of blisteringly fast wins. It might have the potential to win on turn 1 of a match, but this won't be a common occurrence and the primary game plan is significantly more effective at besting other fast combo based decks on a consistent basis than attempting to race with them. In the role of aggressor many of T&T Bloom Scepter's priorities change.

The standard angles of attack are not the path to take in scenarios where the mantle of aggressor has been assumed. Instead, the goal is going to be to assemble a game winning combo as quickly as possible and force it into play with protection or before opponents are capable of interacting with it. Use of tutors to aggressively acquire combo pieces will be necessary, and the standard approach now becomes the path of recovery. Hate pieces that the deck would otherwise be patient about removing are now priorities to remove if they interfere with the deck's engines or loops to enable T&T Bloom Scepter's engines and loops to engage unimpeded. Priority in the opening turn(s) is mostly exclusively going to be on explosive board build up, aggressive acquisition and deployment of resources and engine pieces, and vigorous defense of the pieces deployed.

A pilot should feel very inclined to keep ramp heavy hands with the ability to tutor in an effort to dump the opening hand as fast as possible, tutor for a wheel effect, and attempt to reload to abuse the pace of resource deployment. Opening hands that start with a compact and mana efficient engine piece are more desirable than they might otherwise be. Playing Tymna on turn 2 is likewise more desirable except in the situation where this delays the actual acquisition of a complete engine set up via other, more direct methods. T&T Bloom Scepter will typically only want to switch gears back to the standard, more measured approach in the event an accelerated combo win line is stuffed. Recovery efforts in these situations are exceptionally consistent due to the advantages afforded in deck construction.

Specific Game Play Situations

In addition to the general game play aspects already outlined there are numerous specific game play situations or circumstances that might be more unique and require problem solving to find a work around for a particular conundrum. The deck includes a lot of flexibility and a ton of ways to handle most any issue that arises so a workaround can often be found. A T&T Bloom Scepter pilot should almost never feel hopeless about a particular situation in the way that opposing pilots will often be made to feel as they contest a T&T Bloom Scepter or Inception Scepter style strategy. Some of the more common specific scenarios a T&T Bloom Scepter pilot might find themselves in are addressed next to better prepare those who pilot the deck.

Infinite mana is great, but in T&T Bloom Scepter infinite colored mana is required to win a match. On occasion a pilot may find themselves in a position where the only available mana producing combo engine that remains is Power Monolith which produces exclusively colorless mana. This can be a problem, but is one that can be solved.

Elixir of Immortality is the Key here.

First Method

With Power Monolith combo in play, Thrasios in play, the whole deck drawn, and access to infinite colorless mana the easiest way to produce infinite colored mana from the Power Monolith combo is Elixir of Immortality+Lotus Petal. Simply cast Petal, sac for any color of mana, then cast and activate Elixir using the infinite colorless mana available. Activate Thrasios twice using the infinite colorless mana to draw both of these cards. Repeat the process to generate infinite mana of any color. If both Elixir and Petal are in exile, as long as Karn and Chain of Vapor are available then these pieces can be retrieved. First cast Karn and use his minus ability to return Lotus Petal to hand. Play Petal and sac for . Cast Chain of Vapor targeting Karn and replay him, this time using his minus ability to return the Elixir. Proceed to loop Elixir and Petal for infinite mana of any color.

Second Method

With Power Monolith in play, Thrasios in play, the whole deck drawn, and access to infinite mana but with Karn and Lotus Petal in exile there is still a method to generate infinite colored mana as long as the deck still has access to at least one of either Mox Opal or Mox Diamond (potentially Fellwar Stone as well), one mana rock (or non summoning sick Noble Hierarch in play) that can produce , Elixir of Immortality, and Dramatic Reversal. First use the infinite colorless mana to cast the mana rocks needed and the Elixir. Tap the mana rocks available for plus any color(s) mana and use to cast Dramatic Reversal. Use the infinite colorless mana to activate the Elixir and then draw the cards back to hand. Repeat the loop for infinite colored mana.

Even with Dark Ritual, Karn, the Great Creator, Isochron Scepter, and Grim Monolith/Power Artifact in exile it is possible to produce infinite colored mana with the Mystic Top engine. Provided mana rocks/dorks are in play that can produce at least and one additional mana of any color, Dramatic Reversal is used in place of Dark Ritual in the standard Mystic Top mana producing loop with Elixir of Immortality. If Helm of Awakening is also in exile ( to pay for Elixir, Reversal now costs more, and to pay for the 2 Sensei's Divining Top recastings) additional mana is needed to perform the loop for infinite mana (Lotus Petal can no longer be used in the loop without the Helm) as long as the graveyard is empty and only the Elixir and Dramatic Reversal are returned to the library.
Pretty straight forward here. In the event an important artifact engine piece needs to be tutored up, as long as Karn, the Great Creator is in play Extract can be used to exile an artifact from the library and Karn can be used with his minus ability to return the artifact to hand.
A number of opposing decks may be running combo elements or pieces that T&T Bloom Scepter itself will be able to employ such as the common Isochron Scepter, Grim Monolith, Laboratory Maniac, Jace, Wielder of Mysteries, or Aetherflux Reservoir, and potentially less common things like Bolas's Citadel or Future Sight. At times the most vulnerable point in an opposing deck may be a link in the combo chain rather than one of these win conditions outright which can afford a T&T Bloom Scepter pilot the ability to use opponent's pieces against them via Praetor's Grasp. Priority should always be given to compromising a single or most critical point of failure as soon as possible, so greeding out to acquire one of these with Grasp is not typically a good idea. However, there are some situations where there is a choice to be made about what point of failure to compromise, for example: with the standard Isochron Scepter/Dramatic Reversal combo. In this example the correct piece to exile with Extract would be Dramatic Reversal as taking it away from an opponent to play against them won't enable T&T Bloom Scepter to employ it as a combo element, while Isochron Scepter is the correct piece to exile with Praetor's Grasp as it can be employed by T&T Bloom Scepter as a combo element as long as care is taken with the order opponents are eliminated from the match and what is imprinted on the opposing player's Scepter.
In some matches it will be the case that a T&T Bloom Scepter pilot has a tutor available in hand but not enough information to go on to determine the best possible tutor target. Perhaps the right resources aren't in play to assemble a game winning engine, perhaps not enough is known about opposing players' ability to interact, perhaps an opponent is angling for a win of their own and the T&T Bloom Scepter pilot is low on resources to combat such a line. Often times in these types of situations a correct line to take will be to simply tutor up Angel's Grace as this target can provide useful functionality in any possible situation. It's one half of a two card combo, and can set up nicely for a pay off later down the line. It's an ideal defense against many game winning lines of play (particularly Consultation lines, which will mostly lose on the spot for attempting the line into a player holding AG). It's a tutor target with a low resource cost that will be easy to play in a number of situations and is inherently incapable of being interacted with due to the Split Second mechanic. It might not be a flashy move, but it's a safe, conservative target that will lead to a winning line or defense an overwhelming majority of the time.
T&T Scepter lists have the advantage of being very modular in nature as the core combo elements are extremely compact which allows a pilot to tailor the 12 or so modular flex slots to best compete in the meta a pilot will be facing. The default configuration of T&T Bloom Scepter with the ANAG and Bloom combo packages are the generally best choices when playing into a meta blind or the cEDH meta at large as this configuration consistently posts the best win rates. In situations where a pilot has upfront knowledge of the meta being competed in, however, the ability to easily swap in and out flex slot packages affords unique opportunities to gain incremental advantages.

The Mystic Bloom Package, as discussed some in the engine section of the primer, generates some very consistent play pattern advantages and is very effective against a wide range of archetypes in the meta, hence it's inclusion in the default deck configuration. The package is best suited to grindy matches and a focus on the long term general game plan of winning the battle of attrition, a task this package performs better than anything else in the format. The versatility of this choice allows it to bypass many common forms of impediment any given deck might face in a competitive match of EDH, such as needing the commander to perform a game winning line, being stopped by various common forms of meta hate, and difficulty advancing board state in stalled out or stand off game states.

Some of the pieces included in the package are less relevant to run in a general sense, but do offer unique opportunities. Strip Mine as an inclusion offers a pilot the chance to slowly eat away at opposing resources and apply additional attrition in a style that can do an excellent job of controlling the board state of opponents. When a pilot is able to make additional land drops in a turn this tactic can become very potent indeed, often completely eliminating the ability for most opposing decks to develop their mana base at all, eventually losing mana bases completely, and resulting in a soft or even hard lock out. Dryad of the Ilysian Grove assists in both this niche back up game plan, but also offers assistance against aggressive combat based commanders such as Yuriko, the Tiger's Shadow, Tymna the Weaver, or Najeela, the Blade-Blossom and provides nice utility fixing mana bases and generating additional value from fetch lands by allowing them to tap for mana. Burgeoning offers the ability to have extremely explosive starts with opening hands that contain it and 3 or more lands, often allowing a pilot to start turn 2 with up to 4 lands in play. More often, Burgeoning will be an effective mid game piece that enables multiple Strip Mine activations against opponents without disrupting T&T Bloom Scepter's ability to develop it's own mana base or develop board state explosively during a turn cycle in combination with wheel effects and other mass card draw lines of play. Exploration performs a similar function, less explosively, but more consistently from turn to turn and is particularly potent when combined with the ability to play fetch lands from the graveyard. While technically only one of Ramunap Excavator or Crucible of Worlds is a requirement to engage the Mystic Bloom engine, running both improves consistency and reliability of engaging this line of play. The Excavator is also a useful blocker against aggressive combat commanders similar to the Dryad.

The ANAG Package is a very card slot efficient combo engine that offers consistent performance for decks able to run it in terms of generating an explosive game winning line of play. It's a meta staple for a reason. The additional utility of being able to run the best defensive card in the entire format in Angel's Grace to easily stuff opposing win attempts is a nice additional perk. Often times, because of the restrictive mana cost of Ad Nauseam, it's best to run Dark Ritual as part of this package to enable the opportunity to cast the combo very early in games (potentially even on turn 1) when the stars align for such a circumstance.

This package is very well suited for use in a wide variety of metas and is therefore included in the default deck configuration. An equal opportunity performer in both fast paced and slow paced matches, interaction light or heavy matches, combo, control, and mid range matches, the ANAG package is an ideal choice.

The Inception Package is an option that is best suited to opposing fast, glass cannon combo decks that employ inherently risky concepts and deck construction techniques that can be easily abused. While this option can help a T&T list generate a grindy match, in matches that already feature opposing decks that have excellent resilience, grind ability, and long term game plans this is a less effective option to include in the deck configuration. In particular, the Inception Package has some difficulty with green decks that include Veil of Summer as it is an excellent counter tactic to employ against the Inception strategy.

As such, this option is a good choice for flex slot inclusion when a pilot has upfront knowledge of the meta they will be facing as it is known to include a number of decks that are highly vulnerable to the strategy with low resilience levels, over reliance on tutor effects, and fast game plan requirements.

The Mystic Top Package is another alternative combo engine option that can be included in place of one (or both) of the other back up engine options included in the default configuration. It is well suited to longer grindy matches and has some pleasant synergy with other optional packages at times that can make it a solid choice. In terms of card slot efficiency it is slightly better than the Mystic Bloom Package (as the only card slot requirements are Sensei's Divining Top, Helm of Awakening, and Mystic Forge) which can be an advantage at times that allows additional hate or interaction pieces to be run in the remaining modular flex slots, although the play pattern options and advantages are much more limited with it's inclusion.

This package option is a solid choice into metas known to include a number of artifact based combos as the ability to run Karn, the Great Creator in addition to the required elements will provide useful resilience as well as a useful hate piece to counteract artifact based strategies that can be very difficult to remove from the board. The Mystic Top Package also performs very nicely in a set up that includes the Counterbalance Package as the extra library control and manipulation can provide a solid stax/control game play pattern that has the potential to generate nice advantages at times.

The Counterbalance Package offers the opportunity to play a more staxy/control role in a given match with extra library manipulation tools in Scroll Rack and Lim-Dul's Vault as well as additional hand sculpting when Baral, Chief of Compliance is included to function alongside the primary stax component in Counterbalance. This package is best suited for longer, grindy affairs, particularly when opposing decks are known to contain large numbers of 0, 1, and 2, cmc spells that afford the best opportunity to abuse Counterbalance's ability.
The High Tide Package offers T&T Bloom Scepter the opportunity to be the fastest and most explosive deck in a given match by generating huge turns thanks to High Tide, Candelabra of Tawnos, and Bubbling Muck. This options is best suited for metas where opponents are light on interaction and employ slower paced strategies that can have difficulty competing with the explosive speed of the package. In general, it's best to include Urborg, Tomb of Yawgmoth and some additional islands and swamps in the land slots to better enable this game plan when included in the deck configuration. Summer Bloom has some nice synergy with the concept as well, but much of the rest of the Mystic Bloom Package is at odds with a High Tide game plan. The Wheel package elements can also nicely compliment this game plan at times. When this concept is employed a pilot will be looking to wheel and race into a combo win line as fast as possible making this one of the most aggressive deck configurations for a T&T list.
The Wheel Package offers an option to abuse wheel effects by breaking parity on them with various hate pieces like Alms Collector, Notion Thief, and Narset, Parter of Veils. While inherently powerful as a play pattern, this concept can be inconsistent at times since a pilot is still relying on luck of the draw to make use all the extra cards for a game winning play line. In combination with other packages and flex slot card alternatives it's possible to achieve a higher degree of consistency reaching a point where wheeling and dealing results in a game winning line. Typically, this package is best suited to metas where opposing decks are going to be wheeling often, or otherwise doing a lot of card drawing that the hate pieces can take advantage of while simultaneously hampering the performance of those opposing decks. Wheel Package pieces work very nicely with the High Tide Package concept as the generation of lots of mana and lots of cards in hand can lead to some very advantageous game states. While not an option best suited for the meta at large, or long grindy matches, it can be an attractive choice none the less in certain metas provided the pilot has up front knowledge of the situation they will be facing.

Additional Flex Slot Options

There are a number of alternative interaction options available to T&T Bloom Scepter should a pilot feel a need to include these pieces for a particular meta they may be facing.

Countersquall, Fierce Guardianship, Negate, Delay, Drown in the Loch, and Force of Negation are some of the best remaining counterspell options. Of these, the spell most generally worthy of an inclusion tends to be Fierce Guardianship in a vacuum. T&T Bloom Scepter will often have a commander on the board and most spells that need to be countered in competitive EDH tend to be of the non creature variety. For players building on a budget these can be capable replacements for some of the more expensive options.

Pongify, Rapid Hybridization, Winds of Abandon, Toxic Deluge, and Path to Exile represent some of the best remaining creature removal options. In creature heavy metas it can often be a good idea to include at least one board sweeper in the deck configuration to provide a tutor target and response to that particular scenario should it arise and become an issue.

Into the Roil, Brazen Borrower, and Winds of Rebuke as well as some similar counterparts not mentioned are some of the best remaining bounce options. These types of choices are often best suited for staxier metas where it will be important to remove hate pieces when needed, but the versatility of bounce spells rather than hard removal can ensure the hate pieces affecting other opponents come back to limit them in the event a particular win line for T&T Bloom Scepter fizzles or is stuffed.

Tale's End and Stifle are some of the best available triggered ability counters. While rarely needed in most competitive settings, they can be useful from time to time when a pilot has advanced knowledge of the meta they will be facing and these pieces represent significant value against each opponent. They can be effective choices in metas that include lots of Thassa's Oracles from multiple opponents as a means of forcing a player attempting a Fish line to lose the game on the spot (though Angel's Grace is still far superior in this role).

In certain deck configurations it can be a good idea for the pilot to tweak the mana ramp slots to better facilitate a given game plan or avoid anticipated meta hate pieces.

Bloom Tender, Elves of Deep Shadow, Elvish Mystic, Fyndhorn Elves, Gilded Goose, and Llanowar Elves represent the best available mana dork options. When running all the elves possible Priest of Titania is also a worthwhile consideration. The upside of more mana dorks is the synergy they have with Tymna the Weaver to acquire extra resources over time and the ability to dodge some hate effects like Stony Silence and Karn, the Great Creator. The downside is that they are much easier to remove from the board, require a turn cycle of set up to be able to tap for attacks or ability activations, are still vulnerable to hate pieces like Cursed Totem or Linvala, Keeper of Silence, and are significantly worse in combination with Ad Nauseam or wheel lines of play than mana rocks.

The Talisman and Signet cycle of cards represent some the best available mana rocks, but Jeweled Amulet, Everflowing Chalice, Lion's Eye Diamond, and Basalt Monolith can also be worthwhile considerations at times. While immune to Cursed Totem hate effects, they are still vulnerable to Null Rod style hate pieces.

Utopia Sprawl and Wild Growth are the best available enchantment ramp pieces and will tend to dodge most forms of meta hate. They are vulnerable to land destruction effects, however, and at times do not play nice with Squandered Resources.

A mix of ramp card types is usually ideal and a competitve EDH deck list will want to run 16 ramp sources as a general rule with as low cmc as is possible to be as consistent as possible about opening turn development plays and opening hand consistency.

In some metas including alternative hate options can be an excellent choice to gain advantages against opponents. While most stax type pieces tend to yield significantly lower win rates against the meta at large due to their inefficient deck construction nature and often ineffective play patterns, they can be favorable inclusions in certain metas where they are likely to have a more universal effect on each opponent.

Karn, the Great Creator is a highly effective hate piece for artifacts that can provide a relevant level of resilience as well by retrieving artifact combo components from exile and won't disrupt T&T Bloom Scepter's own ability to use artifacts. Collector Ouphe is a significantly worse option for the same task, but better than Cursed Totem as it is a creature that can trigger Tymna draws. Either of these last two options greatly diminishes the card slot efficiency of T&T Bloom Scepter and requires a major overhaul in game plan to avoid artifact reliance, they are not generally recommended.

Hushwing Gryff and Torpor Orb are useful hate pieces to deny ETB triggers in metas where this might be relevant (such as those that include a large number of opponents playing Thassa's Oracles). As the default deck configuration of T&T Bloom Scepter includes no creature based ETB effects these piece won't generally disrupt the deck's game plan. Hushwing Gryff pairs nicely with Tymna as an evasive creature that can generate additional value, but both of these options have generally less than ideal performance levels against the meta at large.

Pithing Needle and similar cards offer useful hate options against activated abilities and are well suited to metas that include commanders they can negatively impact (such as Yisan, the Wanderer Bard or Teferi, Temporal Archmage. T&T Bloom Scepter will typically be able to manage in these circumstances without additional assistance from hate pieces of this type, however, and their performance against the meta at large is less than ideal.

Grafdigger's Cage is an effective hate piece for graveyard based strategies or Sensei's Divining Top lines of play. It's inclusion is not recommended when T&T Bloom Scepter elects to include the Mystic Top combo in it's deck configuration, but in it's default configuration is a worthwhile consideration in metas that include archetypes such as Kess, Dissident Mage or Emry, Lurker of the Loch.

Teferi, Time Raveler is a powerful hate piece that forces opponents to play at sorcery speed. Unfortunately, this generally runs counter to the general gameplan of T&T Bloom Scepter winning the battle of attrition and dictating that opponents spend their interaction elements on one another as they will be unable to do so (requiring T&T Bloom Scepter to spend it's own resources and lose the battle of attrition). This type of piece is generally better suited to a deck that operates with a different, more dedicated stax game plan despite the inherent power level of the card itself.

Arcane Laboratory and similar cards can be effective hate pieces against storm style decks and can pair nicely with Teferi. Unforunately, these pieces also generally run counter to the general game plan of T&T Bloom Scepter as the deck will want to be able to cast more than one spell to consistently gain developmental advantages against opponents as part of it's primary game plan in addition to requiring multiple spell casts in order generate looped win lines. Another hate piece that is generally better suited to a more dedicated stax game plan where it can shine as a center piece.

Gilded Drake and Legacy's Allure represent some of the best available forms of Commander hate, though the default deck configuration already includes the most universally effective hate piece of that type in Oko, Thief of Crowns. Gilded Drake is a particularly poor performer against opposing Tymnas and many low cmc commanders, but a solid choice against commanders like The Gitrog Monster. Legacy's Allure is a solid choice against low cmc opposing commanders but too slow to be effective against commanders with a higher cmc.

Alternative tax options can be included to supplement the primary game plan of T&T Bloom Scepter to win the battle of attrition when needed.

Rhystic Study can be a useful option at times, but in the most competitive settings it's performance against the meta at large is generally less than ideal. Most effective against opposing storm style play patterns.

Runic Armasaur can be an effective choice in metas that include Tymna/Thrasios pairings as it is a useful blocker for Tymna and a card advantage piece that matches Thrasios. It can also be an effective choice against other commanders with activated abilities that can help it to generate good value. While effective in these types of circumstances, it's performance isn't universally strong enough to warrant inclusion in the default configuration and is better suited for a meta dependent inclusion role.

Verity Circle is an option that is an ideal performer in metas that include lots of opposing mana dorks, and a strict upgrade over Rhystic Study more often than not in these situations, but not universally effective enough to warrant inclusion in the default configuration.

Smothering Tithe as an option can be a powerful tool against opposing decks that want to draw lots of cards, but is generally too slow to deploy to be an effective piece in deck lists that have access to superior, faster green ramp options.

Sometimes a pilot might want to include additional utility options in the modular flex slots to provide greater resilience or enhanced side line play patterns.

Memory's Journey and Gaea's Blessing are options that serve the primary purpose of providing a redundant looping mechanism. Memory's Journey also performs a niche function of instant speed targeted graveyard interaction against opposing graveyard strategies while Gaea's Blessing affords protection against opposing mill style win lines.

Riftsweeper will primarily be a consideration for metas that include a heavy focus on exile effects or Inception style stategies as an additional layer of resilience to those game plans that can rescue lost components from exile. Ideally, a deck would prefer to avoid it's inclusion as the card does not really provide useful functionality in any other role.

Manifold Key and Voltaic Key serve less of a role in a world where Paradox Engine is banned, but still nicely complement mana rocks like Mana Vault or Grim Monolith and utility pieces like Sensei's Divining Top or Scroll Rack to generate additional value. Since these pieces no longer reliably serve in a combo element role they won't provide enough universal value to warrant an inclusion in the default configuration, but can be slotted in as complementary pieces for certain modular packages.

Silence and Veil of Summer represent some of the best protection elements in the format and either could be considered for a slot in any deck configuration. As the default configuration of T&T Bloom Scepter tends to already have the required tools to handle most any situation it can often be the case that these cards won't be needed despite the powerful options they represent.

Dark Confidant offers a pilot a choice to further engage opponents on the angle of attrition by passively accumulating additional resources just by being in play and, as a creature, is a card that has pleasant synergy with Tymna. It's performance in the most competitive settings is rather middling, however, and it is therefore not included in the default configuration.

WIP, under construction.

Suggestions

Comments

Attention! Complete Comment Tutorial! This annoying message will go away once you do!

Hi! Please consider becoming a supporter of TappedOut for $3/mo. Thanks!


Important! Formatting tipsComment Tutorialmarkdown syntax

Please login to comment

Casual

100% Competitive

Revision 25 See all

(1 year ago)

-1 Burgeoning main
+1 Chain of Smog main
-1 Dark Ritual main
-1 Takenuma, Abandoned Mire main
+1 Veil of Summer main
+1 Witherbloom Apprentice main
Top Ranked
Date added 5 years
Last updated 1 year
Legality

This deck is Commander / EDH legal.

Rarity (main - side)

13 - 0 Mythic Rares

55 - 0 Rares

18 - 0 Uncommons

14 - 0 Commons

Cards 100
Avg. CMC 1.73
Tokens Bird 2/2 U, Elk 3/3 G, Food
Folders Learning decks, Jeremy would like, Thymna, Commander (Competitive: Tier 1), Sample Decks, Cool decks, AAWant to try, cEDH
Votes
Ignored suggestions
Shared with
Views