WARNING - THE BASIC SYNOPSIS IS RATHER SHORT, BUT THE IN DEPTH GUIDE IS EXTREMELY LONG
Hi guys,
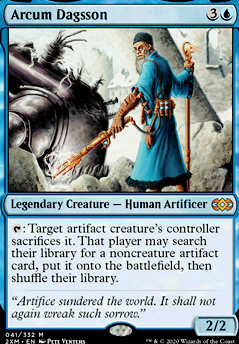
Arcum has always been regarded as a a tier 1.5 commander. With the printing of Modern Horizons (which came with the new force of negation and Urza), mono-blue artifact combo became far too powerful of a deck not to build. There is a reason why tinker is banned in all formats
except vintage, and this deck explains why. The deck I am listing today is my build of Arcum + Paradox Engine, which is arguably one of the most flexible combo decks in all of EDH. The most common mistake I see people make when they play with Arcum is that they treat his ability as if it is a toolbox enabler. The ONLY time we get something like an ensnaring bridge or torpor orb is if we are LOSING ON THE SPOT - there are NO exceptions to this. The other mistake I see is that people use him in a draw heavy deck, but Arcum is extremely “draw vulnerable” - it feels really bad to rip a paradox engine or rings of brighthearth off the top or to be wheeled into garbage. Despite being very hand independent once Arcum is on the field (your hand doesn’t really matter if you are tutoring for everything), he is extremely hand reliant while still in the command zone. Arcum NEEDS to be played on turn 3, and he NEEDS to have an artifact creature to sacrifice - a winds of change or wheel of fortune on turn 2 could be a death sentence for you if you don’t draw what is needed. The final issue I commonly see is the idea of “big mana control”. People leave up all their mana to try and initiate shenanigans with Arcum, even though most of his combo lines are completely manaless. If someone plays a stranglehold or nullrod, USE YOUR MANA. Do everything possible to make sure that it doesn’t resolve, or else you are completely locked out of the game. You cannot afford to sit back and wait on the principle that “someone else will deal with it”, because the game will end before that happens. In mono blue, we don’t have many ways to deal with problematic permanents, so we need to run counter magic to prevent them.
Now, with the basics out of the way, it is time for the in-depth primer; read on if you are interested in truly learning how to master this deck.
Our most common problem is determining what hands are “fast enough”. I find that this is very meta-dependent, some decks play cursed totem, stranglehold, and null rod, others just play degenerate combos themselves.
If there is someone at your table who you know plays these cards, mull aggressively. Dig for Force of Will or Swan Song, all the way down to 3 or 4 if need be. I know that this sounds crazy, but we literally CAN’T PLAY through these cards, so annihilating our hand is the only way to ensure that we can use our deck if we draw out of our troubles. This is the ONLY situation where it is acceptable to keep a hand with no artifact creatures.
If you know that no one has this hate against you, your hands become far more “free” - you can keep slower hands with an artifact creature and some interaction.
There are cards in this deck that demand an instant mulligan if they are in your opening hand.
1. Paradox Engine
2. Citanul Flute
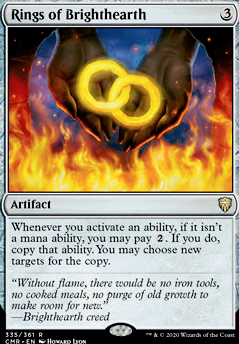
3. Rings of Brighthearth
4. No ability to make at least 3 mana
5. Mycosynth Lattice
6. Staff of Domination
7. USUALLY Myr Turbine - there are hands where this can be acceptable
Our next problem is determining when to play our commander. Arcum has no apparent resilience - no hexproof, shroud, indestructible, or protection from anything. On his own, Arcum is a total glass cannon, waiting to eat a Swords to Plowshares. We only play our commander early if it is on turn 2 or 3, and ONLY if we are set up to win on the following turn (More on this later). This happens almost every time. Otherwise, we sit back and let our opponents use resources against each other. If we can’t win on turn 4, Arcum usually comes out by turn 6, with little to no opposition. This outcome is extremely rare, as almost all games are winnable by turn 4. Most of the power in Arcum comes from the pilot’s ability to read the table.
Our next problem is determining what deserves a counterspell. Our opponents also have strong decks, with many cards that seem extremely powerful. What needs to be kept in mind is that we are trying to race all the others. Our commander wins us the game, so we don’t care if they play a hermit druid or beastmasters ascension. We don’t like, and certainly can’t beat targeted hate if it resolves, therefore, our counterspells are DEFENSIVE - they stop our opponents from interacting with us. It might be tempting to Mental Misstep that Sensei’s Divining Top, but it is far more useful in shutting down an opposing Swan Song when we are trying to combo out. At its core, this deck is simply trying to goldfish as quickly as possible. The only spells that warrant a response from us are ones that stop us from winning, and it is entirely at your discretion to determine what qualifies as doing that. At the end of the day, if you think that using a counterspell in a specific situation will give you the greatest chance of winning that game, then by all means, fire it off; Just don’t become the table policeman and make it your job to stop every one else, our deck isn’t very good at that.
One major question I am frequently asked is “Why extra turn spells?”. To be frank, they win the game on the spot. Treat every extra turn spell in this deck as if it were an additional Arcum activation. While it is usually possible to win off of just one, two activations completely seal the deal.
Many versions opt to run Spine of Ish Sah, but I feel that it just isn’t good enough. Spine only gets rid of one permanent, thus stopping only one opponent from killing us, but cards like Ensnaring Bridge, Pithing Needle, and Torpor Orb have the ability to shut down ALL of our opponents.
Another question I’m asked is “Why Scroll Rack”? To people who ask this, I say, “Have you looked at my list”. Scroll Rack lets us keep hands which are otherwise unkeepable. It hides important pieces (i.e. the artifact creature) from hand hate, and it allows us to put the Paradox Engine we just drew (which normally would be unthinkably bad) back into our deck, as well as letting us see new cards. Scroll Rack is an auto include in any deck which is looking to tinker out combo pieces.
Personal Preference is a major part of this deck. Many pieces are interchangeable with others, so do whatever you want with customizations. However, in my opinion, there are a few cards which MUST be included. Below is a list, ranking most necessary to least needed
MOST
- Rings of Brighthearth, Staff of Domination, Paradox Engine, Basalt Monolith, Walking Ballista, the 4 zero mana artifact creatures, And Citanul Flute (Scrap Trawler and Myr Retriever): these are the main pieces to our combo
- Mana Crypt, Sol Ring, Metalworker, Mana Vault, Grim Monolith, Lotus Petal: Fast Mana is good
- Sensei’s Divining Top, Scroll Rack, Brainstorm: I cannot stress how important it is to be able to get combo pieces back into the deck from our hand.
- Master Transmuter: the only thing better than getting combo pieces back into the deck is getting them into play for free.
- the cheap artifact creatures >3 mana: we need these to sacrifice to Arcum.
- Force of Will, Pact of Negation, Force of Negation, Flusterstorm, Swan Song: Cheap/Free counterspells are a must have.
- City of Traitors, Ancient Tomb, Crystal Vein: Lands that tap for more than one mana are great. They let us play Arcum on turn three without any mana rocks.
- Academy Ruins, Buried Ruin: Recursion is amazing if one of your combo pieces gets blown up.
META DEPENDENT
- Mental Misstep, Ensnaring Bridge, Torpor Orb, Phyrexian Revoker, Pithing Needle, Glacial Chasm, Maze of Ith: It really all depends on what your opponents are playing
PRETTY GOOD, BUT COULD BE CHANGED IF NEEDED
- Mana Drain: there are other, cheaper counterspells.
- Temporal Manipulation, Time Warp, Temporal Mastery: The extra turn package isn’t for everyone.
- Minamo, School at Water’s Edge, Hall of the Badit Lord, Strip Mind, Tectonic Edge, Ghost Quarter, Tolaria West, Prismatic Vista, Cavern of Souls: Islands will work just fine.
- Power Artifact: Very good because it is infinite mana if we have Arcum and a creature to sacrifice, but not a necessary part of the deck.
VERY CUTTABLE
-Boseiju, Who Shelters All: usually worse than an Island
- Mishra’s Workshop: Obviously very good, but 2,000$ is WAY to much money for a piece of cardboard!
- Unwinding Clock: Purely a “win more” card. Doesn’t do very much on its own.
- Karn, the Great Creator: I have not been impressed. All he does is make you a massive target because of your ability to search out Mycosynth Lattice and hard-lock the game, so he gets attacked by every creature. Once Karn is gone, you are the first person to die. Every time. No exceptions.
- Preordain, Ponder: Cantrips are mediocre.
- Fabricate, Trinket Mage: Most artifacts are better in the deck, and most of the ones we want in our hand cost less than the 3 mana we paid to go tutor for them.
- Copy Artifact, Sculpting Steel: Totally “win more” cards Doesn’t help us in the slightest if we are losing.
- Isochron Scepter, Dramatic Reversal: the combo is fun, but isn’t effective and isn’t very good. It just makes a lot of mana we probably can’t use.
An important thing to keep in mind for this deck is that our CMC is rather low, sitting at around 2.5. We will be able to cast almost everything in our hand at all times, so use this to your advantage. Don’t be afraid to vomit out our hand against creature/combat damage based decks because it makes our Ensnaring Bridge backbreaking.
Now for the fun part. Our last issue is determining “whether or not we can win right now”.
If Arcum was played last turn and is on the field with an artifact creature, we can absolutely win. To make things even better, I’ll tell you that it requires ZERO mana to initiate. Here is the main line for manaless winning (this will be the line you use in most of your games)
On your opponents end step
1. Use Arcum to sacrifice the artifact creature - search out Citanul Flute
2. Pay 0, using Citanul Flute to search for Memnite
Your turn
1. Pay 0, using Citanul Flute to search for Shield Sphere
2. Cast Memnite
3. Use Arcum to sacrifice Memnite - search out Paradox Engine
4. Cast Shield Sphere, untapping all nonland permanents with Paradox Engine
5. Pay 0, using Citanul Flute to search for Ornithopter
6. Use Arcum to sacrifice Shield Sphere - Search out Basalt Monolith
7. Tap Basalt Monolith to float 3 colorless mana
8. Cast Ornithopter, untapping all nonland permanents with Paradox Engine
9. Tap Basalt Monolith to float 3 more mana, a total of 6 floating
10. Pay 0, using Citanul Flute to search for Phyrexian Walker
11. Use Arcum to sacrifice Ornithopter- Search out Rings of Brighthearth
12. Pay 3 mana to untap Basalt Monolith, and use 2 more to duplicate the untap trigger with Rings of Brighthearth. There is one mana floating and 2 untap triggers for Basalt Monolith on the stack
13. Resolve the first trigger and untap Basalt Monolith
14. With the second trigger on the stack, tap Basalt Monolith for 3 colorless mana, now with a total of 4 floating
15. The second trigger resolves, Basalt Monolith untaps
16. Repeat this process infinitely many times, gaining one mana each resolution (infinite colorless mana)
17. Cast Phyrexian Walker, untapping all nonland permanents with Paradox Engine
18. Use Arcum to sacrifice Phyrexian Walker - Search out Staff of Domination
19. Pay some of your infinite mana into Staff of Domination to draw your deck
20. Play Swiftfoot Boots
21. Play Silver Myr
22. Equip Silver Myr to Swiftfoot Boots
23. Tap Silver Myr for blue mana
24. Use Staff of Domination to untap Silver Myr
25. Repeat this process infinitely many times (now you have infinite blue mana)
26. Cast Walking Ballista where X = 10000000 off of all the colorless mana floating
27. Kill everybody and win the game.
Important note - if for some reason this loop is not available, after using Citanul Flute to grab 4 zero drops, Use it for 2 and 3 to get Myr Retriever and Scrap Trawler, respectively. These two also go infinite with each other, and allow you to get every artifact from your deck, of which there will by Mycosynth Lattice, Nevinyrral’s Disk, and Darksteel Forge.
Other lines are slower, but still usable. As mentioned earlier, it is possible to initially use Arcum to get Myr Turbine
On your opponents end step
1. Sacrifice an artifact creature to Arcum to get Myr Turbine
2. Tap Myr Turbine to make a 1/1
3. Pass the turn
On your opponents next end step
1. Sacrifice the 1/1 to Arcum, fetching out Mycosynth Lattice
2. Untap for your turn
3. Make a 1/1 with Myr Turbine
4. Sacrifice the 1/1 to Arcum, fetching out Clock of Omens
5. Since all permanents are artifacts, all you need to do is tap 4 permanents to untap Arcum and Myr Turbine. Go nuts.
This ends my primer, thank you all so much for reading, I hope you go on to build and enjoy this deck as much as I do.
yours truly,
RandumPersin