
Freyalise High Tide
Commander / EDH Competitive Infinite Combo Mono-Green Primer Tap/Untap Tokens Tokens
Instant (5)
Sorcery (7)
-
1x
Finale of Devastation

-
1x
Genesis Wave
-
1x
Green Sun's Zenith
-
1x
Natural Order
-
1x
Shamanic Revelation
-
1x
Sylvan Scrying
-
1x
Tooth and Nail
Enchantment (10)
Artifact (6)
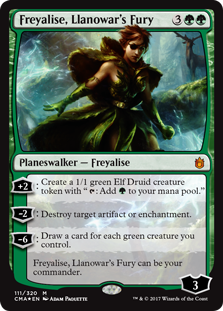
Planeswalker (1)
Creature (36)
-
1x
Arbor Elf
-
1x
Avenger of Zendikar
-
1x
Azusa, Lost but Seeking
-
1x
Beast Whisperer
-
1x
Birds of Paradise
-
1x
Boreal Druid
-
1x
Craterhoof Behemoth
-
1x
Deep Forest Hermit
-
1x
Deranged Hermit
-
1x
Devoted Druid
-
1x
Dosan the Falling Leaf
-
1x
Elvish Archdruid
-
1x
Elvish Mystic
- 1x Elvish Spirit Guide
-
1x
Eternal Witness
-
1x
Fierce Empath
-
1x
Fyndhorn Elves
-
1x
Hornet Queen
-
1x
Joraga Treespeaker
-
1x
Kozilek, Butcher of Truth
-
1x
Llanowar Elves
-
1x
Llanowar Visionary
-
1x
Lotus Cobra
-
1x
Manglehorn
-
1x
Marwyn, the Nurturer
-
1x
Nyxbloom Ancient
- 1x Oracle of Mul Daya
-
1x
Priest of Titania
-
1x
Realm Seekers
- 1x Reclamation Sage
-
1x
Regal Force
-
1x
Temur Sabertooth
-
1x
Voyaging Satyr
-
1x
Wall of Roots
-
1x
Wood Elves
-
1x
Woodland Bellower

Maybeboard
Planeswalker (1)
Creature (9)
Suggestions
Comments View Archive
Attention! Complete Comment Tutorial! This annoying message will go away once you do!
Important! Formatting tips — Comment Tutorial — markdown syntax
Please login to comment
| Top Ranked |
|
| Date added | 9 years |
| Last updated | 2 years |
| Legality | This deck is Commander / EDH legal. |
| Rarity (main - side) | 16 - 0 Mythic Rares 41 - 0 Rares 12 - 0 Uncommons 10 - 0 Commons |
| Cards | 100 |
| Avg. CMC | 2.94 |
| Tokens | Beast 3/3 G, Elf Druid 1/1 G, Insect 1/1 G w/ Flying, Deathtouch, Plant 0/1 G, Squirrel 1/1 G |
| Folders | Competitive Decks, EDH Like, Next idea, Decks, Commander, cutthroat fun, Cool deck ideas, EDH Decks, Decks I like, Interesting Brews |
| Votes | |
| Ignored suggestions | |
| Shared with | |
| Views |